Page History
...
| Sv translation | ||||||
|---|---|---|---|---|---|---|
| ||||||
BellaDatiは、Google OAuth2ユーザーログインをサポートするように構成できます。
前提条件
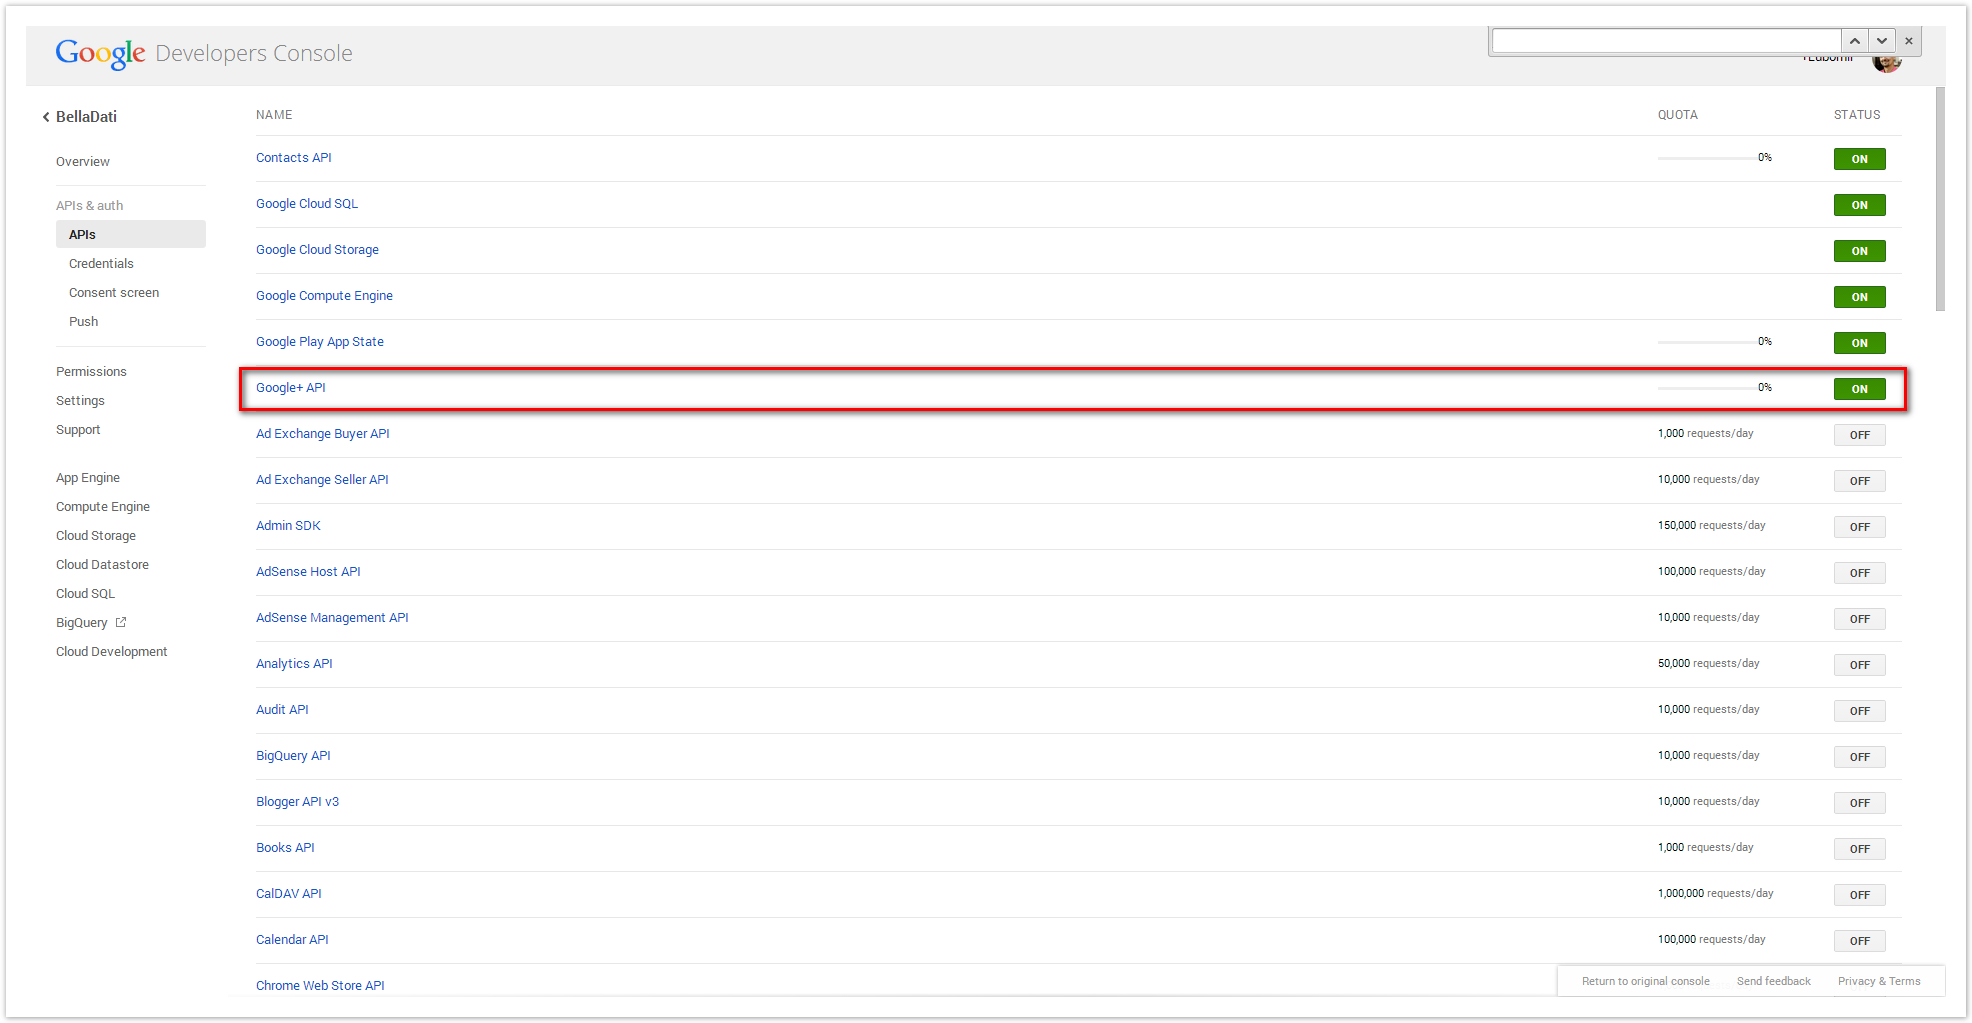
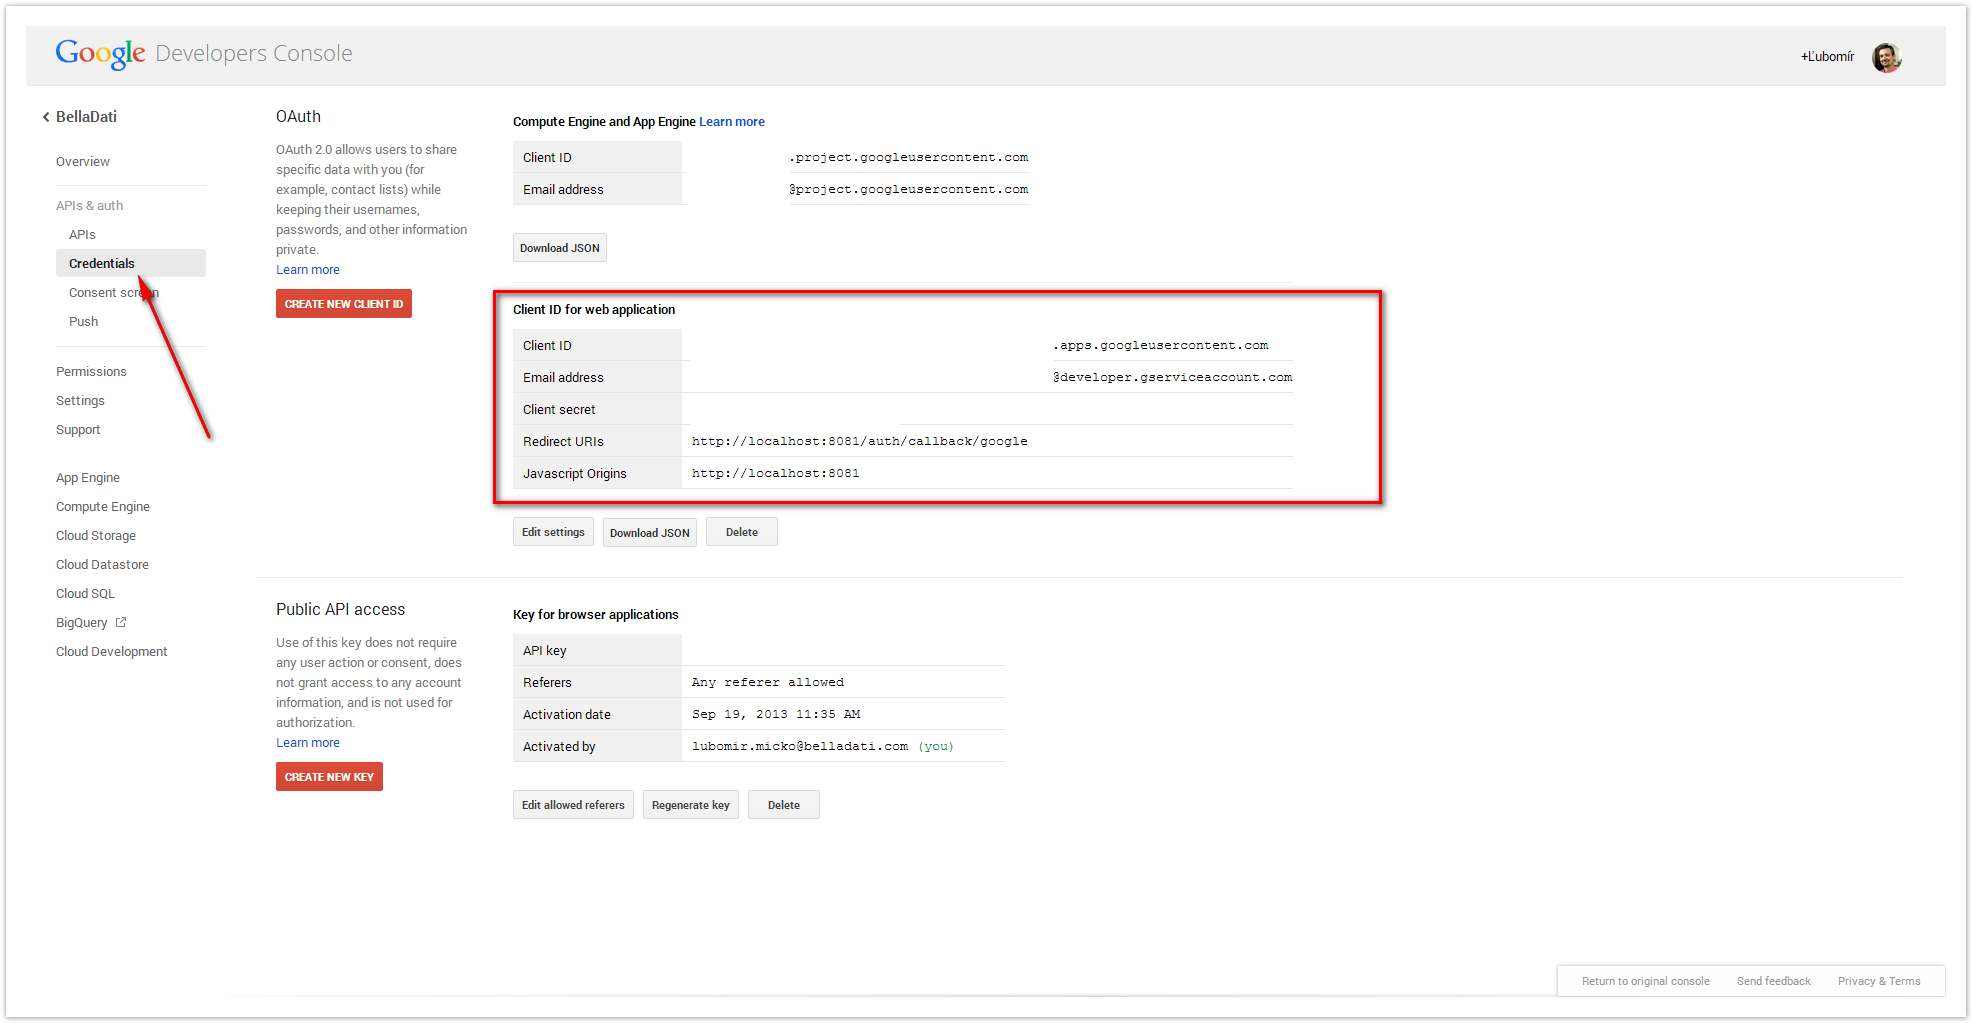
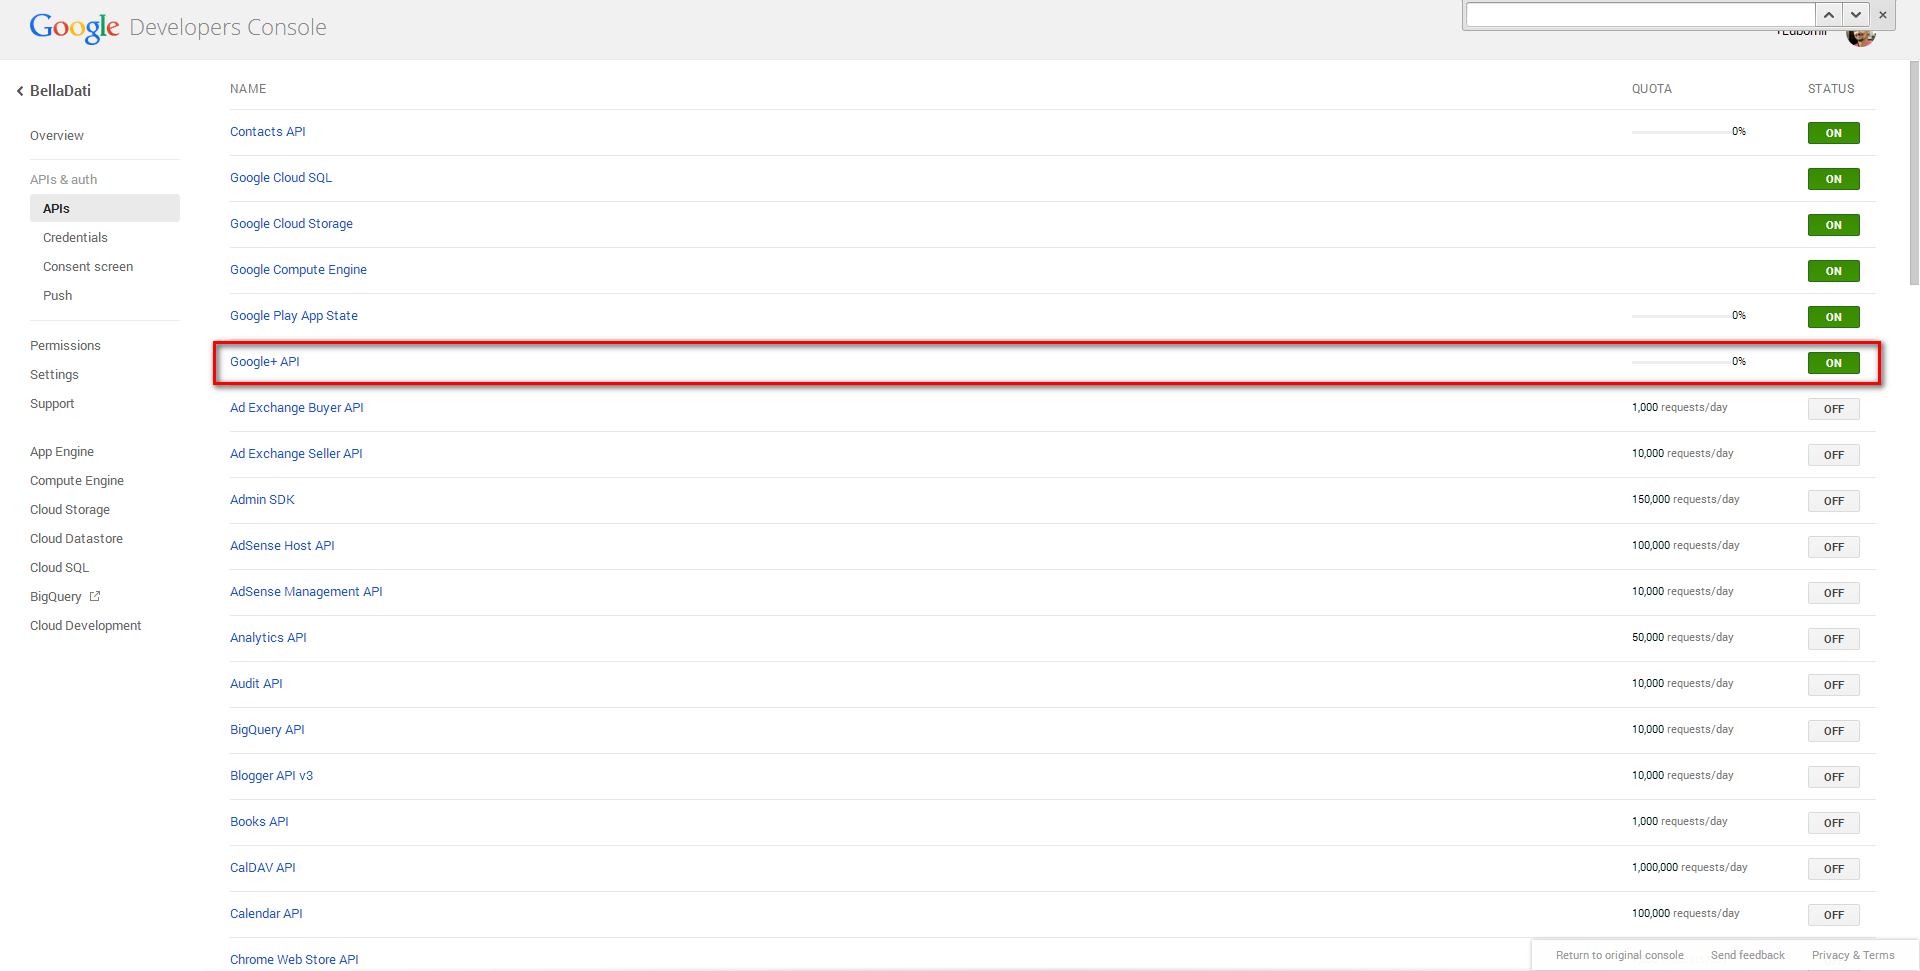
GOOGLEののログインを有効にするBellaDatiログインのページでGoogleログインを有効にするために、管理ドメインとしてアプリケーションを入力し、アプリケーションの設定ページを開き、次の操作を実行します。BellaDatiログインページで、Googleログインを有効にするために、ドメイン管理者としてアプリケーションを入力し、アプリケーション設定ページを開き、次の操作を実行します:
|

| Sv translation | ||||||
|---|---|---|---|---|---|---|
| ||||||
BellaDati kann so konfiguriert werden, dass es die Anmeldung von Google oAuth2-Nutzern unterstützt.
Prerequisites
Aktivieren der Google-AnmeldungUm die Google-Anmeldung auf der BellaDati-Anmeldeseite zu aktivieren, geben Sie die Anwendung als Domänenadministrator ein, öffnen Sie die Seite Anwendungseinstellungen und gehen Sie wie folgt vor:
|

Overview
Content Tools