Page History
| Sv translation | |||||||||||||||||||||||||||||||||
|---|---|---|---|---|---|---|---|---|---|---|---|---|---|---|---|---|---|---|---|---|---|---|---|---|---|---|---|---|---|---|---|---|---|
| |||||||||||||||||||||||||||||||||
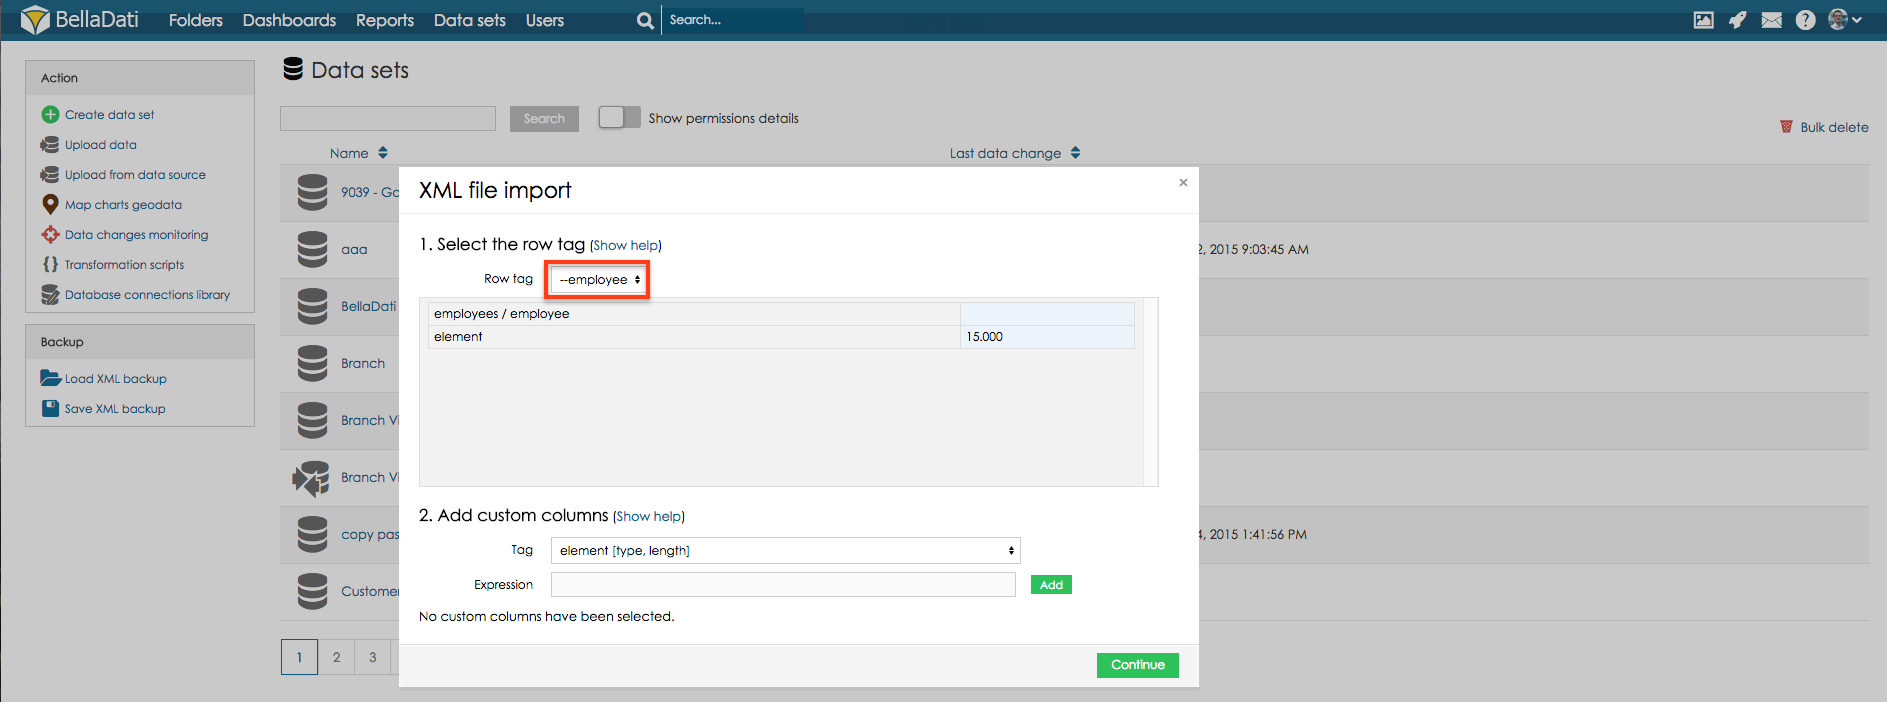
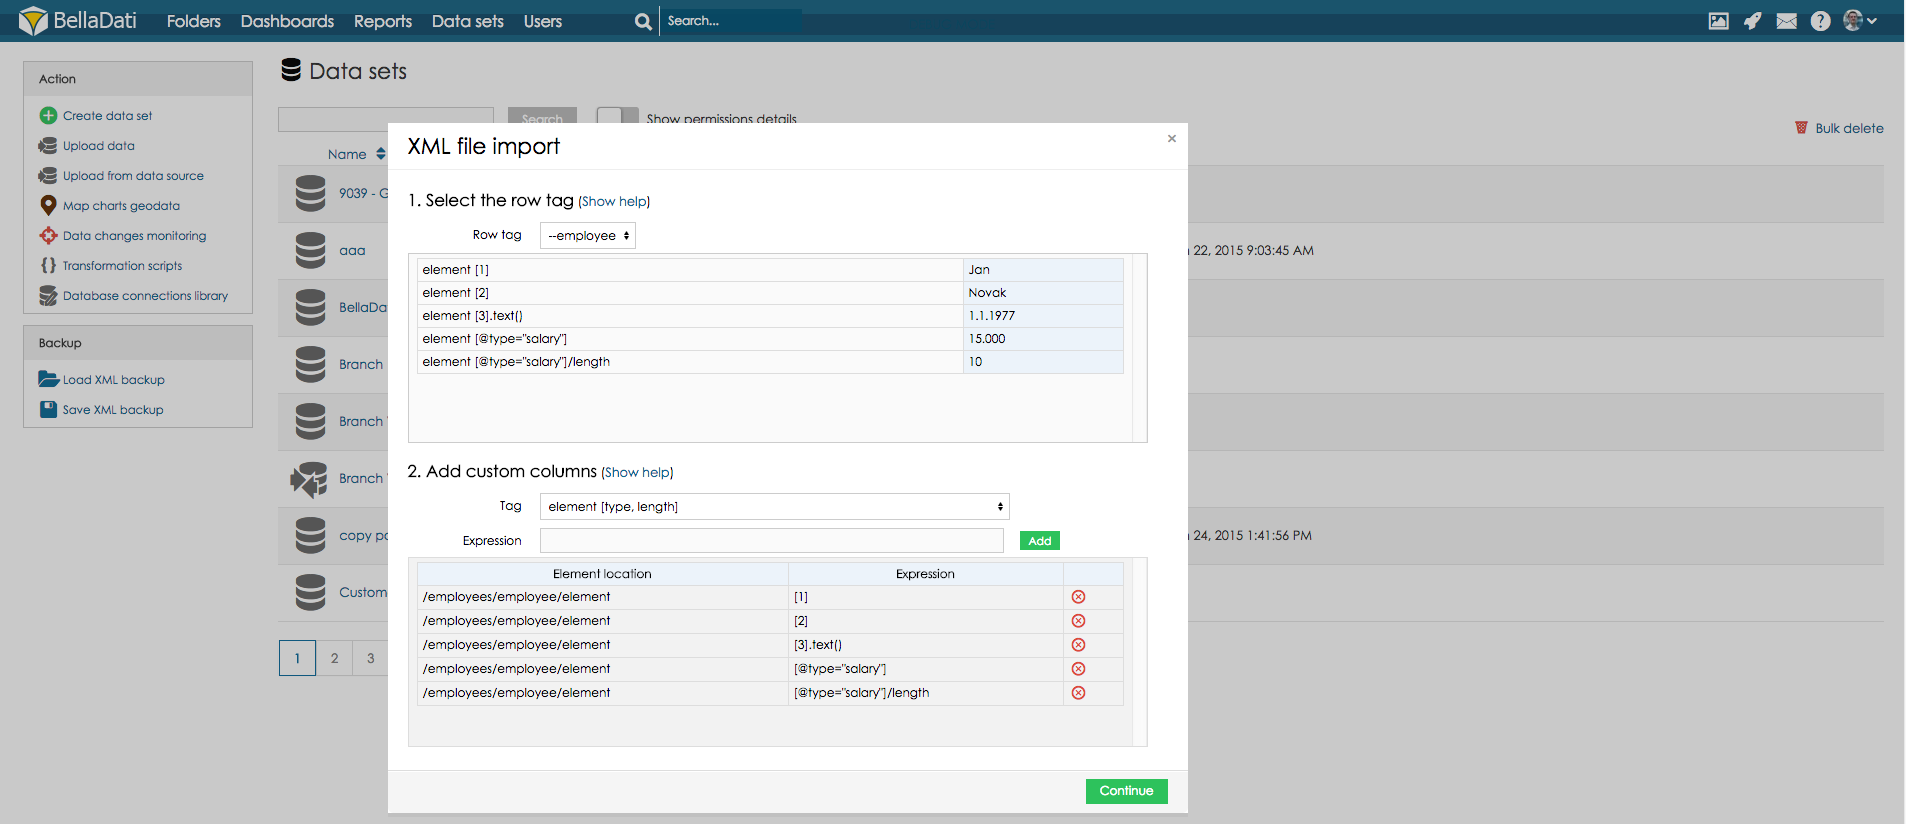
By adding custom columns can be selected, which rows will be imported. We will use following XML structure for this example:
As row tag should be selected --employee (this tag repeats for each record).
Now, there need to be added new columns, columns are divided by its type (name, surname, birthday, salary).
Click Continue to proceed to Import settings. Next Steps
|
| Sv translation | ||||||||||||||||||||||||||
|---|---|---|---|---|---|---|---|---|---|---|---|---|---|---|---|---|---|---|---|---|---|---|---|---|---|---|
| ||||||||||||||||||||||||||
カスタム列を追加することで、インポートする行を選択することができます。 この例では、以下のXML構造を用います:
行タグを選択する必要がある –-employee (このタグは各レコードで繰り返されます)。
ここで新しい列を追加する必要があり、列はそのタイプ(名前、姓、誕生日、給与)によって分割されます。
続くをクリックして、Import Settingsに進んでください。 次に |
| Sv translation | ||||||||||||||||||||||||||
|---|---|---|---|---|---|---|---|---|---|---|---|---|---|---|---|---|---|---|---|---|---|---|---|---|---|---|
| ||||||||||||||||||||||||||
Durch das Hinzufügen von benutzerdefinierten Spalten kann ausgewählt werden, welche Zeilen importiert werden.
Als Zeilen-Tag sollte --employee ausgewählt werden (dieser Tag wird für jeden Dataset wiederholt).
Nun müssen neue Spalten hinzugefügt werden, Spalten werden nach Typ (Name, Nachname, Geburtstag, Gehalt) unterteilt.
Klicken Sie auf Weiter, um mit dem Importieren von Einstellungen fortzufahren. Nächste Schritte
|
Overview
Content Tools