Page History
...
To learn how to work with JSON, please read the following article: http://support.belladati.com/doc/Importing+from+File
Once the import settings are finished, click on Continue and import the data.
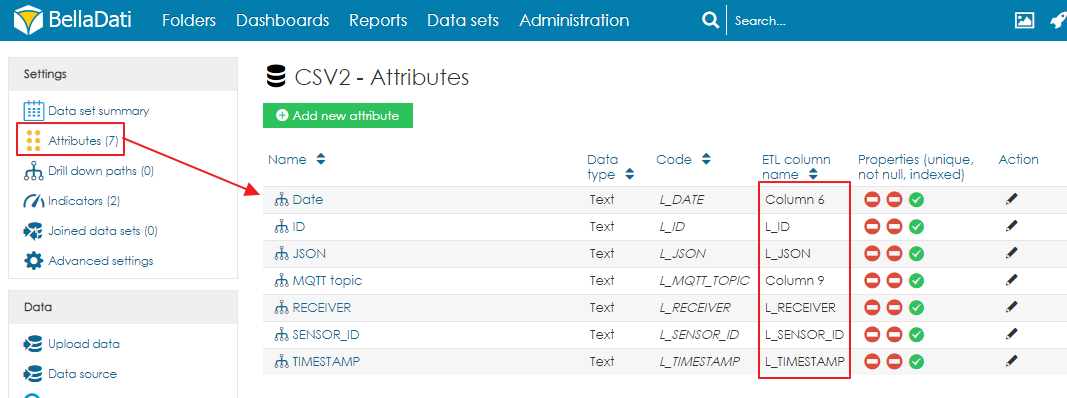
After the import, make sure that the ETL names of attributes are correctly set. If they are not correct, change them to match the code of the attribute.
You can download the XML backup of the final data set from here. Please note that you need to import the data to create the import template.
Usage of the import template
- Make sure you have the developer mode enabled. If not, enable it in the user profile (see http://support.belladati.com/doc/Managing+User+Profile
...
- - Chapter Appearance settings)
- Go to Data set summary and open the Import history.
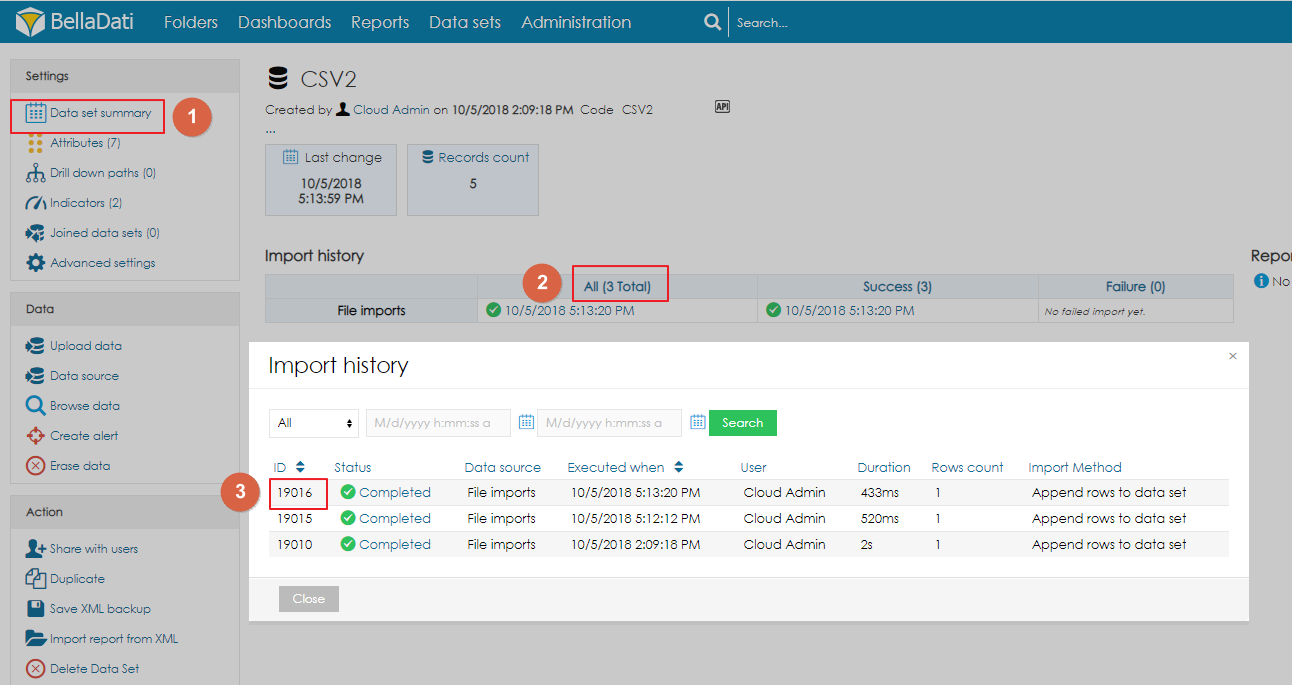
- Copy the ID of the import, which will serve as the Import template.
- Open the IoT Console and configure the BellaDati REST action.
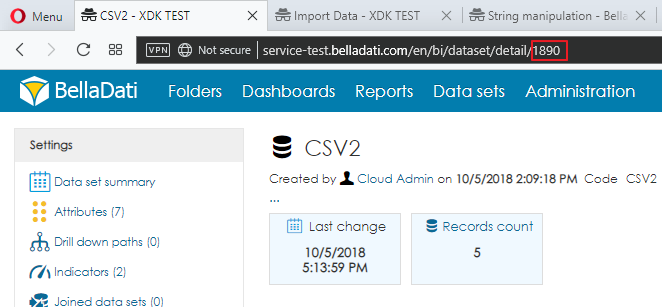
Data Set ID - ID of the Data Set. The ID can be found in the URL
Import Template ID - ID of the Import template
ID attribute - Code of the attribute ID (e.g. L_ID)
Receiver Attribute - Code of the attribute Receiver (e.g. L_RECEIVER)
Content Attribute - Code of the attribute JSON (e.g. L_JSON)
Timestamp Attribute - Code of the attribute Timestamp (e.g. L_TIMESTAMP)

- Save the action and Apply the changes.
- Data sent via from the sensor will now be correctly stored in the BellaDati Data set.
JSONElement e = parseJSON(value(3))return e.getString('sensorId')
Overview
Content Tools