Click Users in the main menu to display the list of users in the current domain.
This table shows:
- User name (surname, title)
- Login name (usually e-mail)
- Lat login date and time
- Phone
- User group each user belongs to
- Authentication source
- Domain (more domains are relevant for global BellaDati administrator only)
- Active/Inactive user
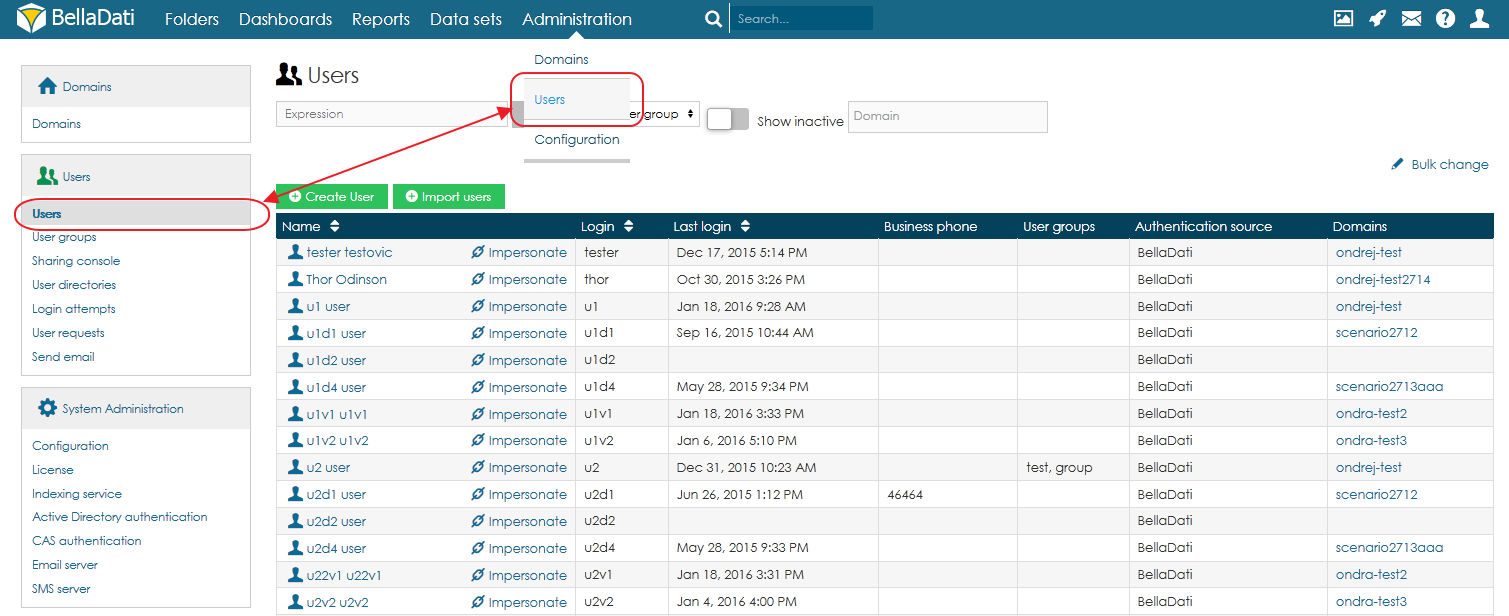
Actions available:
- Sort existing users by name, login, last login date and phone.
- Filter users by: expression (match within name or login), user group, show deactivated users
- Search user
- Create new user
- Bulk user import using the CSV file
- Bulk change delete
Creating user
- Click Create User in the left submenu. The popup appears.
- Enter the information and set the options below.
- Click Create. New user has been created now in the actual domain.
Enter the following information in the popup (bold are mandatory):
- Name: 2 characters minimum
- Surname: 2 characters minimum
- User group
You can immediately assign these basic roles to the user:
- Report editor
- Data manager
Check "Send notification" option to let the new user know about his new account in BellaDati via automatic e-mail.
To send email notifications, your administrator must have configured an email server.
Tutorial video
<iframe width="560" height="315" src="https://www.youtube.com/embed/HkUOeDNdKZo" frameborder="0" allow="accelerometer; autoplay; encrypted-media; gyroscope; picture-in-picture" allowfullscreen></iframe>
Next Steps
- Take me back to administration overview
- Administering user groups
- Managing user profile
Overview
Content Tools