When using BellaDati for building custom applications in the UI, forms are very important part for adding and editing content. In this example we will focus on IoT application for tracking assets. End users will be allowed to add new and edit existing assets via forms.
Adding new assets
First we need to create data set structure, we will store ID, Name, Type and Manufacture year, so we will create columns with the following codes:
- L_ID (attribute)
- L_NAME (attribute)
- L_TYPE (attribute)
- L_MANUFACTURE_YEAR (attribute)
Now open Data collecting forms for the same data set:
- Select the option New import form
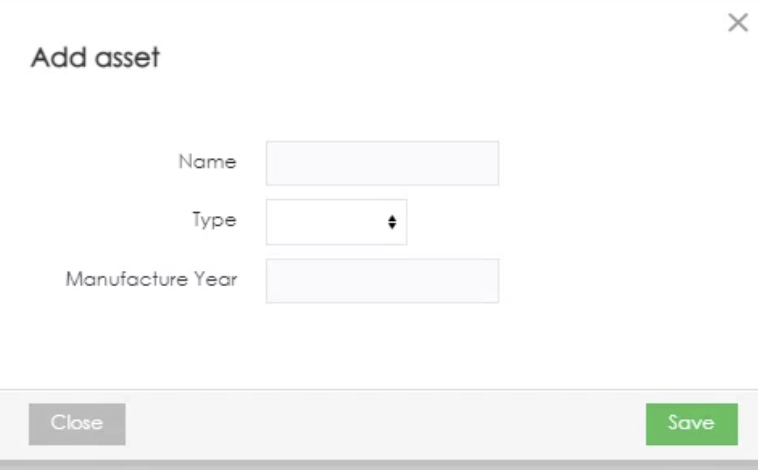
- Use name Add asset
- Select the option Edit in the column Elements
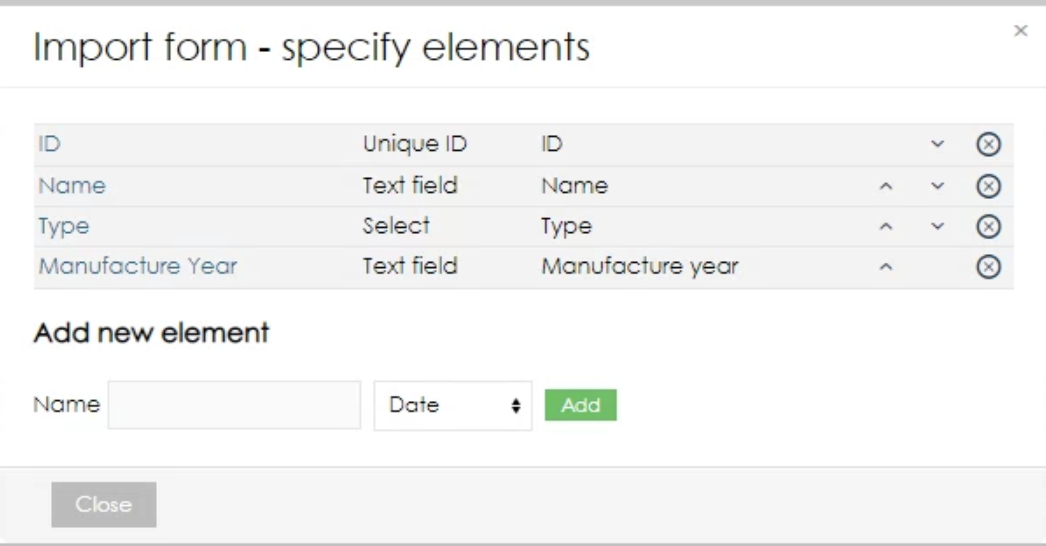
- Now add the following elements:
- ID - select type Unique ID
- Name - select type Text field
- Type - select type Select
- Manufacture year - select type Text field
- Now we need to map the elements to the data set columns. In order to do that, click the element and select the attribute column that the element will be linked to and press the button Back. Repeat the same for all the elements. In our case, the element name matches the name of the column so the final settings will be as follows:
- In the last step, we need to load the values for the column Type. Use the following steps to do that:
- Select the element Type
- Click the button Edit items formula
Enter the following formula (this formula will load all member values of column L_TYPE_NAME from the data set with code ASSET_TYPE):
def cV = [] cV=allValues('ASSET_TYPE','L_TYPE_NAME') return cV- Select the option Refresh on data change in the element mapping
As the last step, we will set up the action for closing the dialogue window when the values are entered in the report pop-up view. Click the form name and use the following code in the section After submit JavaScript:
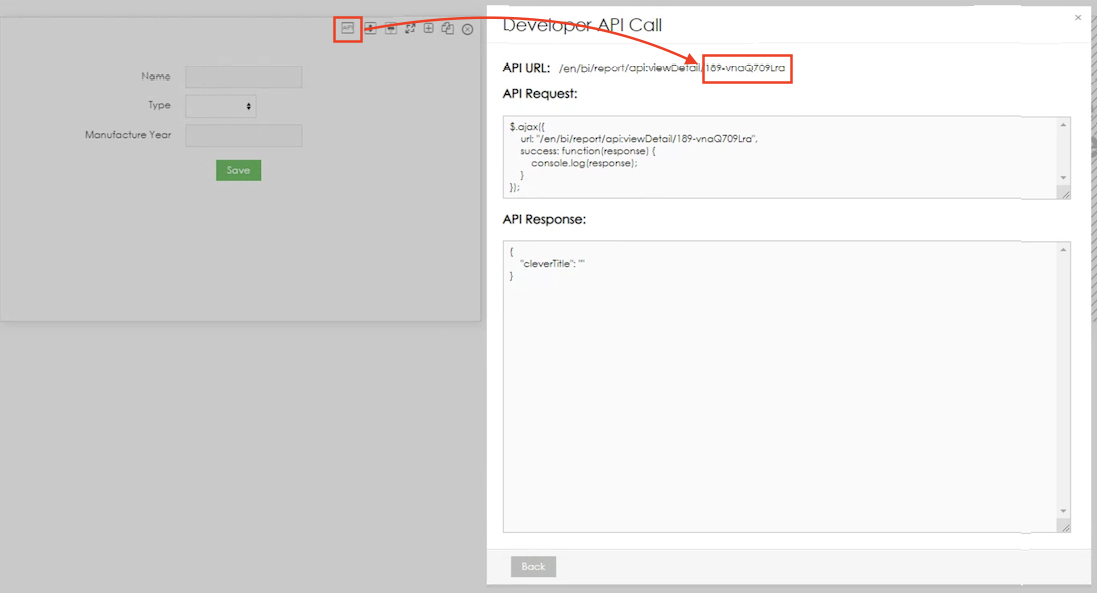
window.parent.layoutReload(true) window.setTimeout(function() { window.parent.Kaelyn.closeAll() },1000)- Now add the form as a report view, click the button API and copy the ID of the new view:
- Now the data set is ready and can be added to the report action button (this report must be based on the data set with the newly created form). Create a new report, this report will be used to display the list of available assets. For adding new assets, the action button will be used, use the following settings:
- Button type: URL
- Link: viewreport:ID of the view that you've copied in the previous step
- Link target: Open in a popup
- Width x Height: define based on the size of your form (e.g. 450x200 for our case)
- Show buttons: enable (thus option will display the control buttons for the form out of the view)
- Once defined, our new form will open in a popup and can be used for adding new data
Editing existing assets
For editing the existing assets, there has to be created a new form, you can use the same settings as for adding assets and then make the following adjustments:
- Change type of the element ID to Hidden and define the following formula @L_ID
- In the import form detail select the value of the field Edit row attribute to ID
- When defining the form link, add the following code: ?vr:L_ID=@ASSET_ID where ASSET_ID is the code of variable in the report for editing the asset detail
Overview
Content Tools