In case you have added new columns to the data source your data set is based on, you need to update the import settings. Otherwise, new columns will not be imported. A similar approach can be also used when you have removed one or more columns from the data source.
Following example represents description how to add new columns for SQL database with the changed structure.
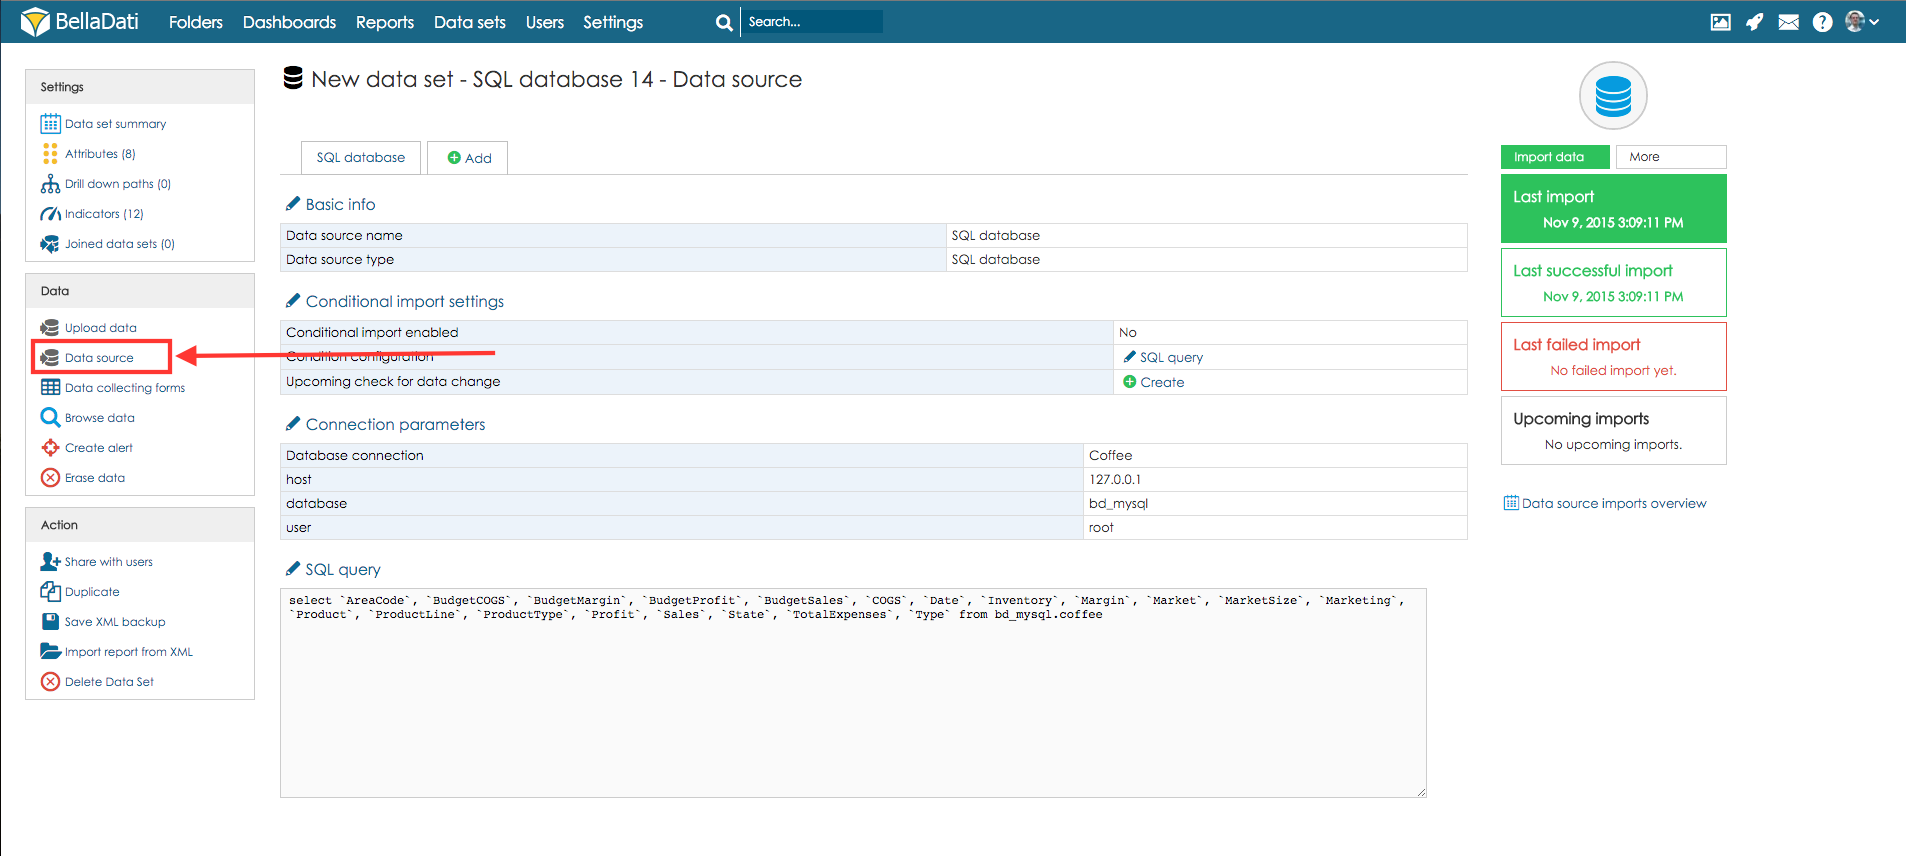
First, you need to proceed to the data source settings.
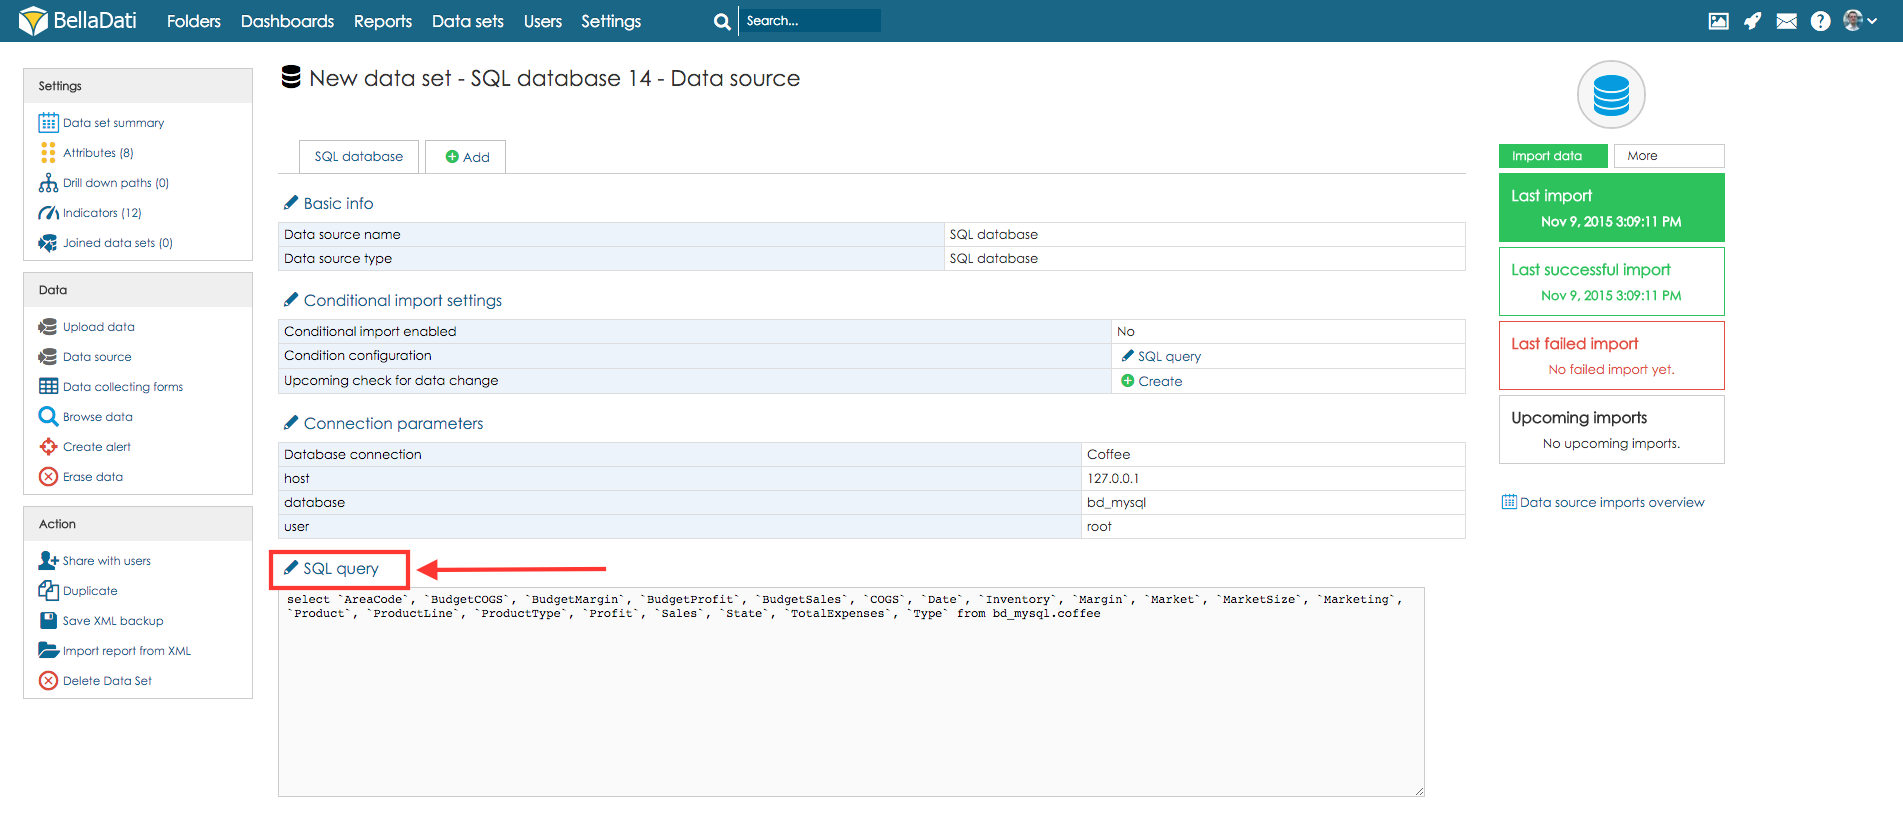
Now hit a click on button SQL query.
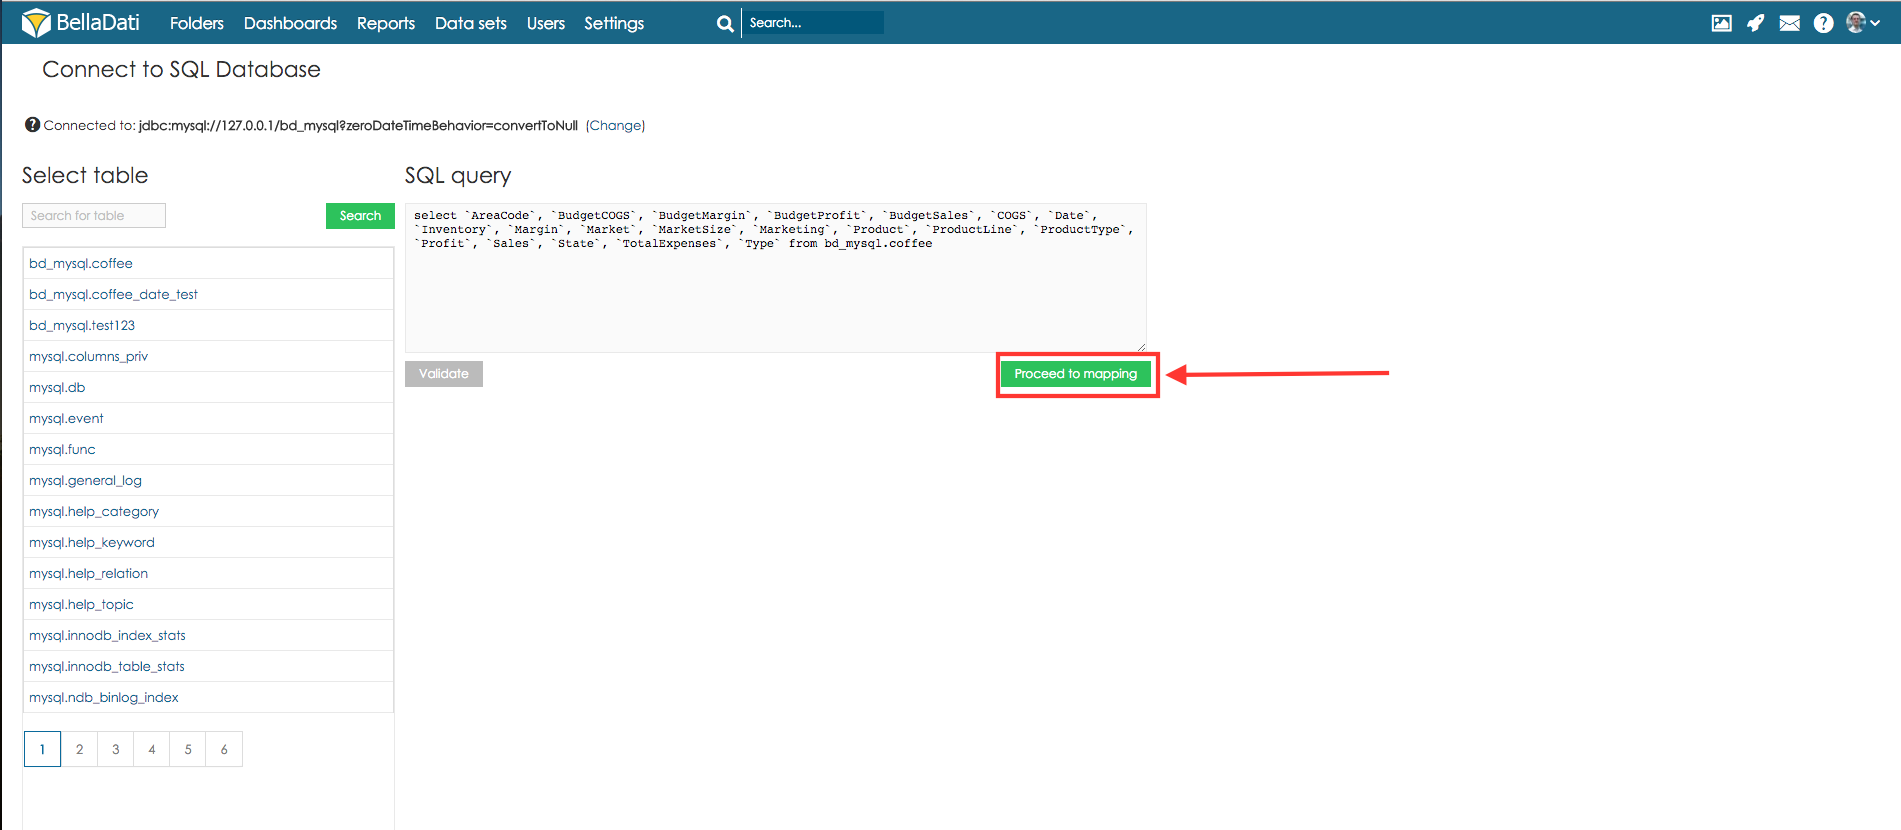
Update the SQL query and click button Proceed to mapping.
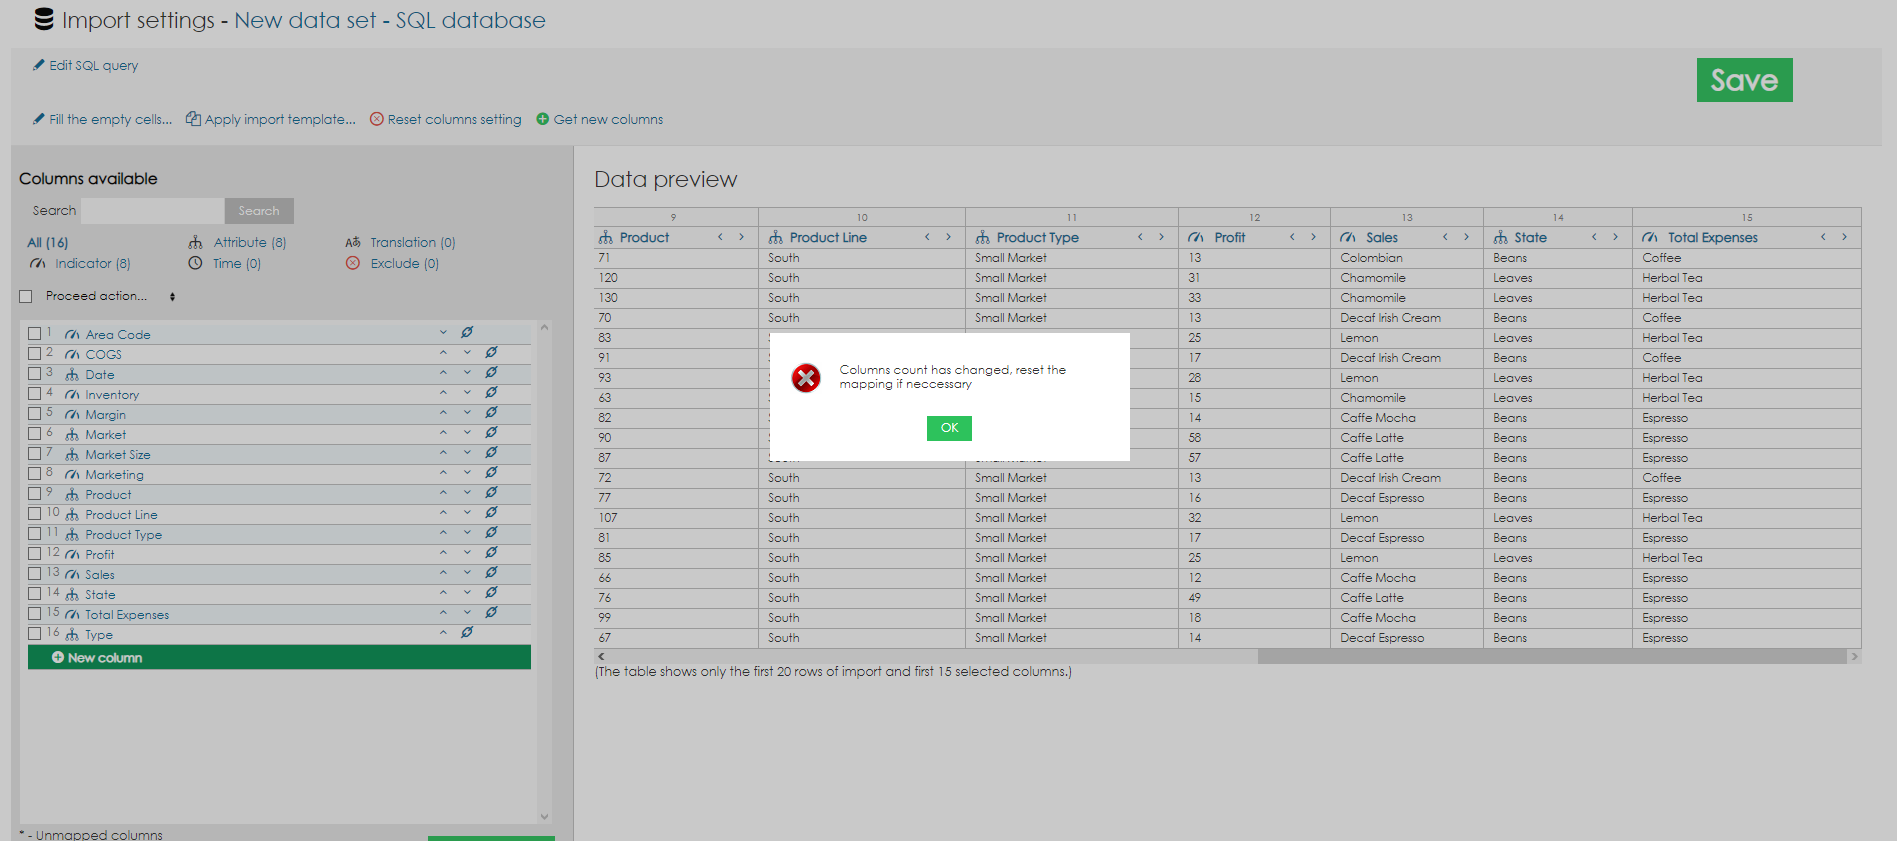
BellaDati will display a warning that the Columns count has changed.
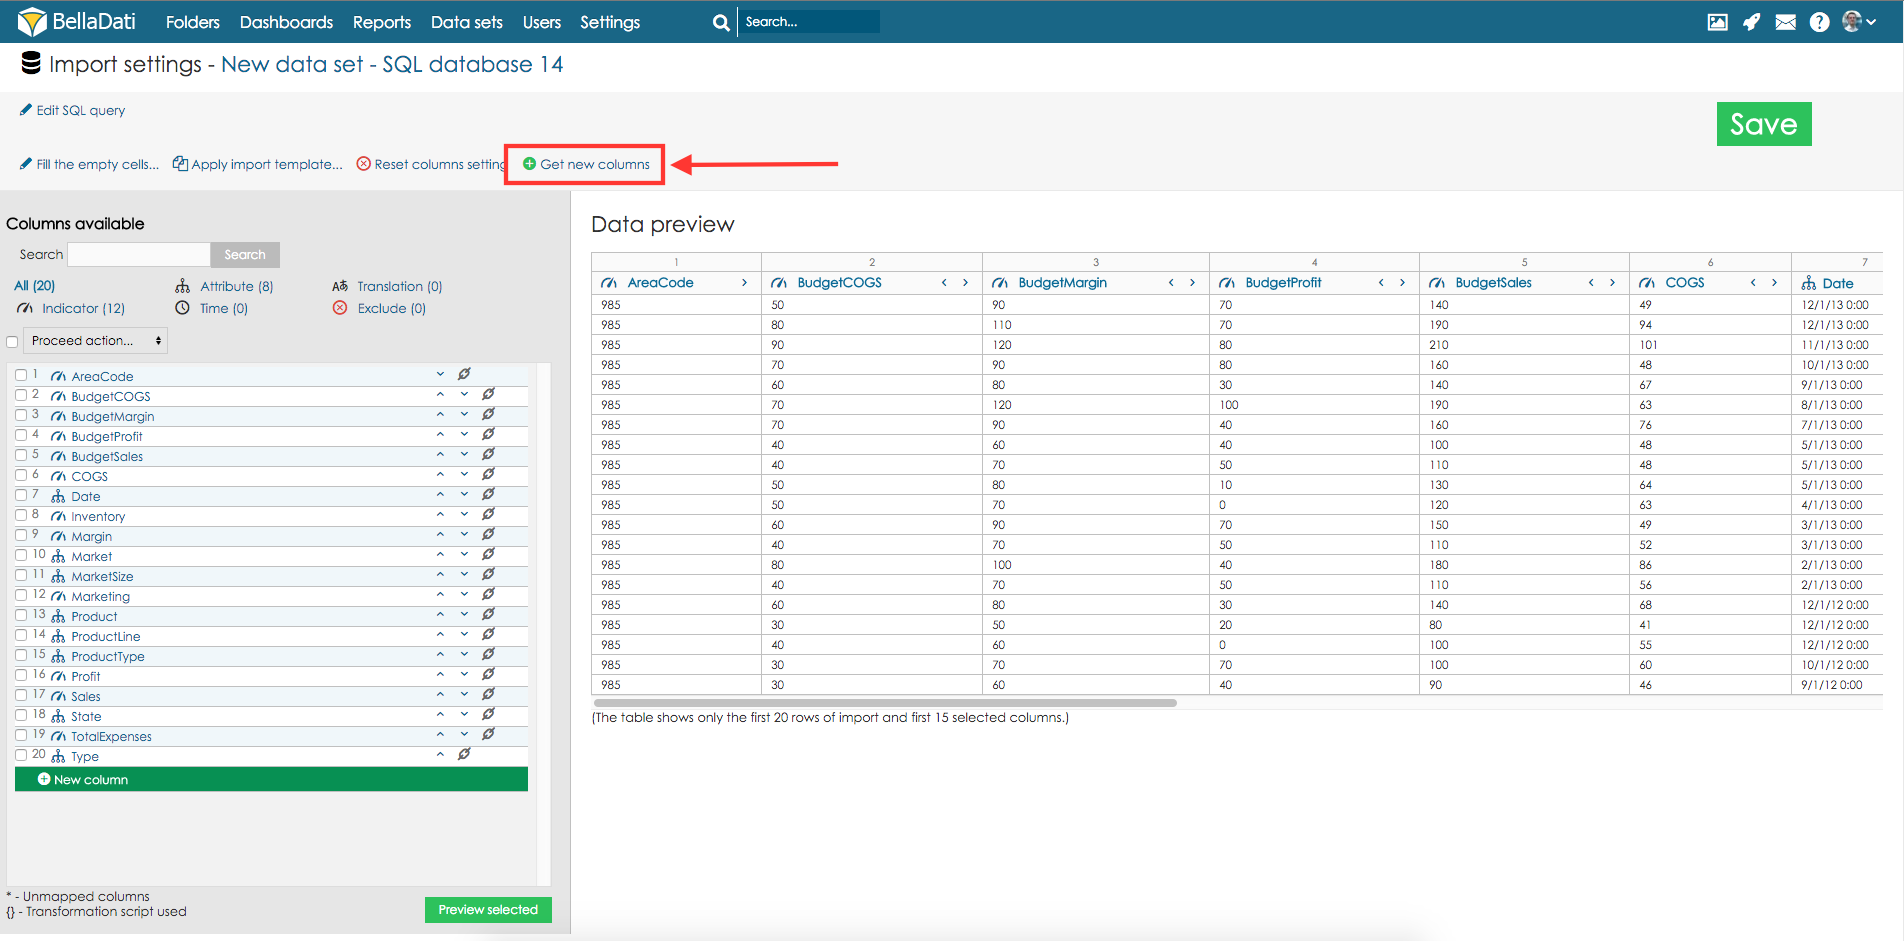
Click button Get new columns to add new columns.
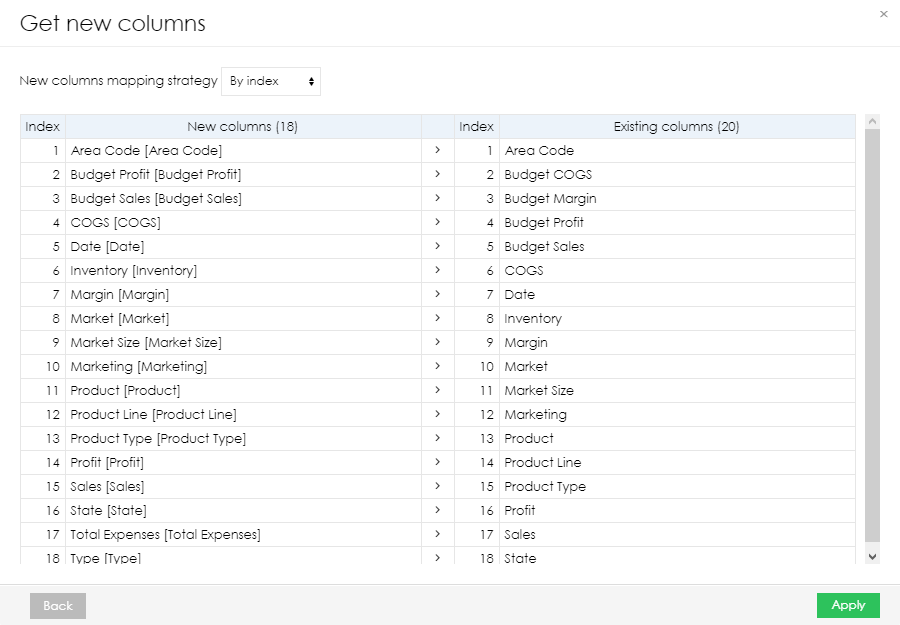
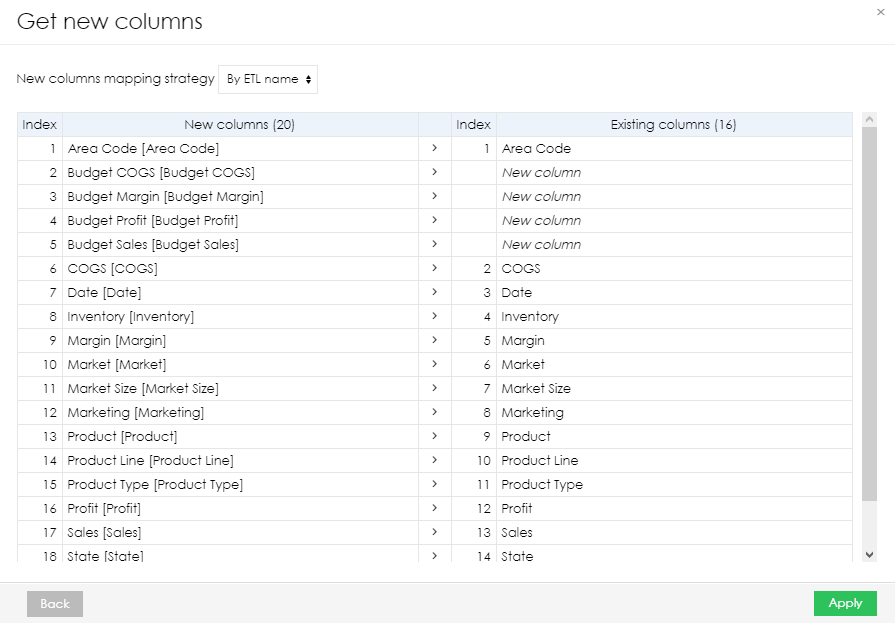
As the next step, the user can select which mapping strategy should be used:
- By Index - BellaDati will ignore the ETL names and the columns will be matched according to their index (Column 1 from the data source to Column 1 in data set, Column 2 from the data source to Column 2 in data set, etc.)
- By ETL name - BellaDati will match the columns with the same ETL name. Columns with an ETL name, which is not present in the data set, will be added as new columns.
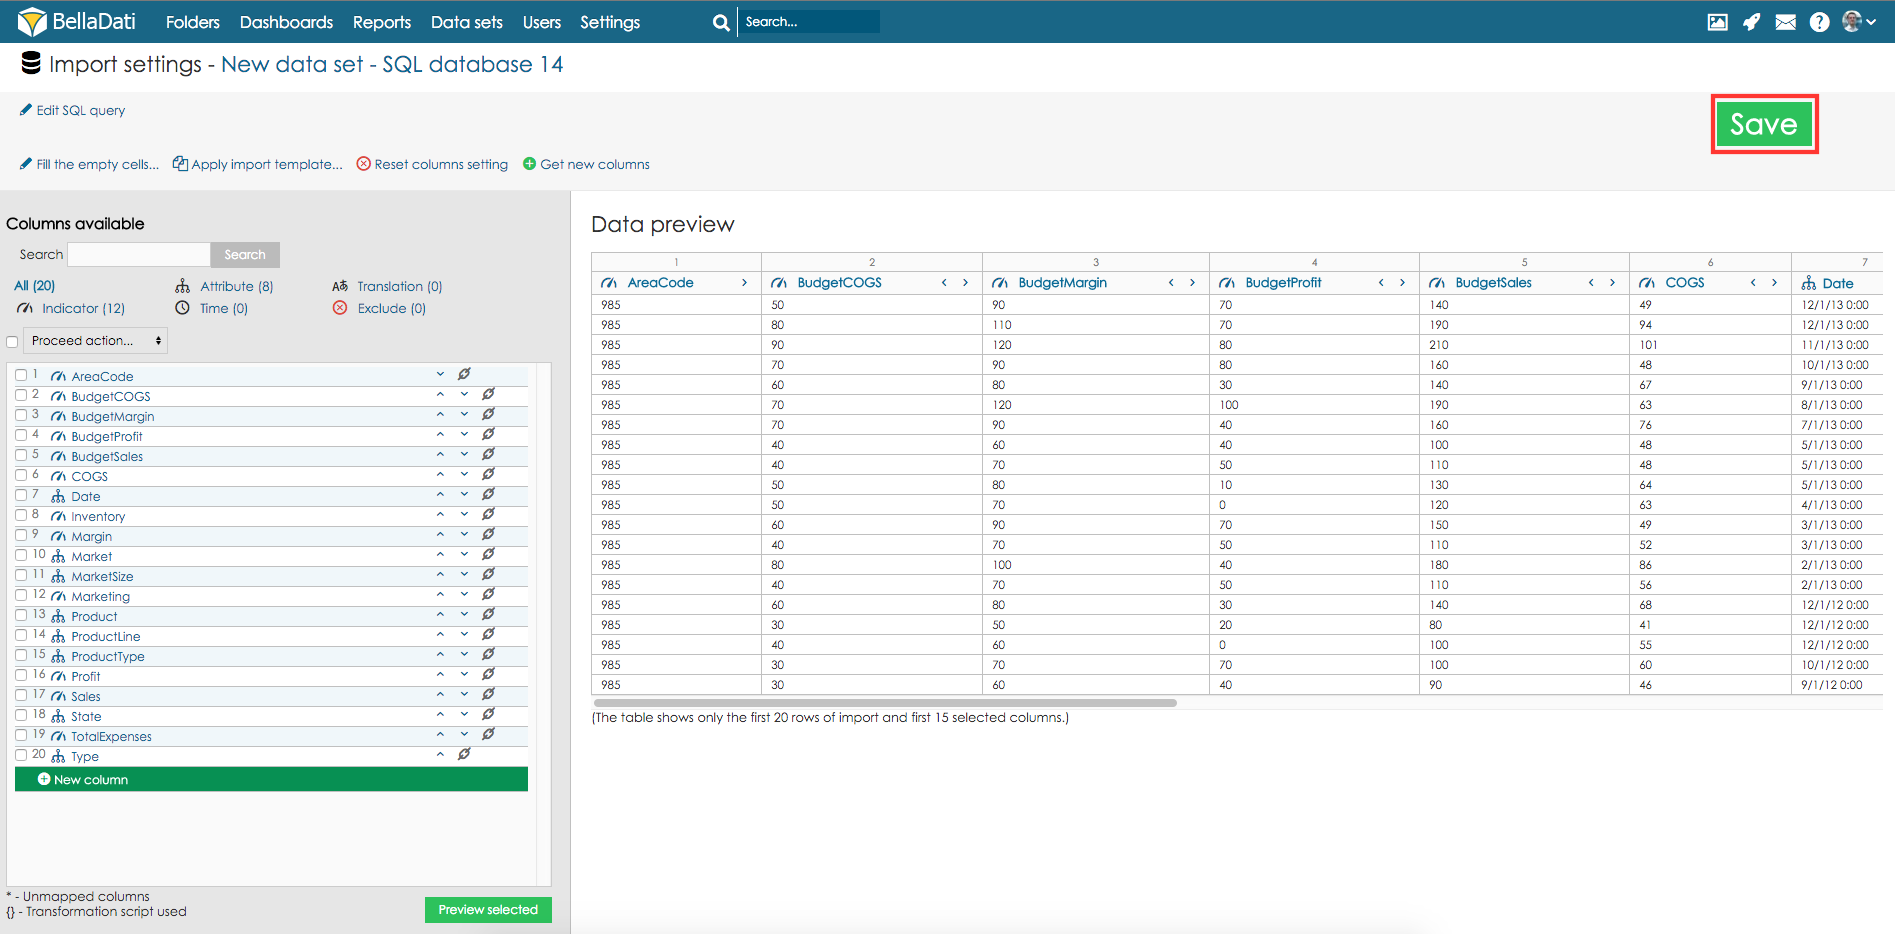
You can optionally change column settings of newly added columns.
Confirm new settings by hitting a click on button Save.
New import settings will be applied during next scheduled import.
