Adjust layout and size of the views in email body
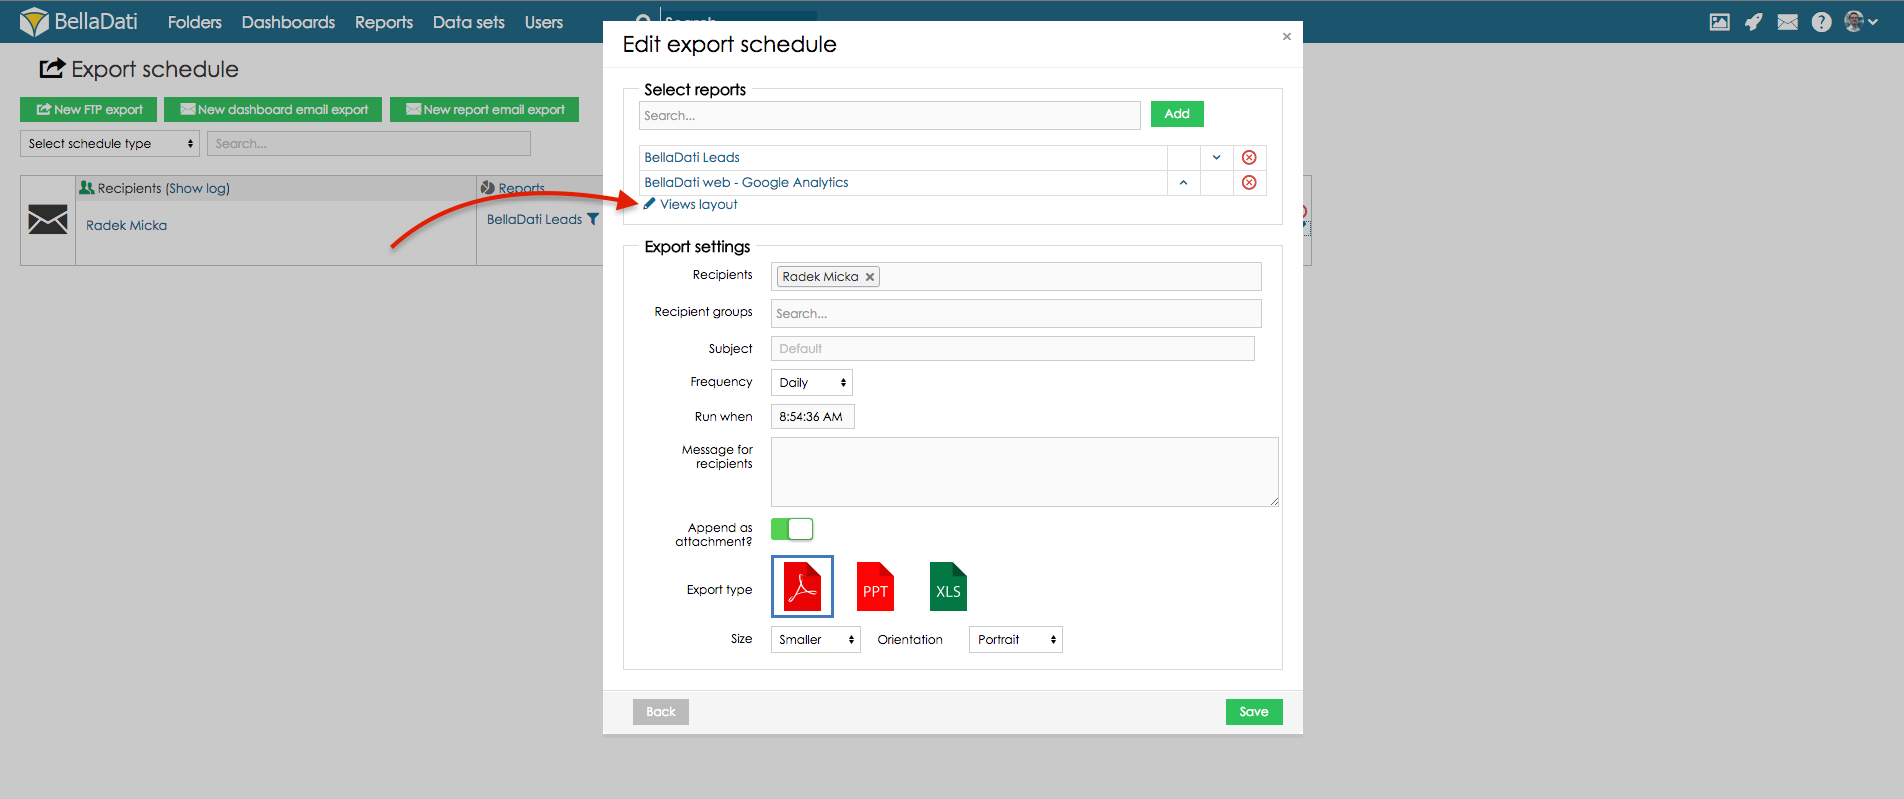
To adjust layout and size of the views in email body, go to Export schedule and select option Edit.
Only size of the charts and maps can be adjusted.
Go to views layout:
Select report you want to set up and click button Add row.
Click the button Add column to open Views layout. Select view which should be adjusted and set the width and height and click Save:
If there is added more columns into one row, visualisations will be added into one row, next to each other.
Position of columns can be changed by using arrows in section Action.
If you need to manage position of the rows, go Back to the rows settings.
Position of rows can be changed by using arrows in section Action.
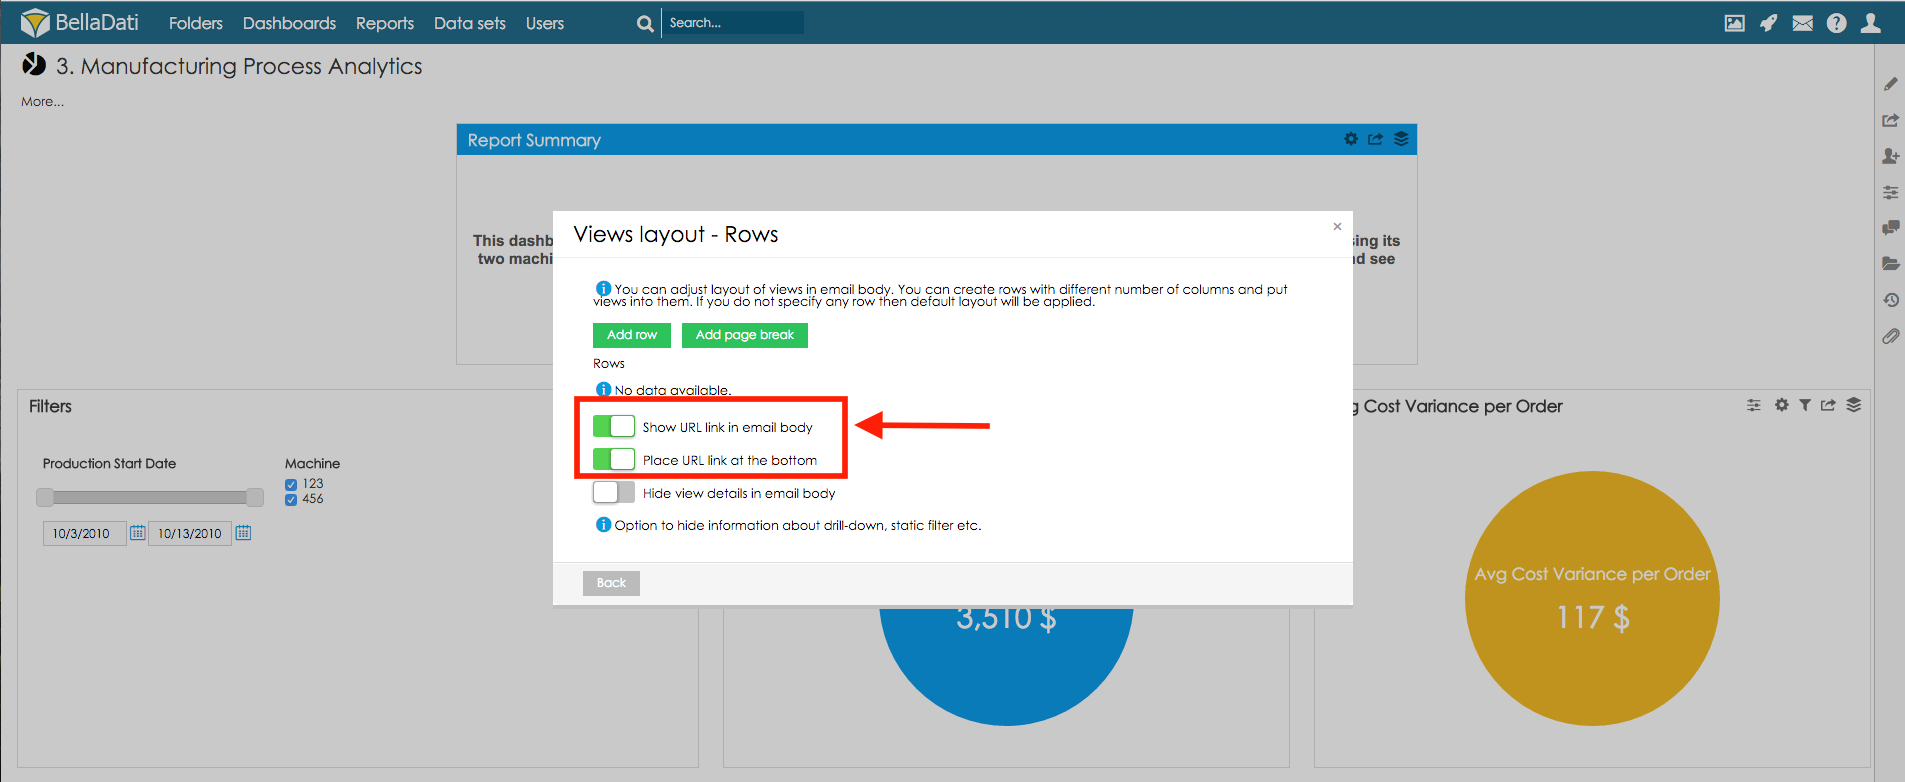
Display link to the report in email Body
In order to display links to relevant reports in email body, select option "Show URL link in email body". This link is by default placed at the top of the email. Selecting option "Place URL link at the bottom" will place the link to the bottom of the email.
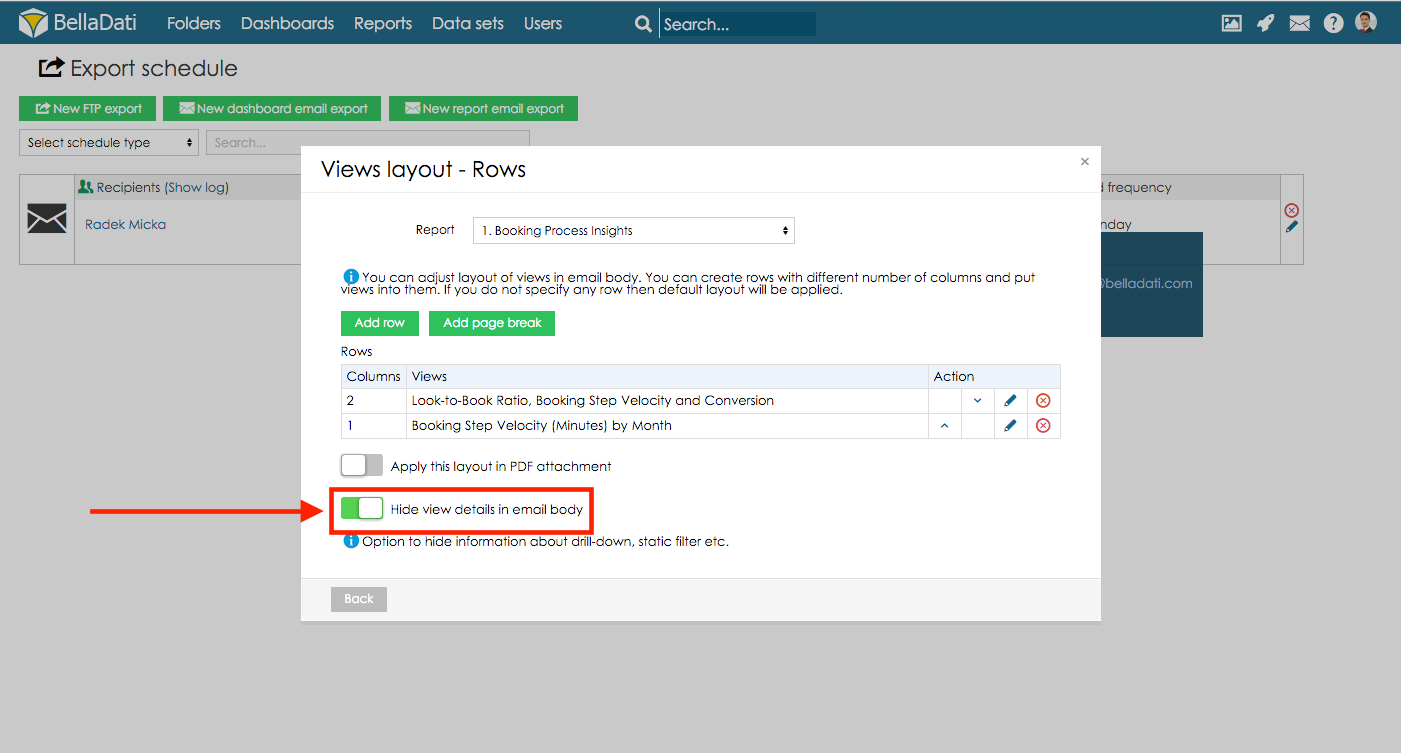
Do not display view details in email body
In order to hide view details (g.e. drill-down details or static filter condition), select option "Hide view detail in email body".
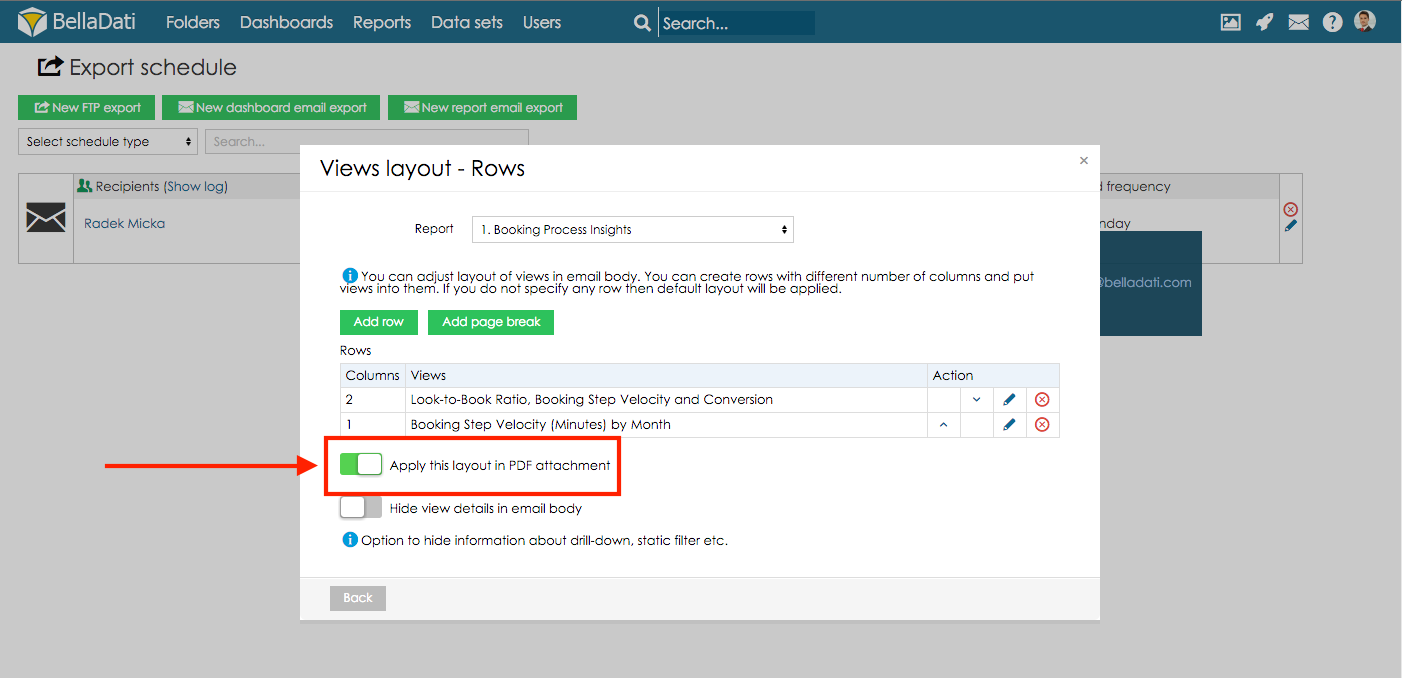
Adjust PDF export layout
In order to apply custom layout in PDF export, select option "Apply this layout in PDF attachment" in the views layout settings (rows).
Add page break to PDF export
When the email layout is being set up, it might be convenient to split the content on more pages. In order to do that, page break needs to be set in the views layout settings (rows). When the layout is being defined, hit a click on button Add page break - page break will be added, it means that rows above the page break will be placed on one page, rows below page break will be added on the new page.


