To be able to access Notification, the user has to have at least read-only access to the data set.
When data reaches selected condition, data-driven notification automatically sends an email or push notification to the people you specify. You can set data-driven notifications in the data sets.
Data-driven notifications are available from BellaDati 2.9.8.
Creating notification
Notifications can be created from the data set details. Click the option Notification in the section Data to create new notification and list existing notifications from the selected data set.
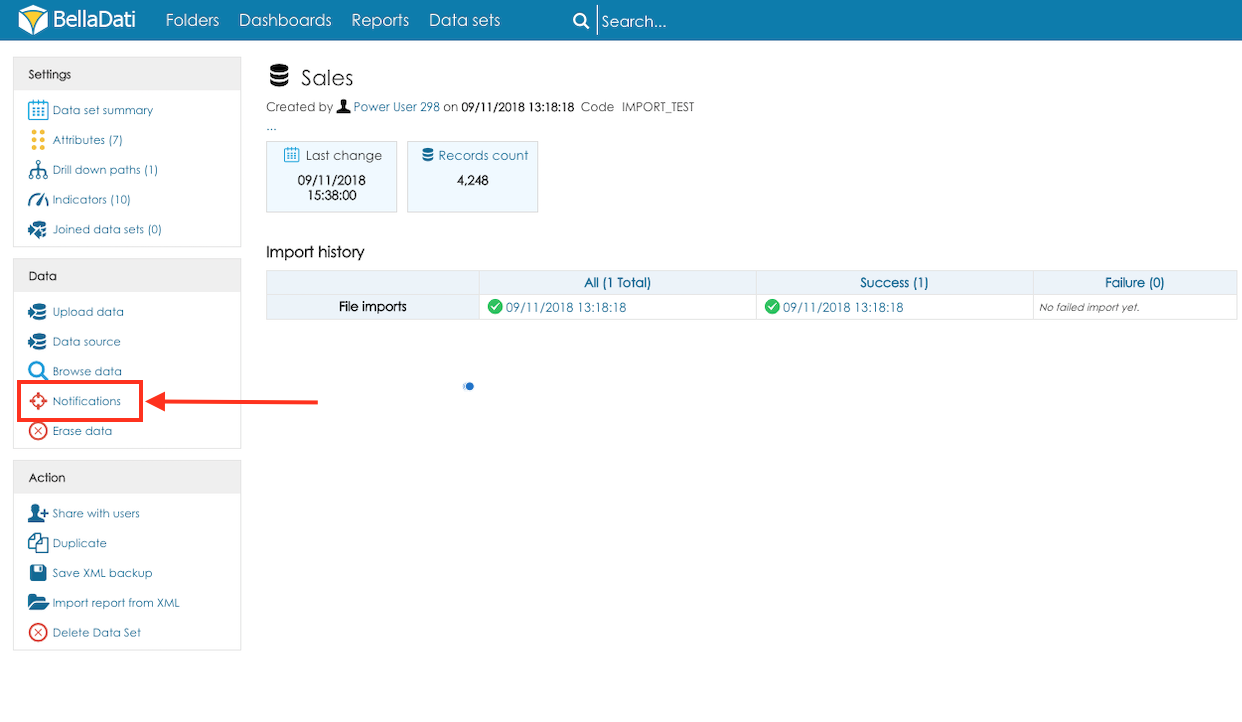
Click the button New notification to open the Notification wizard.

The notification wizard will guide you through the steps required for creating a new notification. Each step is displayed as a separate tab.
Use the navigation at the top of the screen to navigate in the notification wizard:
- Button Back will display the previous tab
- Button Continue will move you to the next tab
- Tab name will display the details of the selected tab
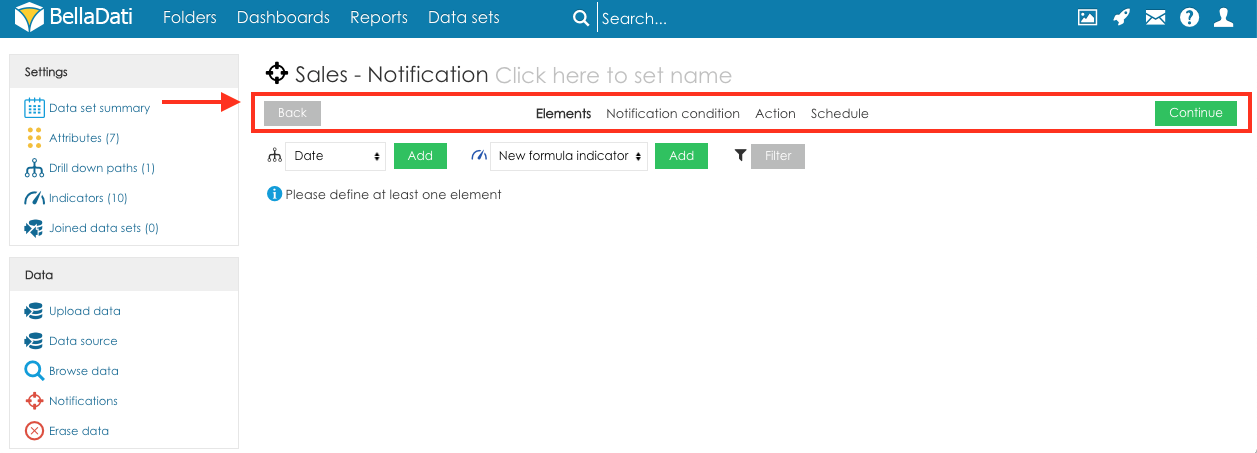
1. Elements
The elements are columns which will be used for the evaluation of the designated condition. The tab elements is used to select the columns will be used for the evaluation of the designated condition. You can add attributes, indicators, formula indicators or filters. Attributes define the aggregation of the condition. For example, if the user selects column Country, the data will be aggregated for each country (one row = one country). The condition will be checked for every country.
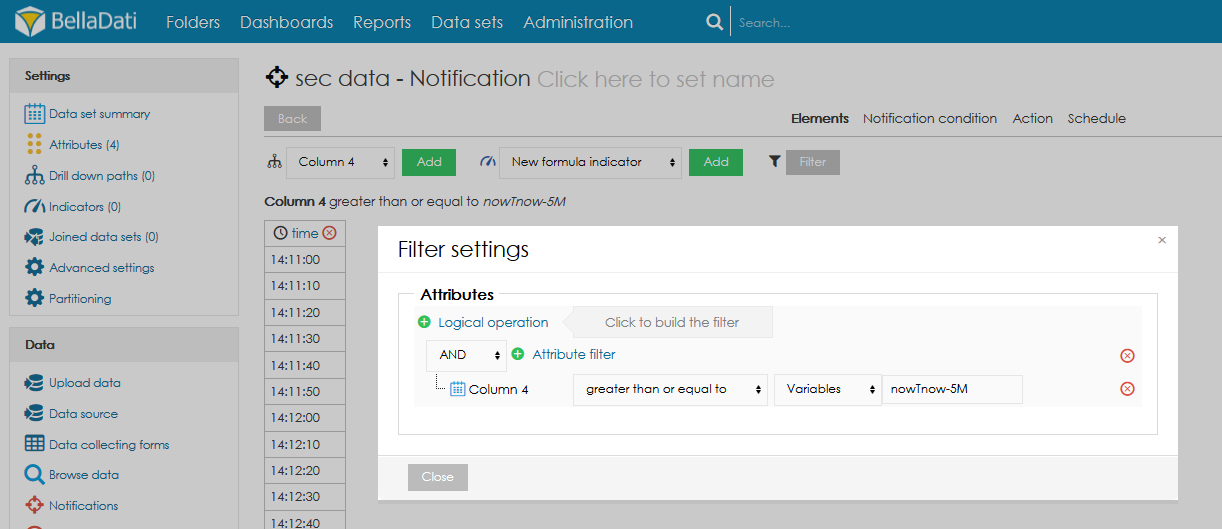
The filter can also work with the actual date. To use this function, the data set has to contain a DateTime attribute. Then, users can configure a filter that will return only values from the selected interval, e.g. from last one day and five minutes:"now-1dTnow-5M".
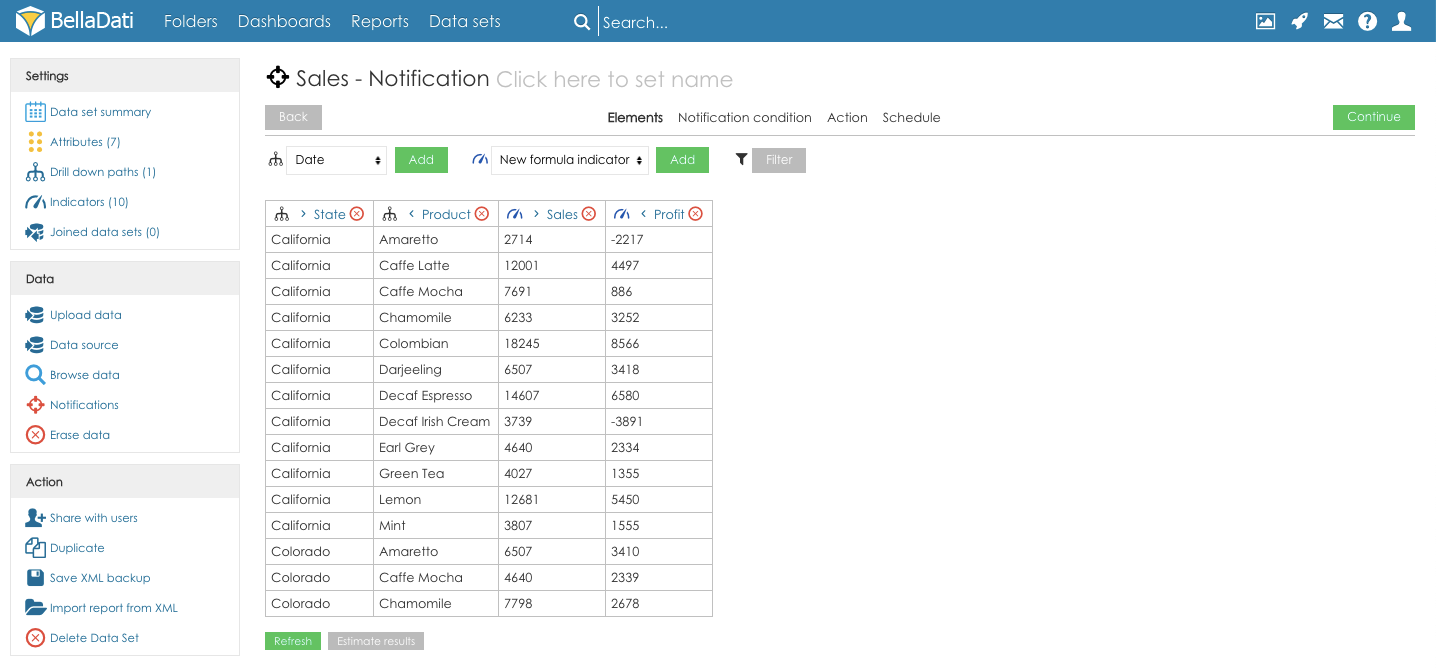
Users can also create formula indicators (the process is the same as when creating formula indicators in the report). The preview of the table which will be used for the evaluation of the condition is displayed below the panel for adding the elements. Please note that the preview is built on the data sample only, which means that it can be empty, although some data will be validated. It is possible to change the order of the attributes and dates by using the arrows displayed next to the names of the columns in the header of the preview.
Click the button Continue to proceed to the next step of the Notification configuration:
2. Notifications condition
The condition defined on the tab Notification condition will be used for the notification evaluation. Elements available for the condition evaluation:
- No condition - notification will be always sent
- Indicator element selected on the tab Elements
The value can be compared against a static value or formula. The condition is evaluated for each row defined on the tab Elements
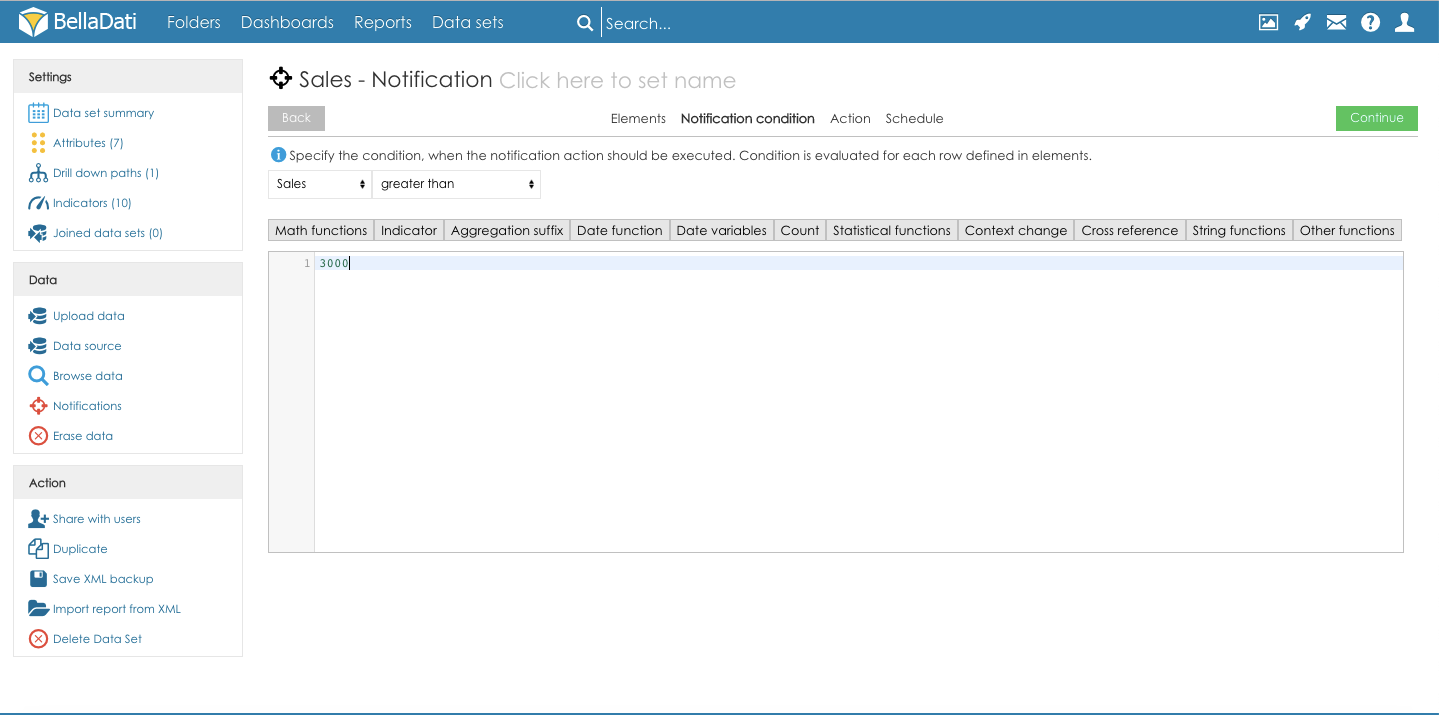
Click the button Continue to proceed to the next step of the Notification configuration:
3. Action
Selected action will be used to send the notification in case the Notification condition is met.
- Click the button Add notification action to start creating a new notification
- Select notification action:
- Send email - email notification will be sent to the selected users
- Send FCM notification - push notification will be sent to the smartphones of the selected users (make sure that Firebase configuration is correctly set and Device IDs of the users' smartphones are available in the elements)
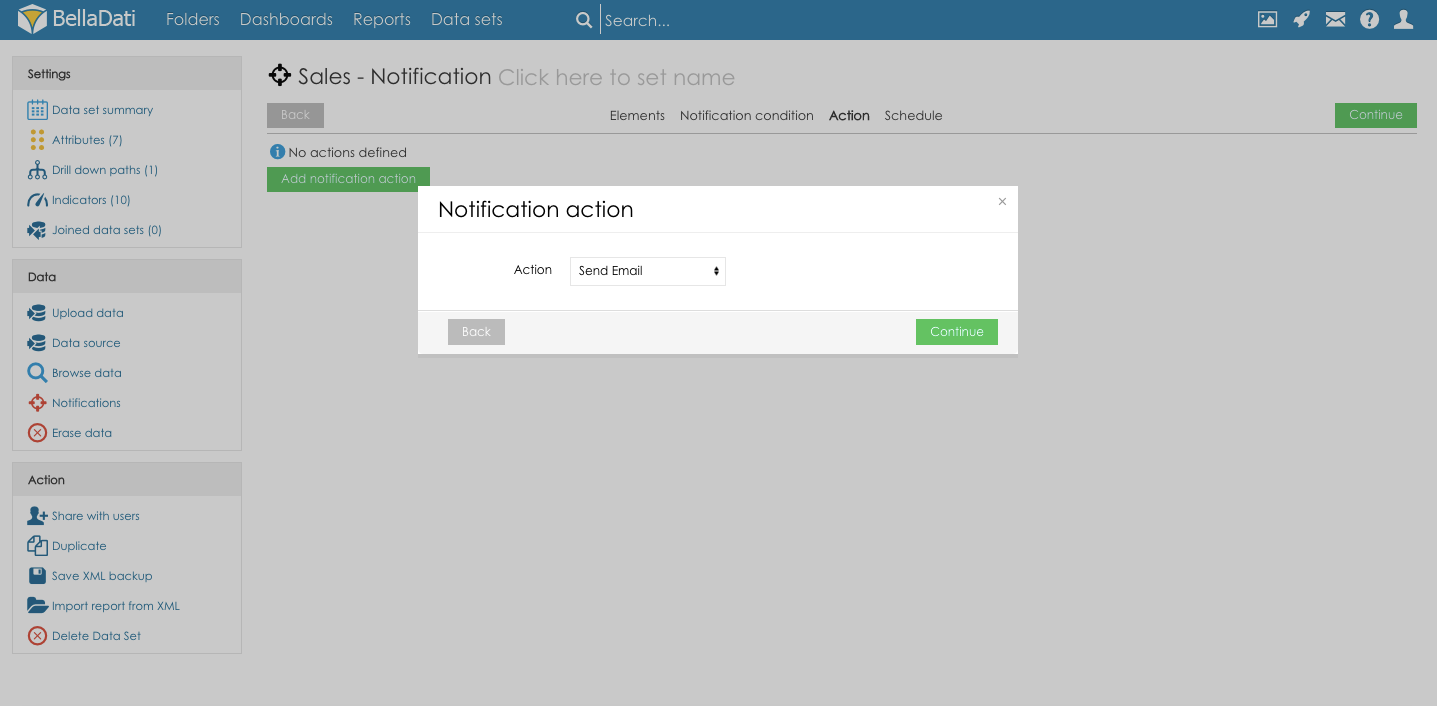
- System notification - is used to display notification inside Map view in report. This notification needs to be also set with that specific view.
- Define message and recipients (the setup is the same for all notifications):
- Subject - Custom message sent in the notification
- Message for recipients - Custom message sent to the notification recipients
- Merge notifications - All evaluated rows will be included in one email only. Variables should be wraped with three at signs example: @@@ ${L_ATT_CODE} ${L_ATT_CODE_2}@@@ . This L_ATT_CODE and L_ATT_CODE_2 variables will be replaced with all values in loop. See also example in picture bellow.
- Recipients - select BellaDati users who will receive the notification
- Recipients groups - select BellaDati user groups which will receive the notification
- Take recipients from element - if some element contains the recipients who should be notified when the condition is met, select the column which contains the recipient's contact
- Variables - the Subject and Message for recipients can contain dynamic values based on the actual row value. Following variables are available:
- ${compare_value} - row value based on the aggregation defined in the Elements
- ${operation} - the operation selected in the Notification condition
- ${condition_value} - condition value defined in the Notification condition
- ${L_ATTRIBUTE_CODE} - code of the attribute selected in the Elements
- ${indicator_name} - name of the indicator defined in the Elements
Recipient formula - You can define your recipients using formula, you can also read data from different dataset.
here is example of formularesult = [] List allUsers = readDataset(940) allUsers.each { user -> result.add(user.getValues()['L_ID']) } return result
- Click the button Continue to proceed to the next step of the Notification configuration

4. Schedule
The notification schedule defines the date interval in which the notification will be executed. Following options are available:
- Execute on data change - the notification will be executed everytime the data is changed
- When - time of the notification - the notification will be scheduled to the predefined time
- Schedule - select the interval in which the notification will be repeated
- Allow once in interval [min] - this parameter defines the limit (in minutes) of how often the notification can be sent. If the limit is set to 60 and the condition is reached in less than 60 minutes after the first notification was sent, the next notification is ignored.
- Dry run - click the button Dry run to see the results of the notification evaluation
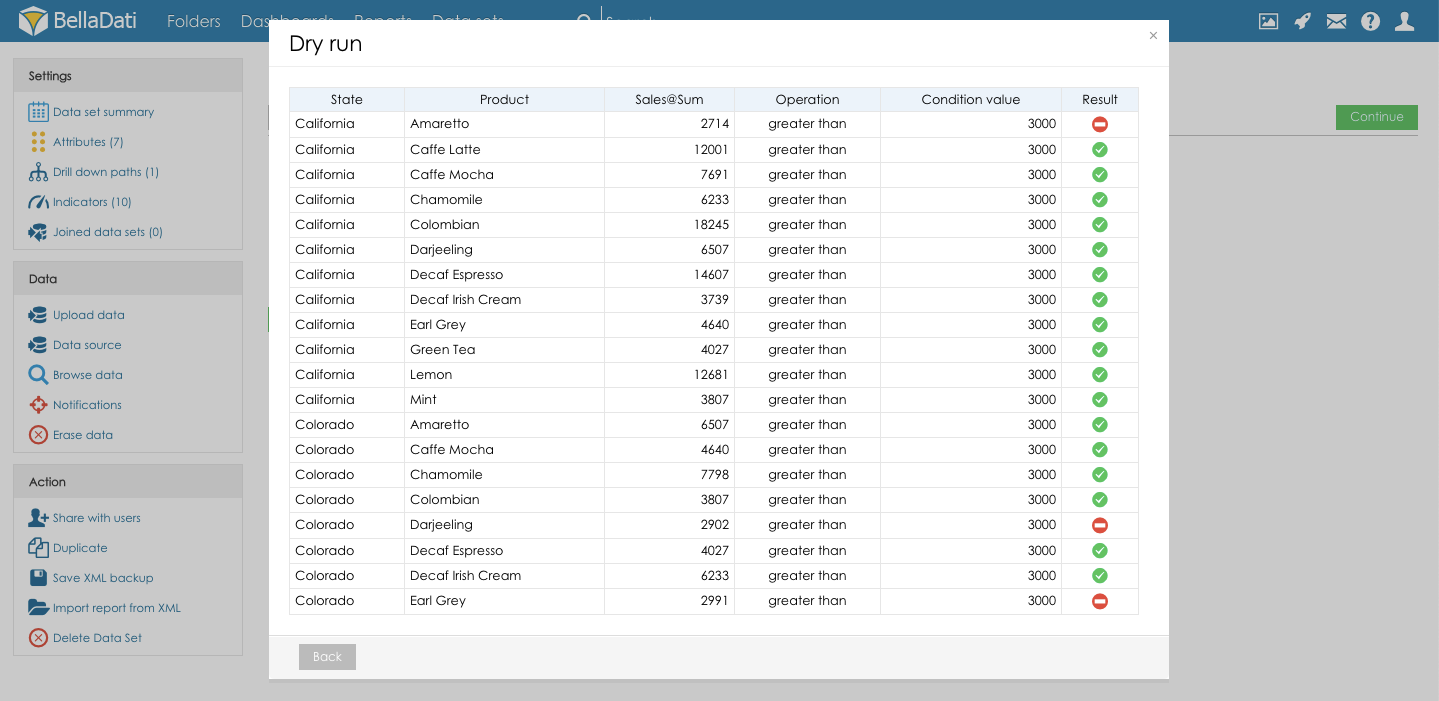
Click the button Continue to schedule the notification.
Managing notifications
Notifications associated with the selected data set
Notifications associated with the data set can be accessed from the data set details. Click the option Notification in the section Data to create new notification and list existing notifications from the selected data set.
The notifications overview provides the details of the notification and the following actions:
- Check now - will execute the notification manually
- Show log - Will display the overview of the notifications checks and the results
- Delete - will delete the notification
All notifications
All the notifications can be managed from the screen Data sets - click the action Notifications to open the list of all the Notifications.

Screen Notifications provides details about:
- Notification Name - clicking will redirect to the list of the data set notifications
- Name of the associated Data set - clicking will redirect to the data set summary
- Selected Notification action applied in the notification
- Execution on data change - enabled/disabled
- Owner - the user who create the notification
- Created - date and time when the notification has been created
- Last event - last time when the notification condition has been met and the notification has been sent
- Button Show log - Will display the overview of the notifications checks

Overview
Content Tools