BellaDati can be configured to support Google oAuth2 users log-in. | Info |
|---|
This procedure is applicable in on-premise installations only. |
Prerequisites- Existing Google Developers account in https://console.developers.google.com/project and project created.
- Enabled access to Google+ API
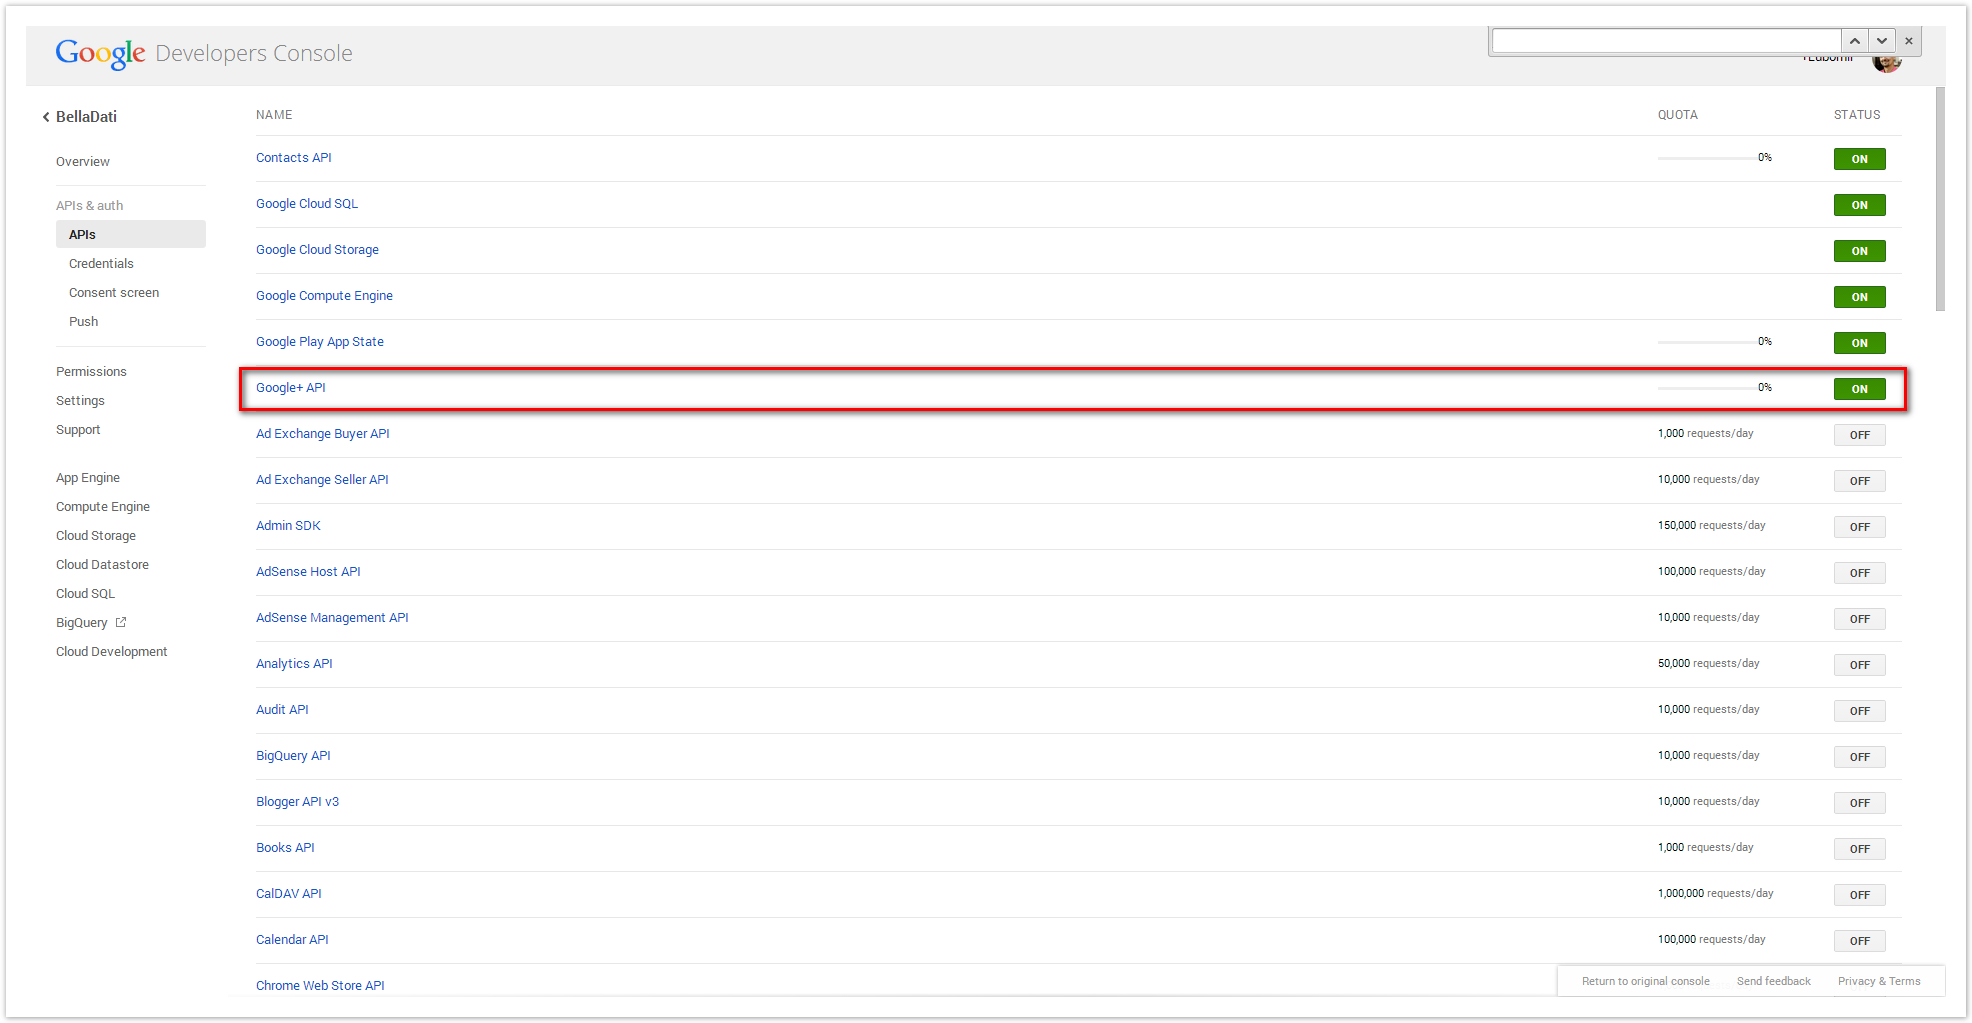 Image Modified Image Modified
- Existing client application credentials (web application). Context for callback url is /auth/callback/google.
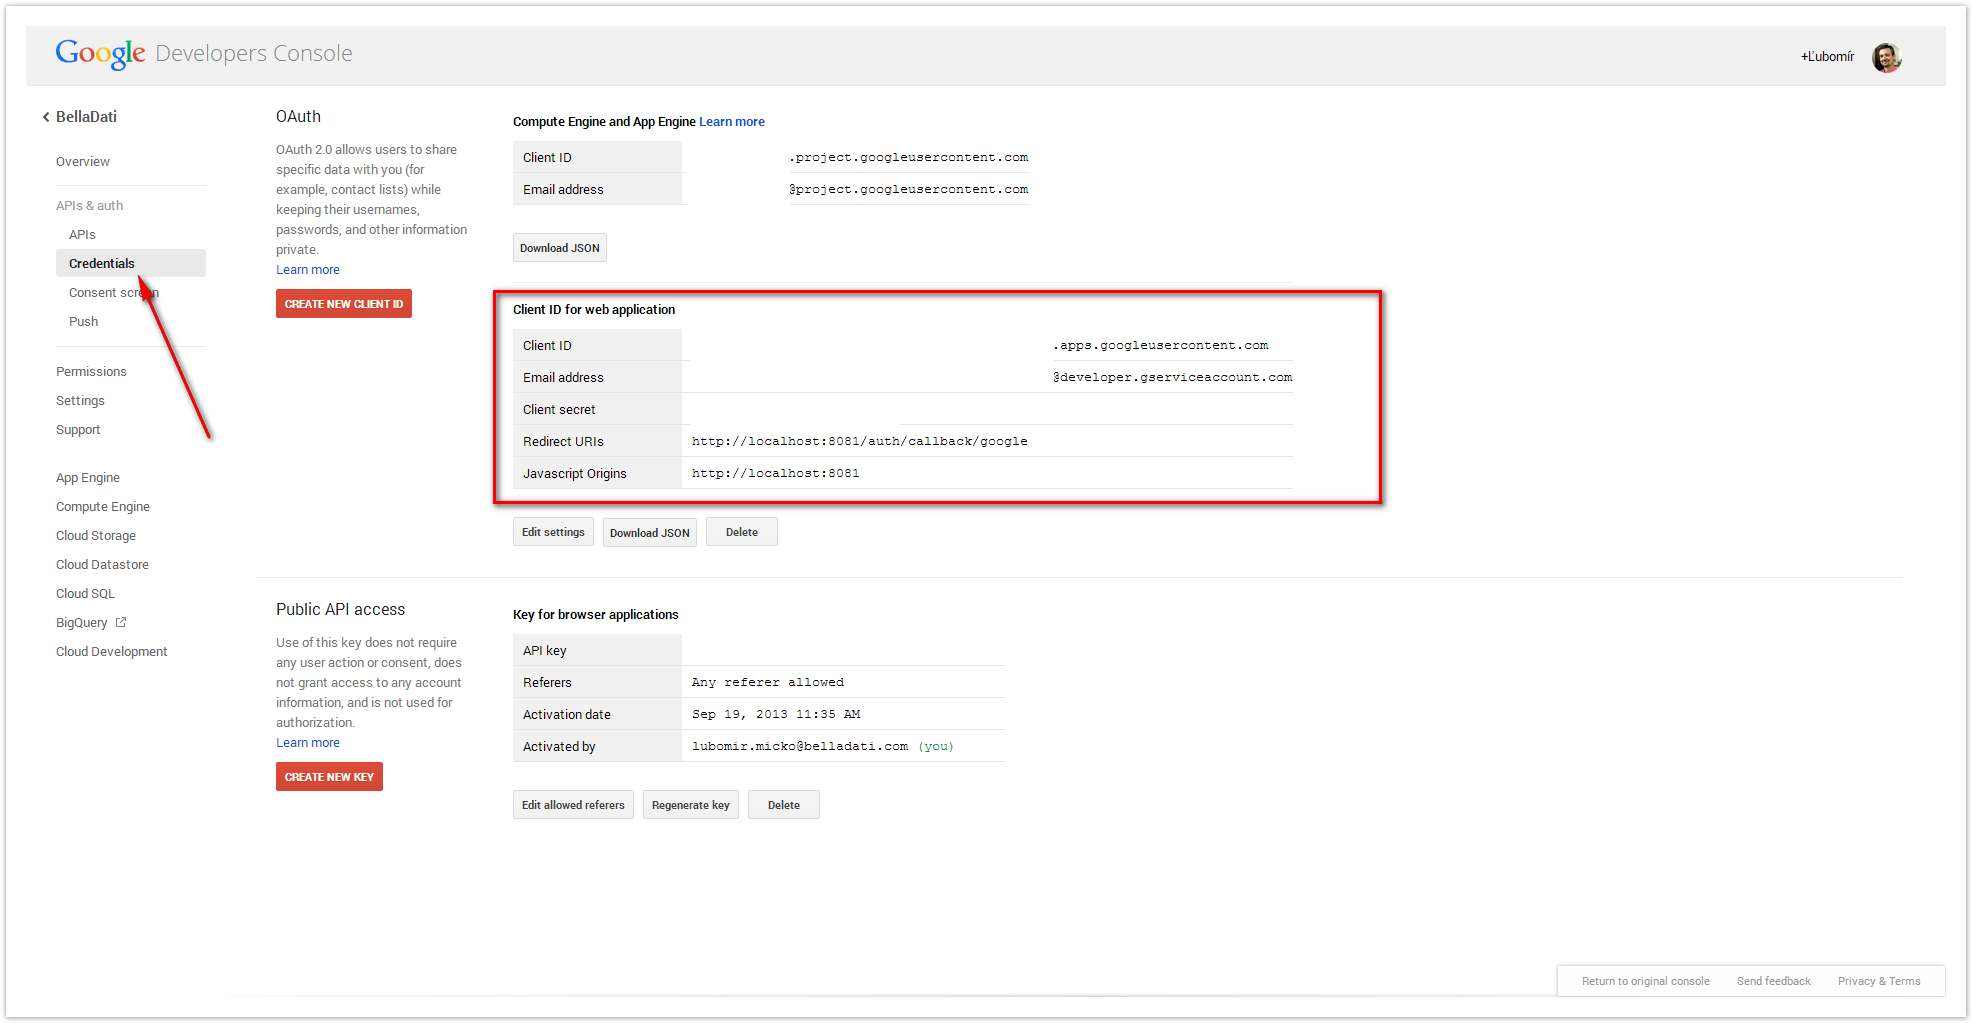 Image Modified Image Modified - If your BellaDati instance is running behind the proxy, you have to setup the JVM parameters -Dhttp.proxyHost, -Dhttp.proxyPort, eventually -Dhttp.proxyUsername and -Dhttp.proxyPassword. BellaDati server must have the access to the following domains: www.googleapis.com and accounts.google.com.
Enabling Google log-inIn order to enable the Google log-in on BellaDati log-in page, enter the application as Domain administrator, open the Application settings page, and do the following: - Provide Google Client ID and Client Secret parameters
- Enable Google log-in
 Image Modified Image Modified
| Warning |
|---|
Make sure, that the Application URL parameter matches the URL you have entered in Google Developers Console. |
| Warning |
|---|
Internet Explorer users must disable the pop-up blocking feature. |
|