Page History
| Sv translation | ||||||
|---|---|---|---|---|---|---|
| ||||||
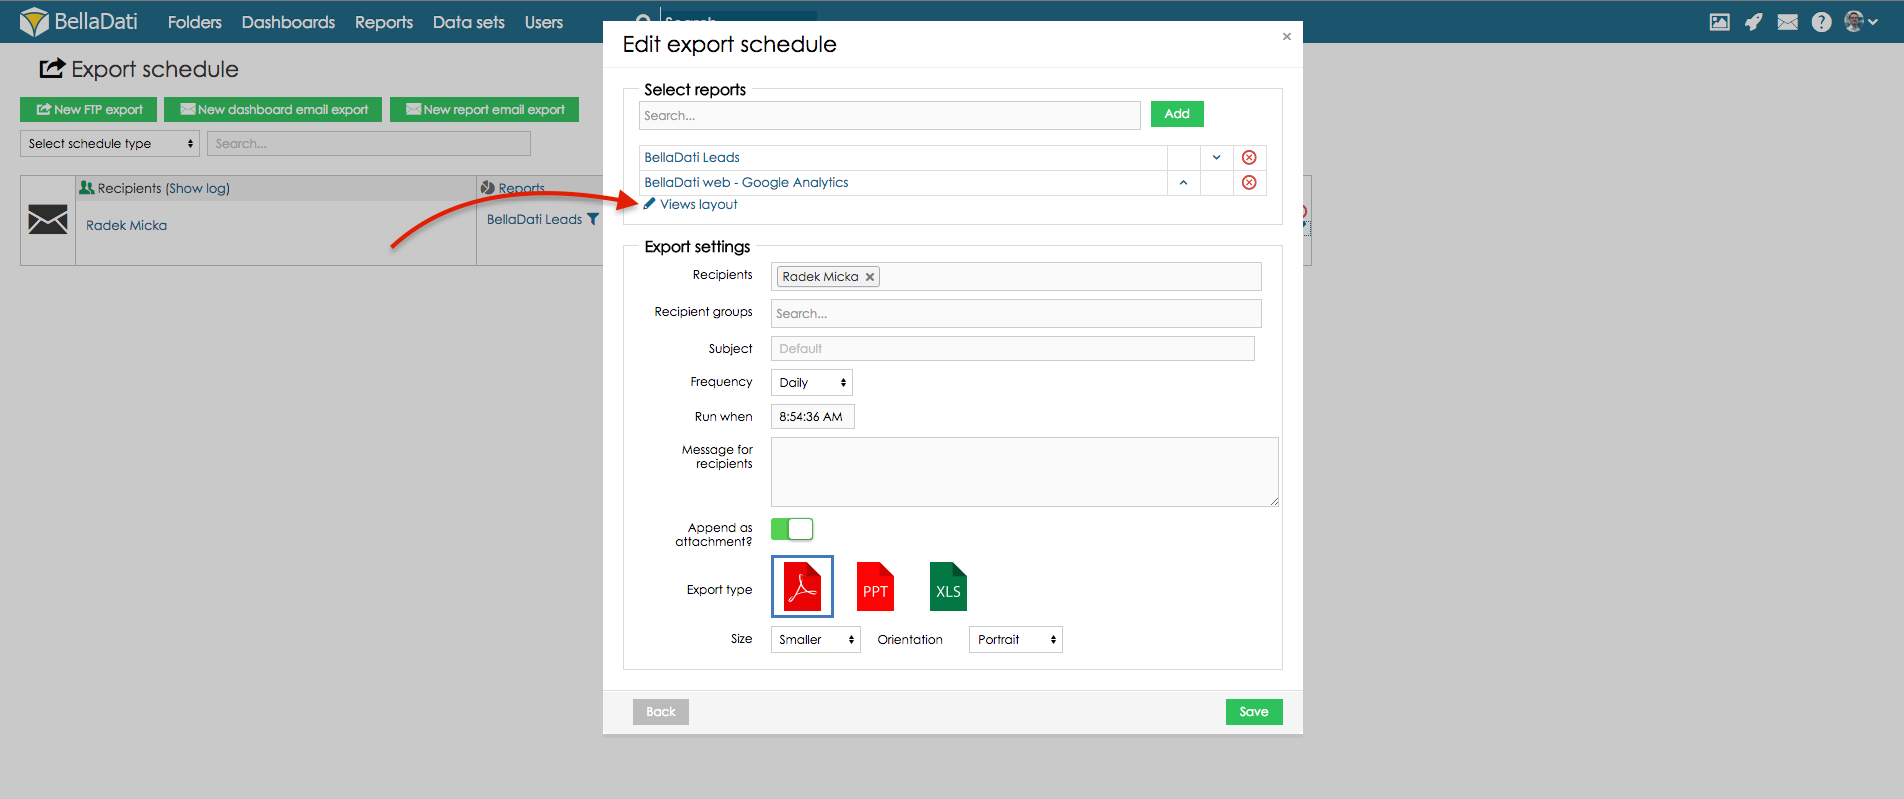
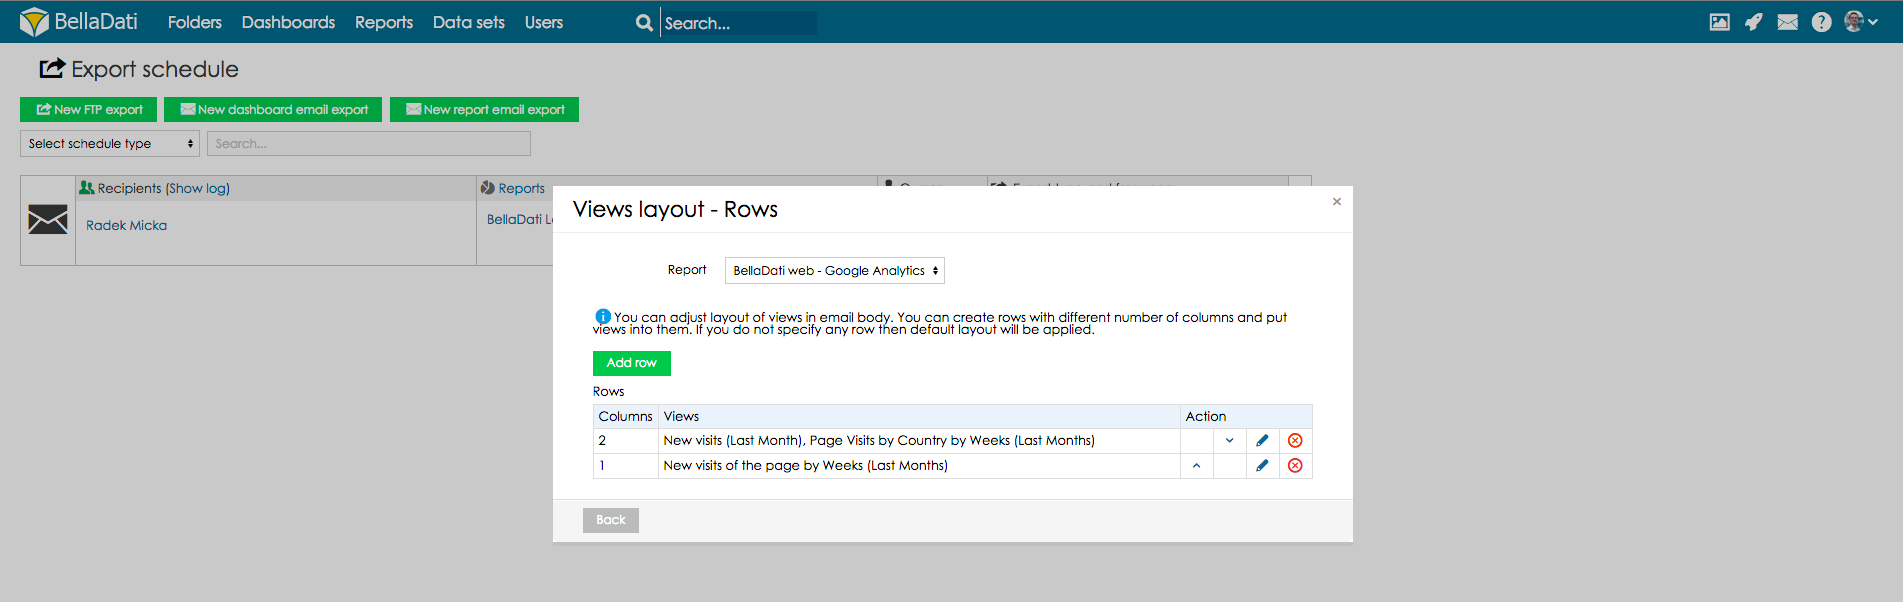
Adjust layout and size of the views in email bodyTo adjust layout and size of the views in email body, go to Export schedule and select option Edit.
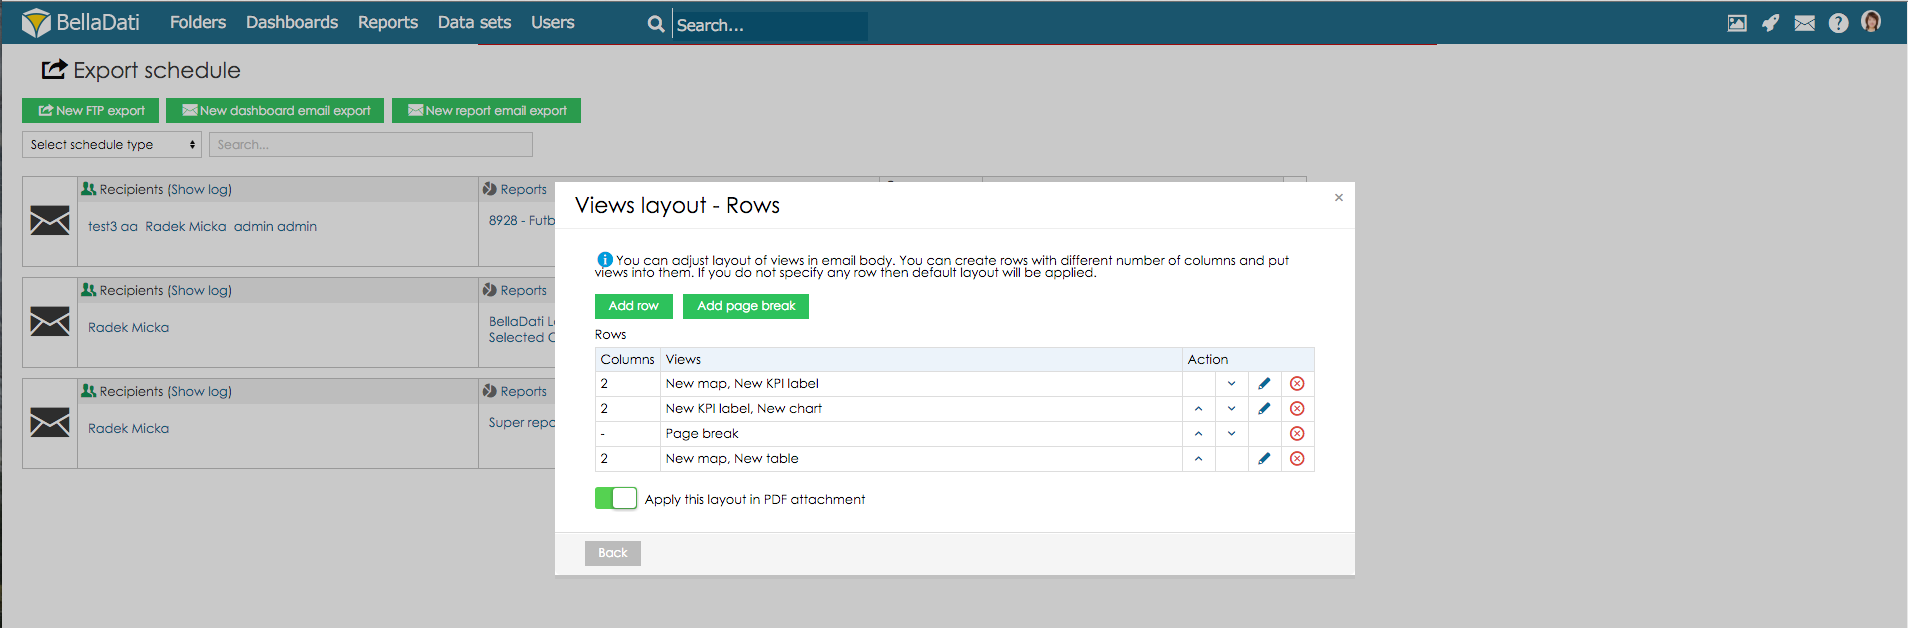
Go to views layout:
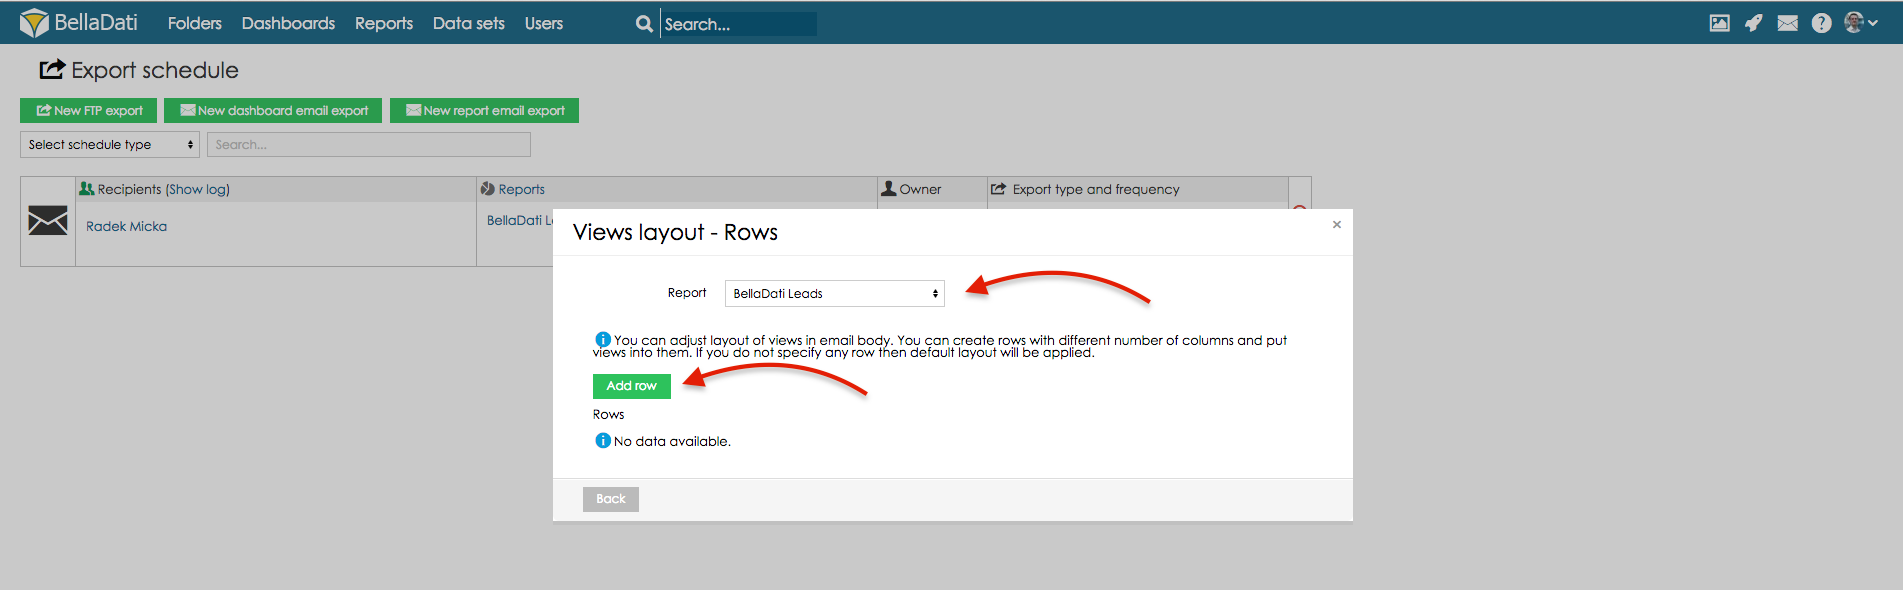
Select report you want to set up and click button Add row.
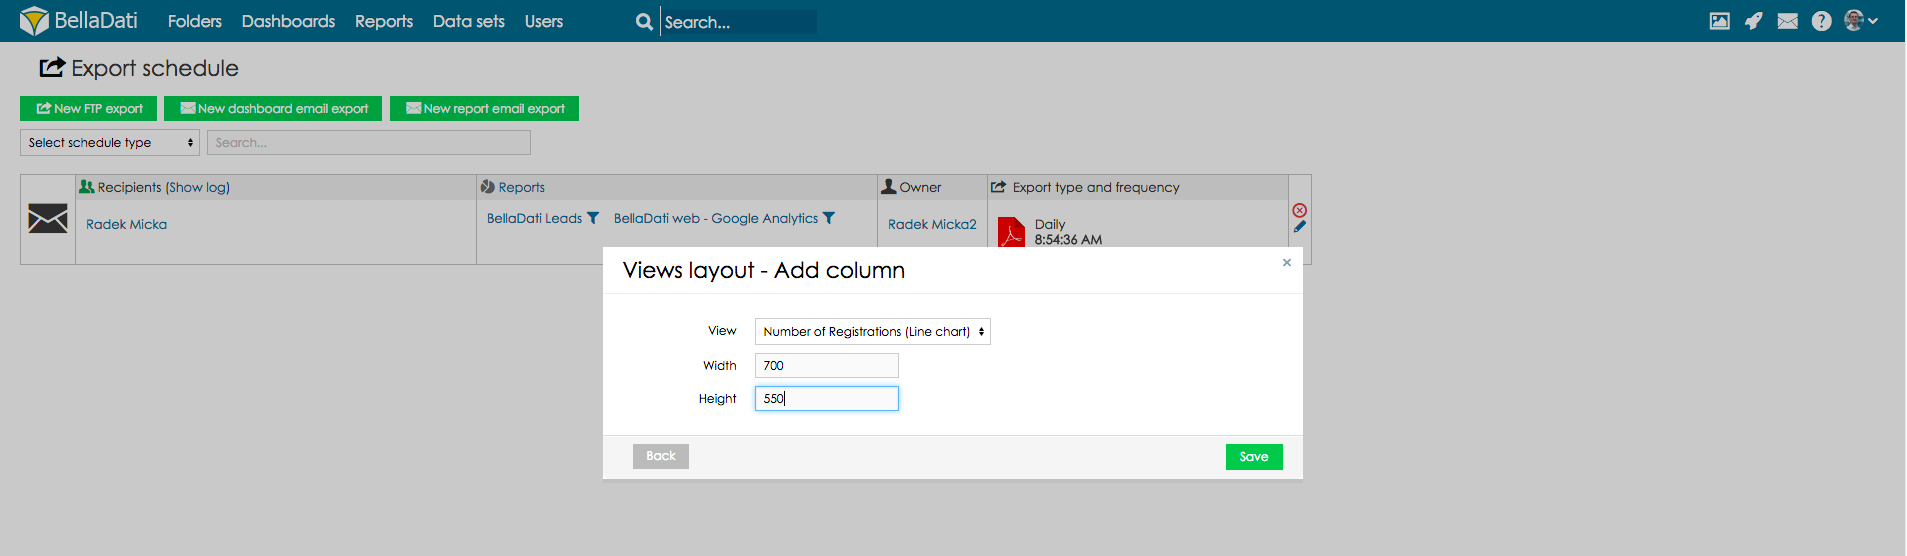
Click the button Add column to open Views layout. Select view which should be adjusted and set the width and height and click Save:
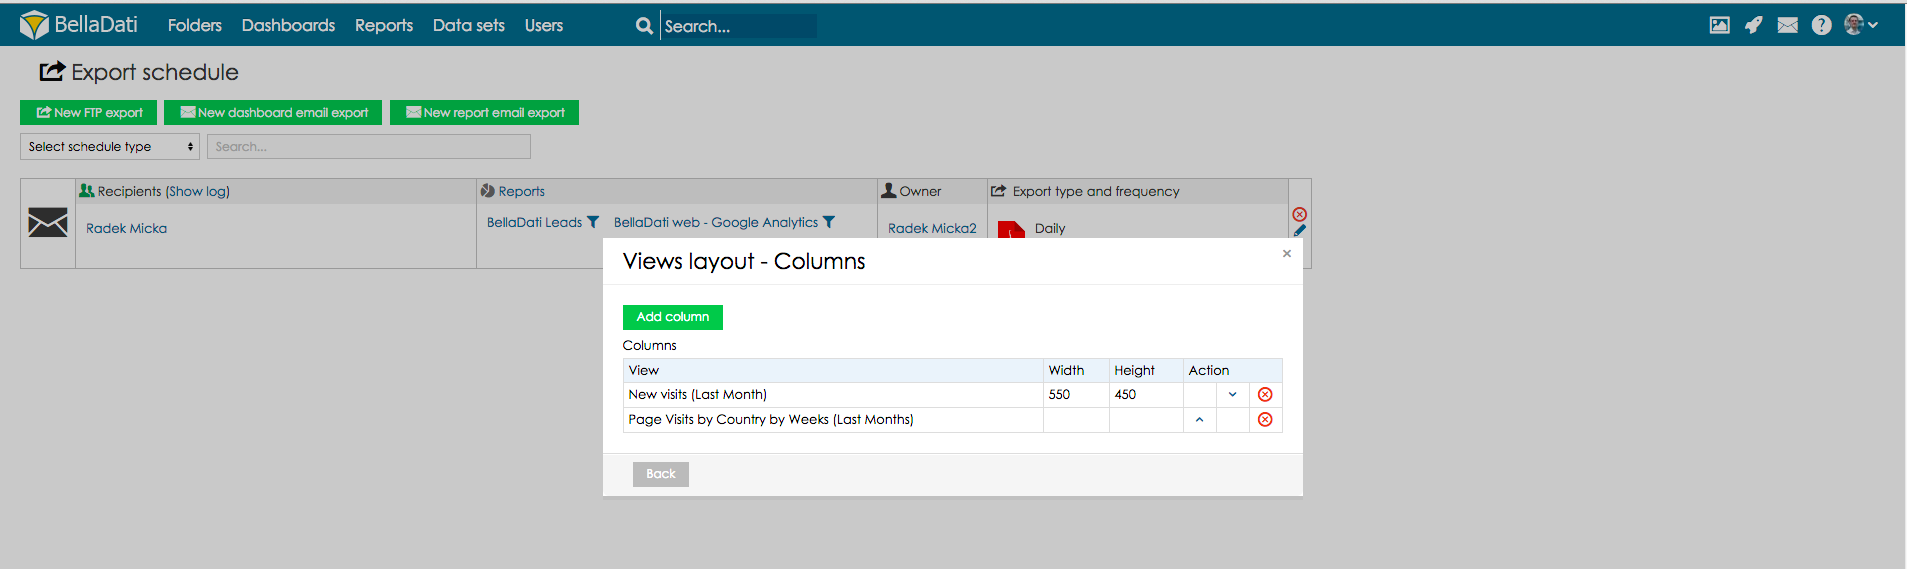
If there is added more columns into one row, visualisations will be added into one row, next to each other.
If you need to manage position of the rows, go Back to the rows settings.
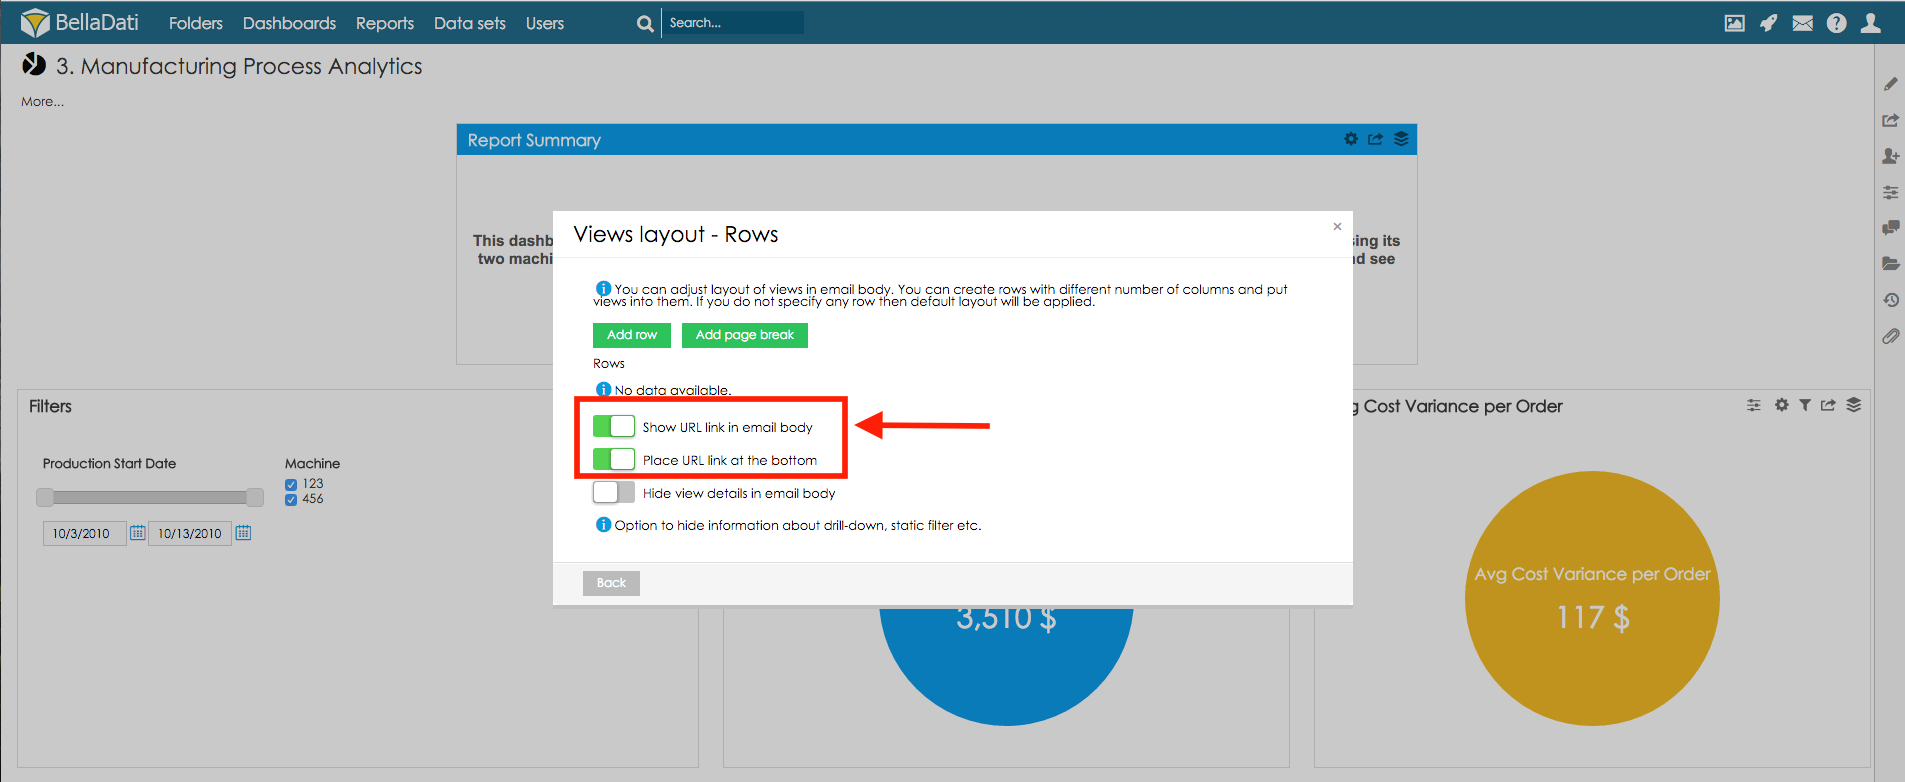
Display link to the report in email BodyIn order to display links to relevant reports in email body, select option "Show URL link in email body". This link is by default placed at the top of the email. Selecting option "Place URL link at the bottom" will place the link to the bottom of the email.
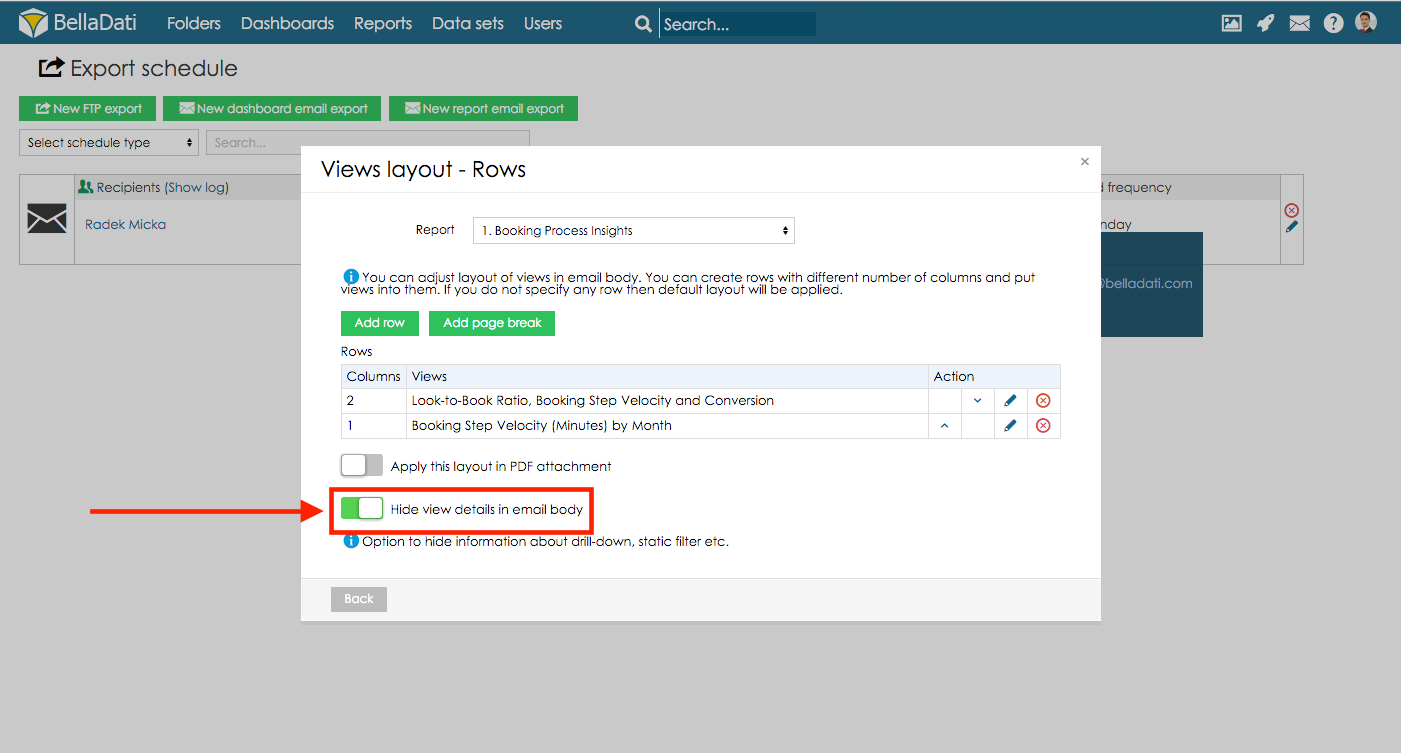
Do not display view details in email bodyIn order to hide view details (g.e. drill-down details or static filter condition), select option "Hide view detail in email body".
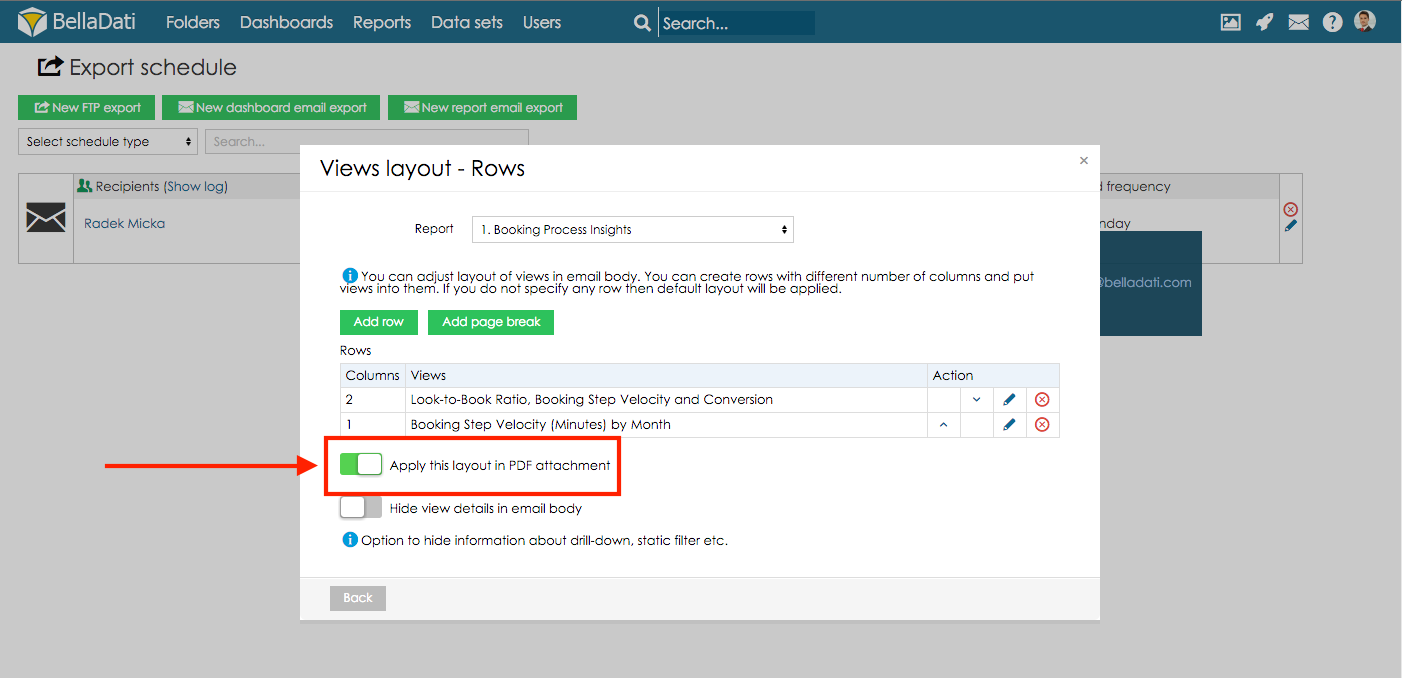
Adjust PDF export layoutIn order to apply custom layout in PDF export, select option "Apply this layout in PDF attachment" in the views layout settings (rows).
Add page break to PDF exportWhen the email layout is being set up, it might be convenient to split the content on more pages. In order to do that, page break needs to be set in the views layout settings (rows). When the layout is being defined, hit a click on button Add page break - page break will be added, it means that rows above the page break will be placed on one page, rows below page break will be added on the new page.
|

| Sv translation | ||||||
|---|---|---|---|---|---|---|
| ||||||
メール本文のレイアウトとビューのサイズの調整メール本文のレイアウトとビューのサイズの調整は、保存スケジュールと編集オプションを選択してください
ビューレイアウトへ行ってください:
設定したいレポートを選択し、追加ボタンをクリックしてください:
追加コラムボタンをクリックし、ビューレイアウトを開いてください。調整されたいビューを選択し、広さと高さを設定し、保存をクリックしてください:
1つの列に別のコラムを加えたい場合はビジュアリゼーションが1つの列に加えられ、それぞれ次に加えられます:
列のポジションを管理したい場合は、列の設定にもとってください。
メール本文へレポートへのリンクを表示するメール本文に間連レポートへのリンクを表示するには、メール本文へのURLリンクを表示を選択してください。このリンクはメールのトップのデフォルトされた場所の近くにあります。一番下にURLリンクを置くを選択し、メールの底にリンクが置かれます。
メール本文にビューの詳細を表示しないビューの詳細を隠すためには(例、ドリルダウン詳細、統計フイルター)メール本文へのビュー詳細を隠すを選択してください。
PDFレポートレイアウトの調整PDF保存のカスタムレイアウトを適用するためにはPDF添付にこのレイアウトを適用するをビューレイアウト設定(列)から選択します。
PDF保存にページブレークを追加するメールレイアウトが設定されている時は内容を数ページに分けるのは便利かもしれません。そうするためにはページブレークがビューレイアウト設定(列)に設定されてある必要があります。レイアウトが定義されているときはページブレークを追加するボタンをクリックしてください。それはページブレークの上の列が1つのページになり、ページブレークの下の列が新しいページに加えられます。
|
Overview
Content Tools