Page History
...
- Click on Create cube
- Fill-in the name and optionally the description.
- Select which columns (attribute elements and data elements). Attribute elements define the aggregation of the cube. For example, if the user selects column Country, the data will be aggregated for each country (one row = one country). Users can also create formula indicators. In the real-time, users can also see the preview of the cube on the right side of the screen. Please note that the preview is built on the data sample only, which means that it can be empty, although some data will be imported to the data set after the execution. It possible to change the order of attributes and indicators by using the arrows located next to the names.

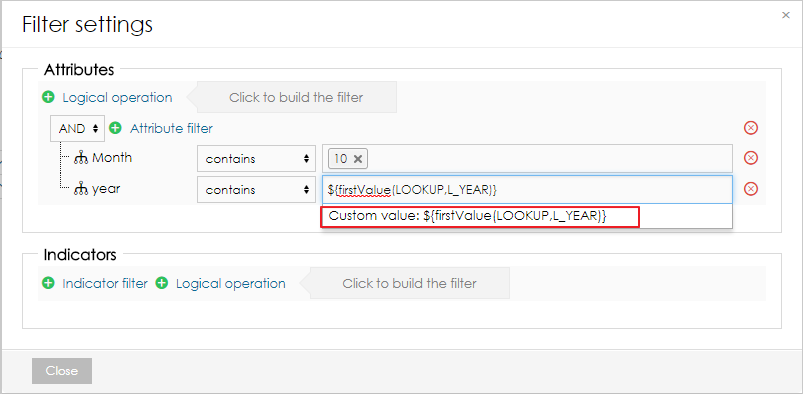
- Optionally, users can also apply filters to work with only part of the data.
In the filters, users can reference first and last values from different data set by using following functions:
Code Block language js ${firstValue(DATA_SET_CODE,L_ATTRIBUTE)} ${lastValue(DATA_SET_CODE,L_ATTRIBUTE)} ${firstValue(DATA_SET_CODE,M_INDICATOR)} ${lastValue(DATA_SET_CODE,M_INDICATOR)}The function has to be added as a custom value to the filter.
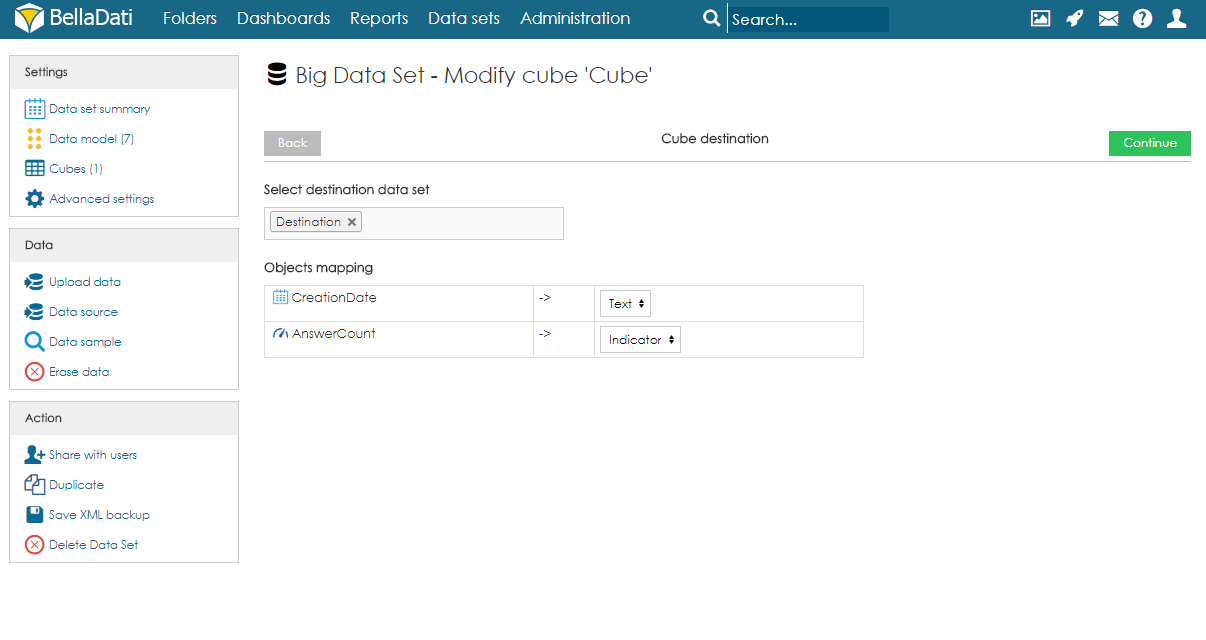
- Select destination data set and mapping. By using the search field, users have to select destination data set. After execution, data will be imported from the cube to this data set. After choosing the data set, users have to specify the mapping. Each column of the cube has to be assigned to an attribute or indicator of the destination data set. Attribute elements can be mapped to attribute columns in destination data set. Data elements can be mapped to indicator columns and also attribute columns.
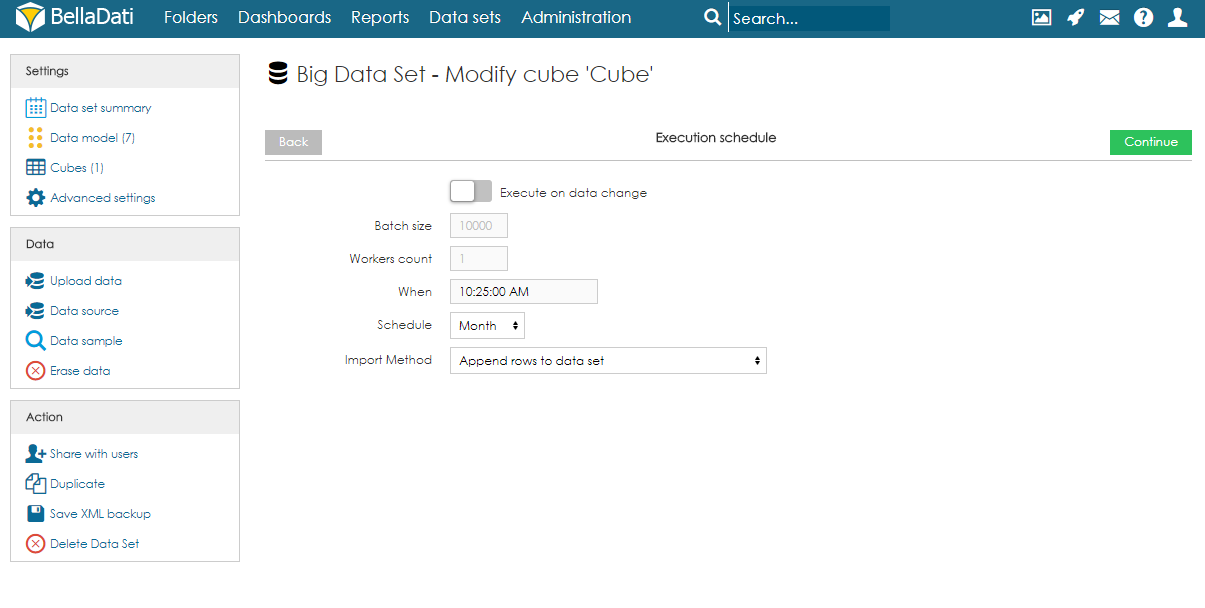
- Set up execution schedule. The execution can be run manually, on data change or by schedule. When scheduling the execution, users can specify following parameters:
Batch size (default 1000) - the number of rows which will be executed in one batch. In special cases, it might be beneficial to increase or decrease the value. However, in most cases, we strongly suggest to leave in on default.
Workers count (default 8) - the number of workers which should be used for paralell parallel execution.
- Execution timeout [s] - sets the maximum duration of the execution.
When - time of the first execution.
Schedule - how often should be executed.
Import Method - what should happen with data in the destination data set. See Data overwriting policy for more information.
...
Overview
Content Tools