Page History
...
| Sv translation | ||||||||
|---|---|---|---|---|---|---|---|---|
| ||||||||
When data reaches selected condition, data-driven notification automatically sends an email or push notification to the people you specify. You can set data-driven notifications in the data sets.
データが選択された条件に達すると、データ駆動型通知は、指定したユーザーに電子メールまたはプッシュ通知を自動的に送信します。データセットにデータ駆動型通知を設定できます。
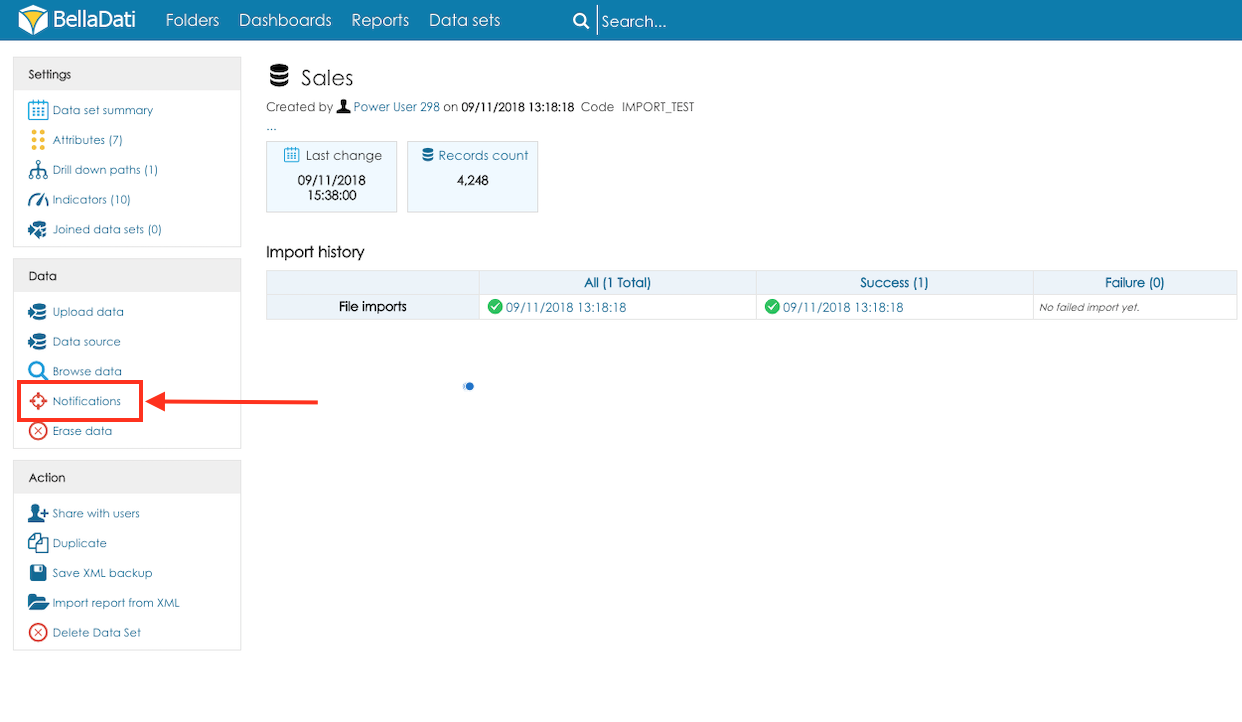
通知の作成Notifications can be created from the data set details. Click the option Notification in the section Data to create new notification and list existing notifications from the selected data set.
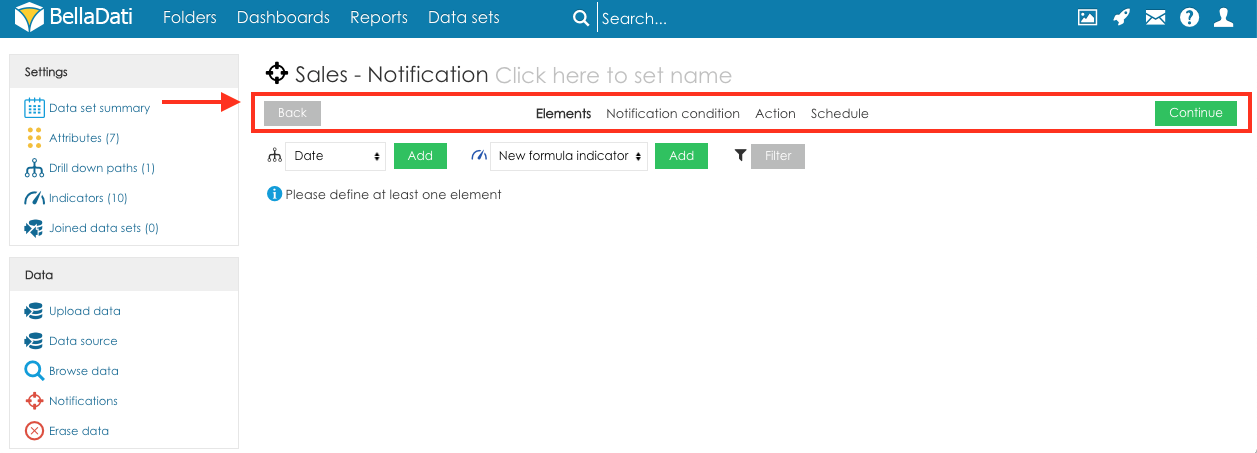
Click the button New notification to open the Notification wizard.
The notification wizard will guide you through the steps required for creating a new notification. Each step is displayed as a separate tab. Use the navigation at the top of the screen to navigate in the notification wizard:
1. ElementsThe elements are columns which will be used for the evaluation of the designated condition. The tab elements is used to select the columns will be used for the evaluation of the designated condition. You can add attributes, indicators, formula indicators or filters. Attributes define the aggregation of the condition. For example, if the user selects column Country, the data will be aggregated for each country (one row = one country). The condition will be checked for every country.
通知の作成通知は、データセットの詳細から作成できます。 [データ]セクションの[通知]オプションをクリックして、選択したデータセットから新しい通知を作成し、既存の通知を一覧表示します。
[新規通知]ボタンをクリックして、通知ウィザードを開きます。
通知ウィザードは、新しい通知の作成に必要な手順をガイドします。各ステップは個別のタブとして表示されます。 画面上部のナビゲーションを使用して、通知ウィザードでナビゲートします:
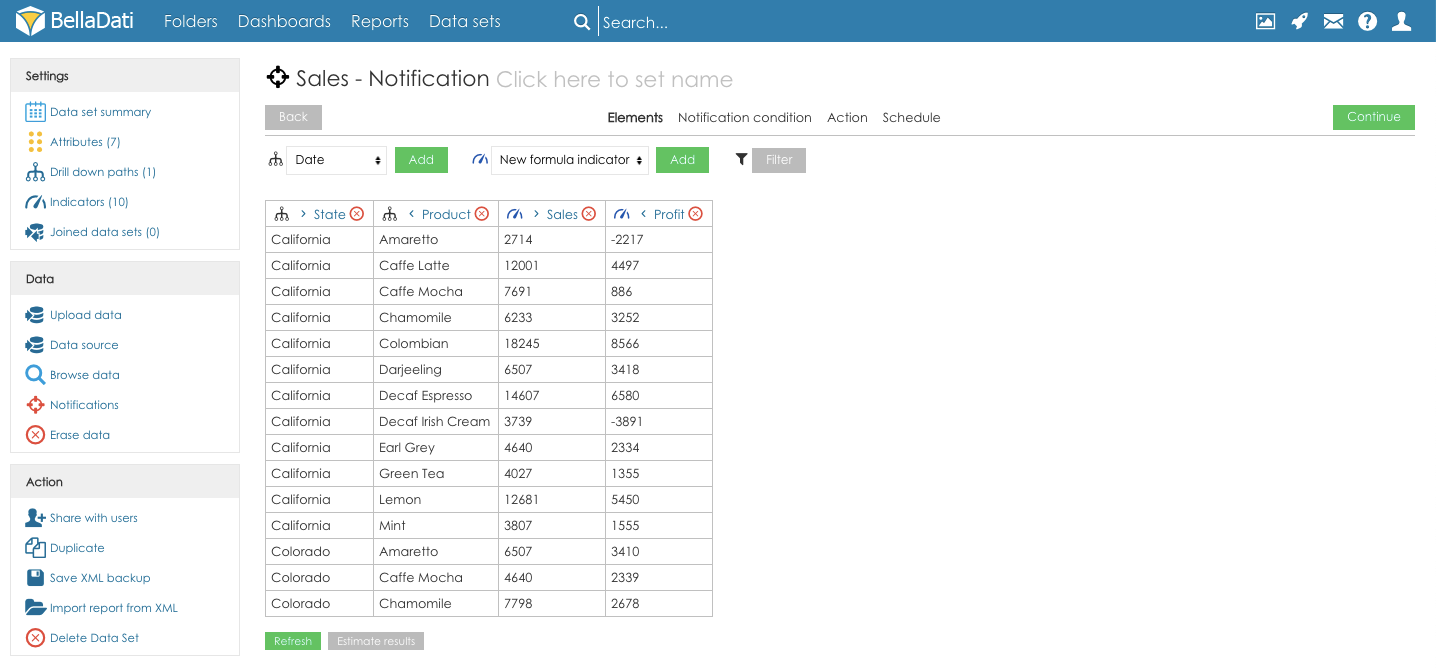
1. 要素(エレメント)The condition will be checked for every country. 要素は、指定された条件の評価に使用される列です。タブ要素は、指定された条件の評価に使用される列を選択するために使用されます。属性、インジケータ、数式インジケータ、フィルターを追加できます。属性は、条件の集約を定義します。例えば、ユーザーが国列を選択すると、データは国ごとに集計されます(1行= 1国)。条件はすべての国でチェックされます。 ユーザーは、数式インジケータを作成することもできます(プロセスはレポートで数式インジケータを作成する時と同じです)。条件の評価に使用されるテーブルのプレビューは、要素を追加するためのパネルの下に表示されます。プレビューはデータサンプルのみに基づいて作成されます。つまり、一部のデータは検証されますが、空にすることができます。プレビューのヘッダーの列の名前の横に表示される矢印を使用して、属性と日付の順序を変更できます。Users can also create formula indicators (the process is the same as when creating formula indicators in the report). The preview of the table which will be used for the evaluation of the condition is displayed below the panel for adding the elements. Please note that the preview is built on the data sample only, which means that it can be empty, although some data will be validated. It is possible to change the order of the attributes and dates by using the arrows displayed next to the names of the columns in the header of the preview.
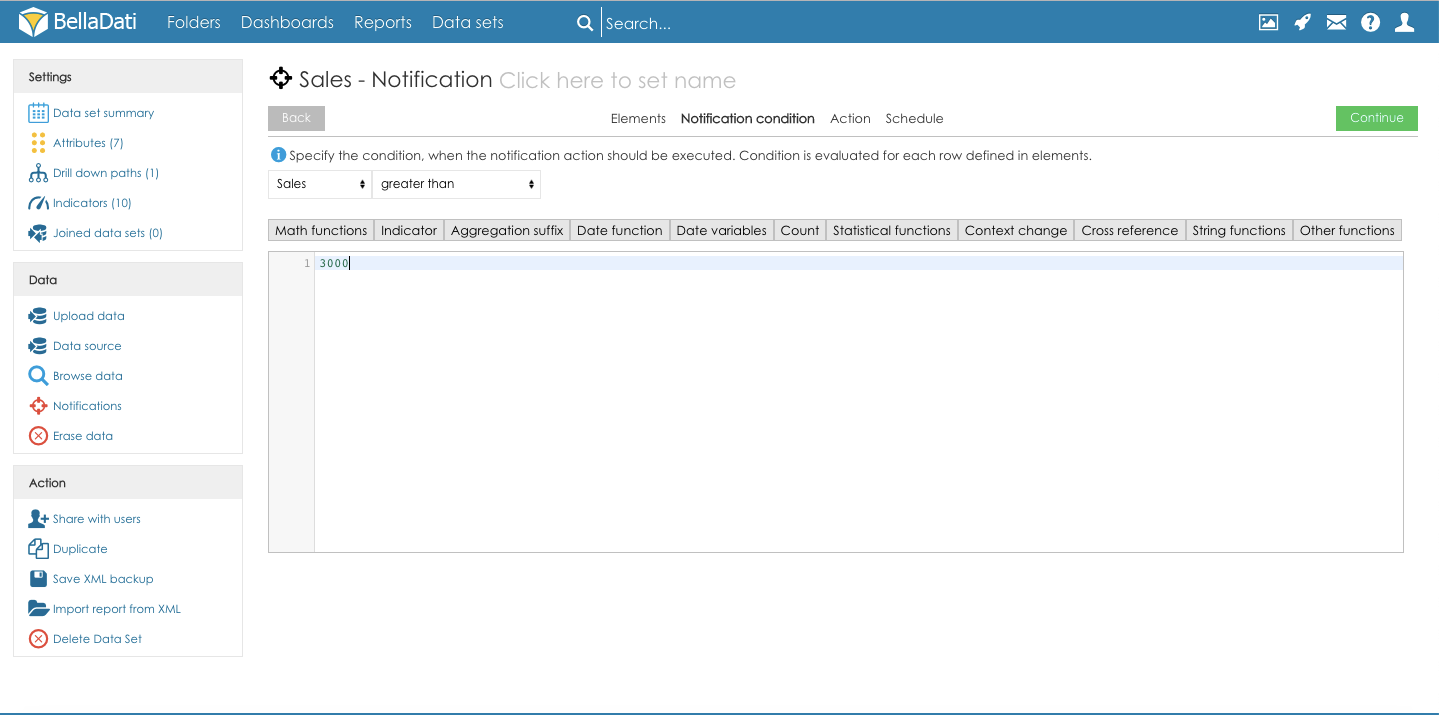
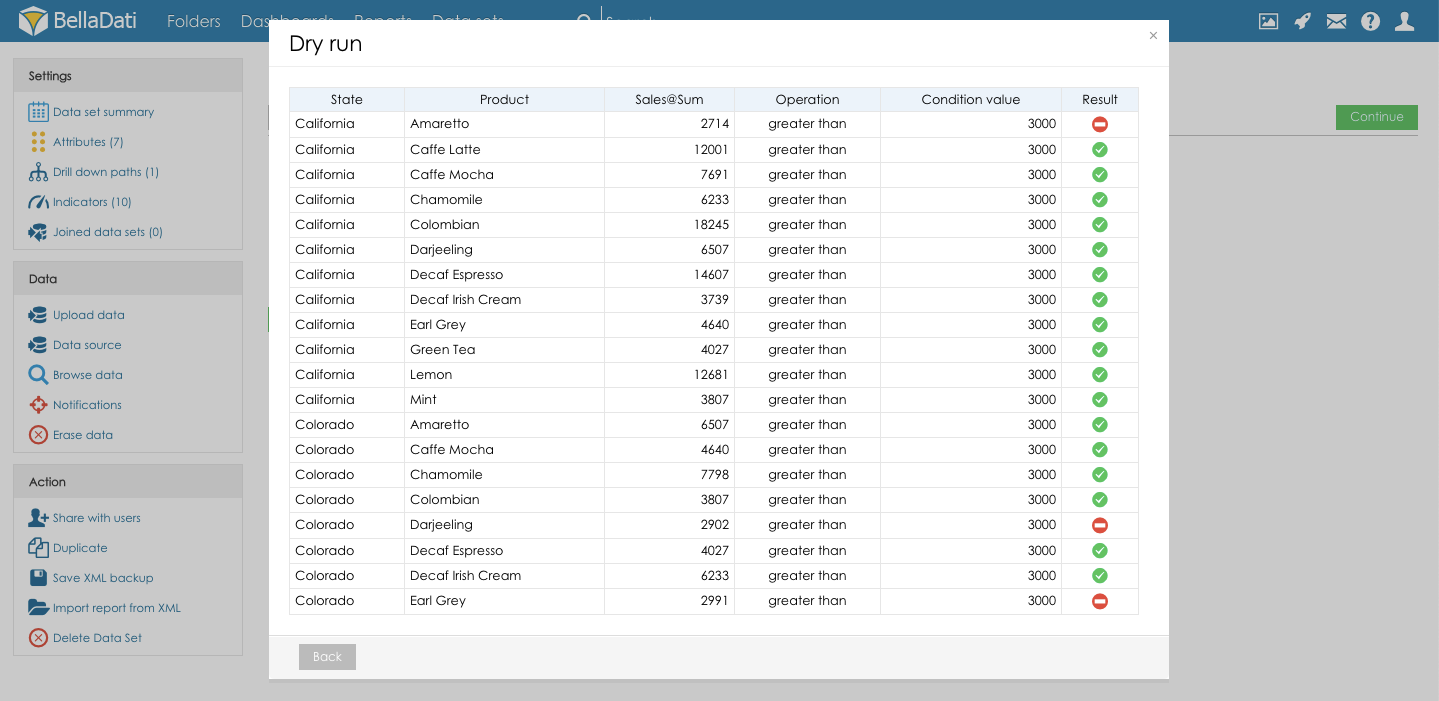
Click the button Continue to proceed to the next step of the Notification configuration: 2.Notifications condition通知条件The condition defined on the tab Notification condition will be used for the notification evaluation. Elements available for the condition evaluation:
The value can be compared against a static value or formula. The condition is evaluated for each row defined on the tab Elements
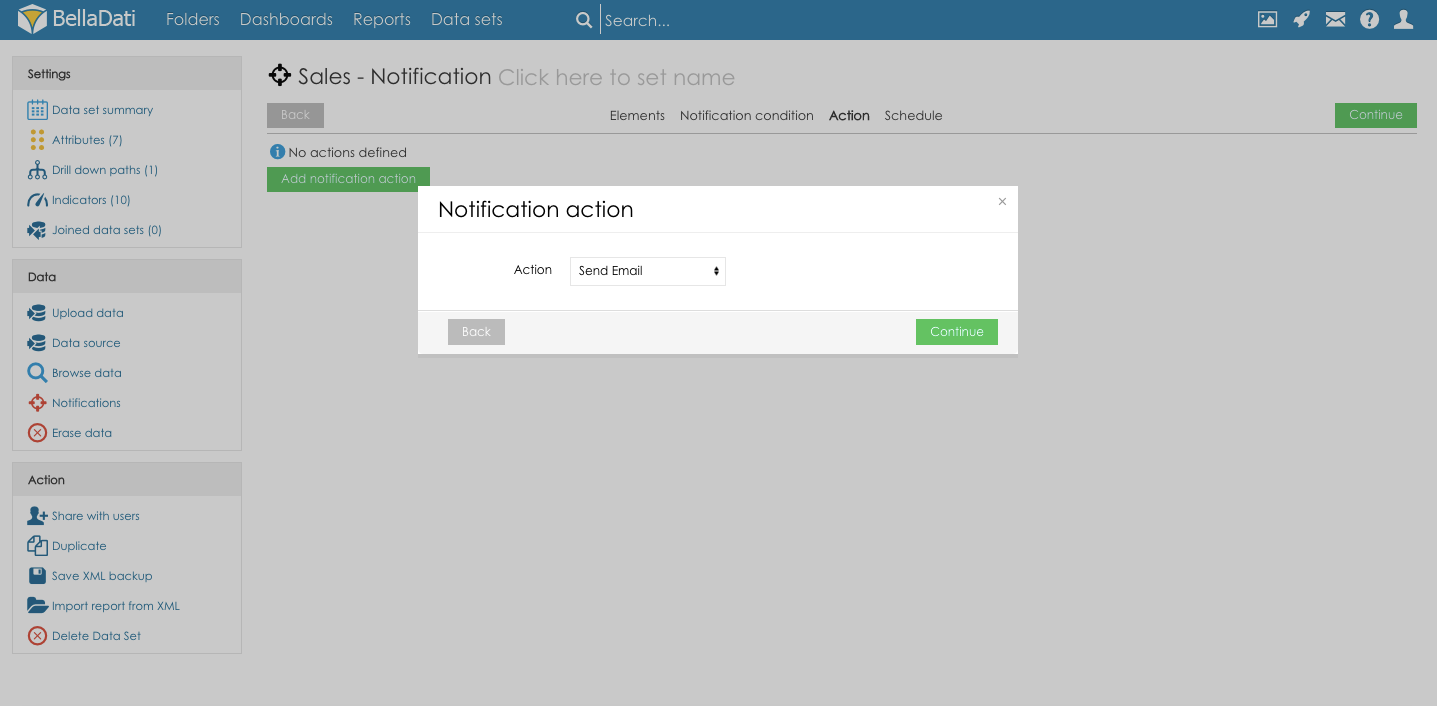
Click the button Continue to proceed to the next step of the Notification configuration: 3.ActionアクションSelected action will be used to send the notification in case the Notification condition is met.
4. スケジュールThe notification schedule defines the date interval in which the notification will be executed. Following options are available:
Click the button Continue to schedule the notification. 通知の管理Notifications associated with the selected data setNotifications associated with the data set can be accessed from the data set details. Click the option Notification in the section Data to create new notification and list existing notifications from the selected data set.
The notifications overview provides the details of the notification and the following actions:
すべての通知All the notifications can be managed from the screen Data sets - click the action Notifications to open the list of all the Notifications.
Screen Notifications provides details about:
|


Overview
Content Tools