You can create you own Table view in Report and Dashboard by BellaDati Extensions feature. This tutorial describes how to create customized Table view with following specification: - custom look & feel (e.g. colors, padding, borders, resizing table columns, etc.)
- displays data from existing DataSet by selected options in Filter view
- user can select multiple table rows
- user can invoke specific Client API endpoints and use selected table rows as parameters
Table of Contents: IntroductionImagine situation that you have a list of PDF files somewhere on your filesystem and metadata about each PDF file stored in the DataSet, e.g.: | Country | City | Date | ... | File Path |
|---|
| France | Paris | 2016-01-01 | | C:\Orders\FRA\Paris-2016-01-01.PDF | | France | Paris | 2016-02-01 | | C:\Orders\FRA\Paris-2016-02-01.PDF | | ... | | | | | | Germany | Berlin | 2016-02-22 | | D:\Rechnung\Berlin\Akte 22. Februar 2016.PDF | | Germany | Düsseldorf | 2016-02-22 | | D:\Bestellen\Düsseldorf\Akte 22. Februar 2016.PDF | | ... | | | | |
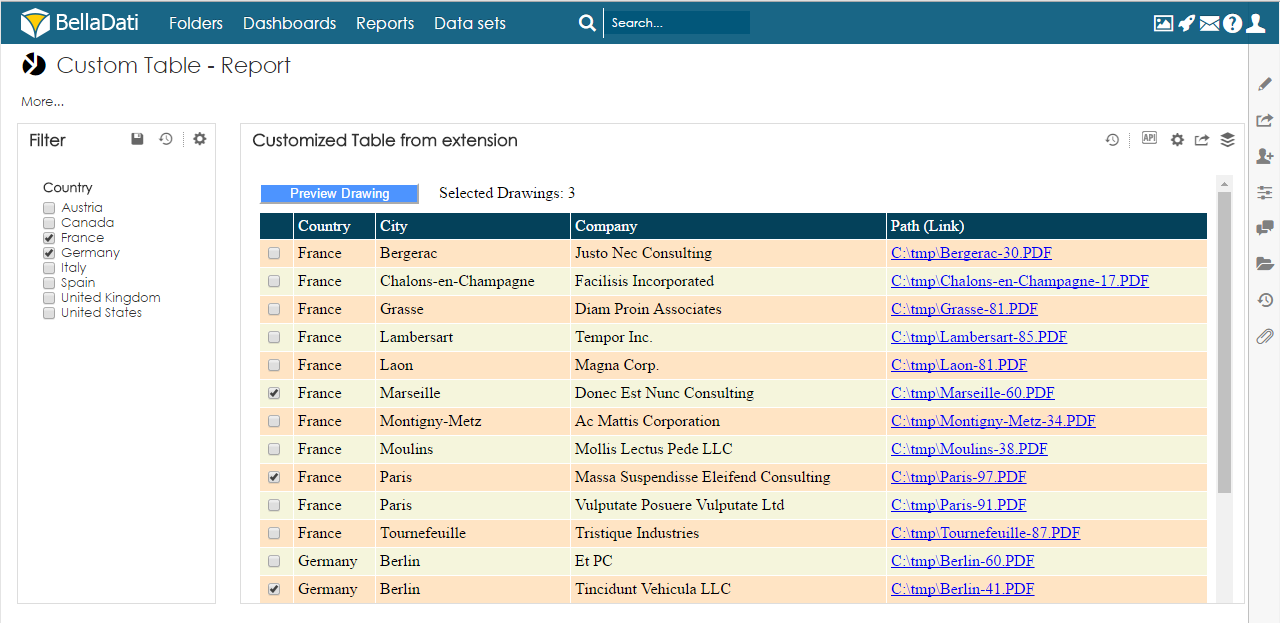
Users want to access (open/download) these files directly from BellaDati Report through their web browsers. User's second use case is to select multiple PDF files, merge them into one PDF file and download only this one PDF file. Of course, users want to filter PDF files displayed in the table by various attributes (e.g. country, city, date, etc.). ProposalWe will create Report with Filter view and Table view. Then we will create Extension that will act as customized table renderer. It will use Client API endpoints to load JSON data of existing Table view and render new table with customized CSS styles and additional features. Extension will have type "Create new page" and therefore we will embed this new page into Custom content in Report. The last step will be just hide original Table view. | Info |
|---|
You can find all source codes including prepared extension on our GitHub. |
Preconditions- You have BellaDati instance in version 2.7.18+.
- You have role Super Admin in multi-domain environment or Domain Admin in single-domain environment.
- You are familiar with JavaScript, CSS, HTML.
- You have set of test PDF files and metadata stored in some file or database.
- You read our user's documentation related to extensions.
Environment Setup- Enable Developer mode in your user profile. Please see section Appearance settings at Managing User Profile for more details.
Prepare DataSet with data. Prepare Report with Table view and Filter view. This step is not covered by this tutorial. Please see our documentation for more details.
- Prepare testing PDF files in some directory.
- To enable file access in your BellaDati instance and domain go to Administration and then Configuration. Please check option Enable file access. Then:
- For single-domain environment please set specific files paths (directory where PDF files are located) into Allowed file paths.
- For multi-domain environment please click Edit on Manage Domain page, go to Restrictions tab. Then check option Enable file access and set specific files paths (directory where PDF files are located) into Allowed file paths.
TutorialPlease refresh extension page after each step to verify that your changes were applied correctly. Step 1. Import and setup basic Table Renderer extensionWe will use basic Table Renderer extension provided by BellaDati on GitHub. It creates a new BellaDati page with table. This table contains data from source table view that is specified as parameter. We will customize this extension to bring new features. - Please download this ready–made extension from GitHub.
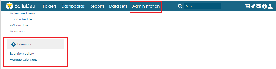
- Go to Manage extensions page that is available in the Extensions section, under Administration menu, and import this extension into your BellaDati instance.
 - Go to your report and determine ID of source table view - Click on API button located at the top left corner of table view and see API URL value. Table view ID is a text after last "/".
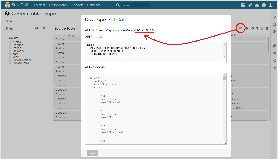 - Set ID of table view as extension parameter called tableViewID.
At the end of this step please verify setup of extension. Go to Extension Gallery and click on name of imported extension. You should see new page with table that contains data from source table. Step 2. Get familiar with basic Table Renderer extensionWe will customize basic extension in next steps and therefore you need to get familiar with it at first. - Go to Manage extensions page and click on extension name. You will be redirected to the Edit extension page.
- Please explore all parts of this extension. The best approach to understand how this basic extension works is play with it, and so please change prefix of CSS class names and prefix of ID attributes from "bd-" to "bd-custom-" in all parts of extension (HEAD, BODY, JavaScript and CSS). Behavior of extension will remain the same if you will do it right.
- Please inspect also text resource called table-renderer.js. It contains JavaScript code that we will modify in next steps.
Step 3. Add new parametersOur extension should be parametrized to allow users to change extension behavior without changing implemented code, therefore we need to add these parameters: | Name | Type | Description | Value |
|---|
| enableResizingColumns | Boolean | Enable/disable resizing columns in table | false | | hideColumnWithPath | Boolean | Show/hide column where file path is located | false | | indexOfColumnWithPath | Integer | Index of column where file path is located | 3 | | linkGetFile | String | Link to our Client API endpoint that returns file from given absolute path | /bi/utils/api:file?path= | | linkMergePdfFiles | String | Link to our Client API endpoint that merges PDF files into one PDF file | /bi/utils/api:mergePdfFiles?paths= | | linkViewDetail | String | Link to our Client API endpoint that loads the view detail with data | /bi/report/api:viewDetail/ |
Step 4. Create DIV containers in HTML body for controlsSet following code into Content of HTML body: | Code Block |
|---|
| <div id="bd-custom-controls">
<div id="bd-custom-link"></div>
<div id="bd-custom-label"></div>
</div>
<div id="bd-custom-table-container"></div> |
Add new CSS styles for new elements into text resource called table-styles.css: | Code Block |
|---|
| #bd-custom-controls {
margin-bottom: 0.5em;
}
#bd-custom-controls #bd-custom-link {
display: inline;
}
#bd-custom-controls #bd-custom-link .disabled {
pointer-events: none;
cursor: default;
opacity: 0.6;
}
#bd-custom-controls #bd-custom-link button {
width: 160px;
background-color: #4d94ff;
border-color: white;
color: white;
}
#bd-custom-controls #bd-custom-label {
display: inline;
margin-left: 1em;
} |
Step 5. Add checkbox as first columnUpdate code of table-renderer.js before both loops over header columns and body columns. | Code Block |
|---|
| var theadCellIndex = 0;
// insert first cell into each THEAD row
var checkboxCell = theadRow.insertCell(theadCellIndex++);
checkboxCell.style.width = '1em';
// iterate over all cells in a THEAD row
var columns = data.header[i];
for (j = 0; j < columns.length; j++) {
...
}
...
var tbodyCellIndex = 0;
// insert first cell with checkbox into each TBODY row
var checkboxCell = tbodyRow.insertCell(tbodyCellIndex++);
var checkbox = document.createElement('input');
checkbox.type = "checkbox";
checkboxCell.appendChild(checkbox);
// iterate over all cells in a TBODY row
var columns = data.body[i];
for (j = 0; j < columns.length; j++) {
...
} |
Step 6. Register events for checkboxesAdd following code into table-renderer.js at the end of success function that handles response from Client API: | Code Block |
|---|
| // register events for rows in tbody and checkboxes
$('.bd-custom-table tbody tr').click(function(event) {
if (event.target.type !== 'checkbox') {
$(':checkbox', this).trigger('click');
}
});
$("input[type='checkbox']").change(function(e) {
if ($(this).is(":checked")) {
$(this).closest('tr').addClass("highlight_row");
refreshControls();
} else {
$(this).closest('tr').removeClass("highlight_row");
refreshControls();
}
});
refreshControls(); |
Create function in table-renderer.js: | Code Block |
|---|
| function refreshControls() {
// clear existing controls
$('#bd-custom-link').empty();
$('#bd-custom-label').empty();
// compute count and paths
var count = 0;
var paths = "";
$('.bd-custom-table tr').filter(':has(:checkbox:checked)').find('td').filter('.bd-cell-with-link').each(function() {
count++;
paths += paths ? (";" + this.id) : this.id;
});
// refresh link for PDF merge
var button = document.createElement('button');
button.type = "button";
button.appendChild(document.createTextNode("Preview Drawing"));
var link = document.createElement('a');
link.appendChild(button);
link.href = "#PARAM=linkMergePdfFiles#" + paths;
if (count == 0) {
link.setAttribute('class', 'disabled');
}
document.getElementById('bd-custom-link').appendChild(link);
// refresh label with count
var label = document.createTextNode("Selected Drawings: " + count);
document.getElementById('bd-custom-label').appendChild(label);
console.log(new Date().toLocaleString() + ': Selected files: ' + paths);
} |
Step 7. Add specific functionality into column with file pathAt first we need to know which column should be customized, and therefore we will add this helper function into table-renderer.js: | Code Block |
|---|
| function isColumnWithPath(columnIndex) {
return columnIndex == #PARAM=indexOfColumnWithPath#;
} |
Based on result from this function we will customize column title in table header: | Code Block |
|---|
| // set column title with appropriate header
var textValue = column.value;
if (isColumnWithPath(column.i)) {
textValue += " (Link)";
}
theadCell.appendChild(document.createTextNode(textValue)); |
Based on result from this function we will customize cell content in table body: | Code Block |
|---|
| // fill cell with appropriate link or text
if (isColumnWithPath(column.i)) {
var aLink = document.createElement('a');
aLink.appendChild(document.createTextNode(escapedValue));
aLink.href = "#PARAM=linkGetFile#" + escapedValue;
tbodyCell.appendChild(aLink);
tbodyCell.setAttribute('id', escapedValue);
tbodyCell.setAttribute('class', 'bd-cell-with-link');
} else {
tbodyCell.appendChild(document.createTextNode(escapedValue));
} |
Step 8. Add functionality to hide column with file pathAt first we need to know which column should be hidden and also recalculate colspans, and therefore we will add these helper functions into table-renderer.js: | Code Block |
|---|
| function shouldBeColumnHidden(columnIndex) {
return isColumnWithPath(columnIndex) && #PARAM=hideColumnWithPath#;
}
function computeColspanByHiddenColumn(columnIndex, colspan) {
if (#PARAM=hideColumnWithPath#) {
if (columnIndex <= #PARAM=indexOfColumnWithPath# && #PARAM=indexOfColumnWithPath# < (columnIndex + colspan)) {
return colspan - 1;
} else {
return colspan;
}
} else {
return colspan;
}
} |
Based on results from these functions we will customize rendering of table header cells: | Code Block |
|---|
| // hide cell with link
if (shouldBeColumnHidden(column.i)) {
theadCell.style.display = 'none';
}
// set colspan attributes
if (typeof column.colspan != 'undefined') {
theadCell.setAttribute('colspan', computeColspanByHiddenColumn(column.i, column.colspan));
} |
Based on results from these functions we will customize rendering of table body cells: | Code Block |
|---|
| // hide cell with link
if (shouldBeColumnHidden(column.i)) {
tbodyCell.style.display = 'none';
}
// set colspan attributes
if (typeof column.colspan != 'undefined') {
tbodyCell.setAttribute('colspan', computeColspanByHiddenColumn(column.i, column.colspan));
} |
Step 9. Make table columns resizableThere are various JavaScript and jQuery implementations that allows you to resize columns in HTML table by drag and drop. We will use jQuery plugin colResizable in this tutorial. Download minified version colResizable from GitHub and upload it into extension as a new text resource with type JavaScript. Register table in this jQuery plugin by following JavaScript code - add it into table-renderer.js at the end of success function: | Code Block |
|---|
| // register resizable columns - see https://github.com/alvaro-prieto/colResizable
if (#PARAM=enableResizingColumns#) {
$(".bd-custom-table").colResizable({
fixed:false,
liveDrag:true
});
}; |
Step 10. Replace source table view with extension page- Go to Extension Gallery, click on name of this extension and copy URL from address bar of your web browser.
Go to Report and create new Custom Content view with following code (use copied URL from previous step instead of "XXX"): | Code Block |
|---|
| <iframe src="XXX" width="100%" height="500" /> |
- Go to Table appearance settings of source table view and select checkbox Hide view in view mode in Options section.
Result| Tip |
|---|
You can find all source codes and also download ready-made extension from our GitHub. |
|