Page History
| Sv translation | |||||||||||||
|---|---|---|---|---|---|---|---|---|---|---|---|---|---|
| |||||||||||||
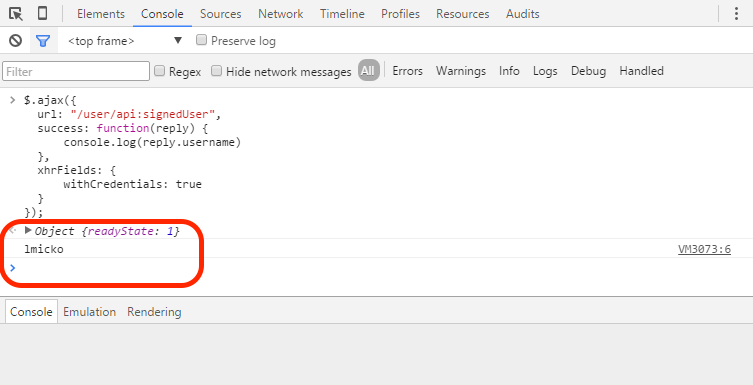
How to startActivate Development console in your favourite web-browser using the following steps.
Example - Getting signed userLog-in into BellaDati. Into the activated development console write following script:
As a result, the current user's username will be displayed in the console.
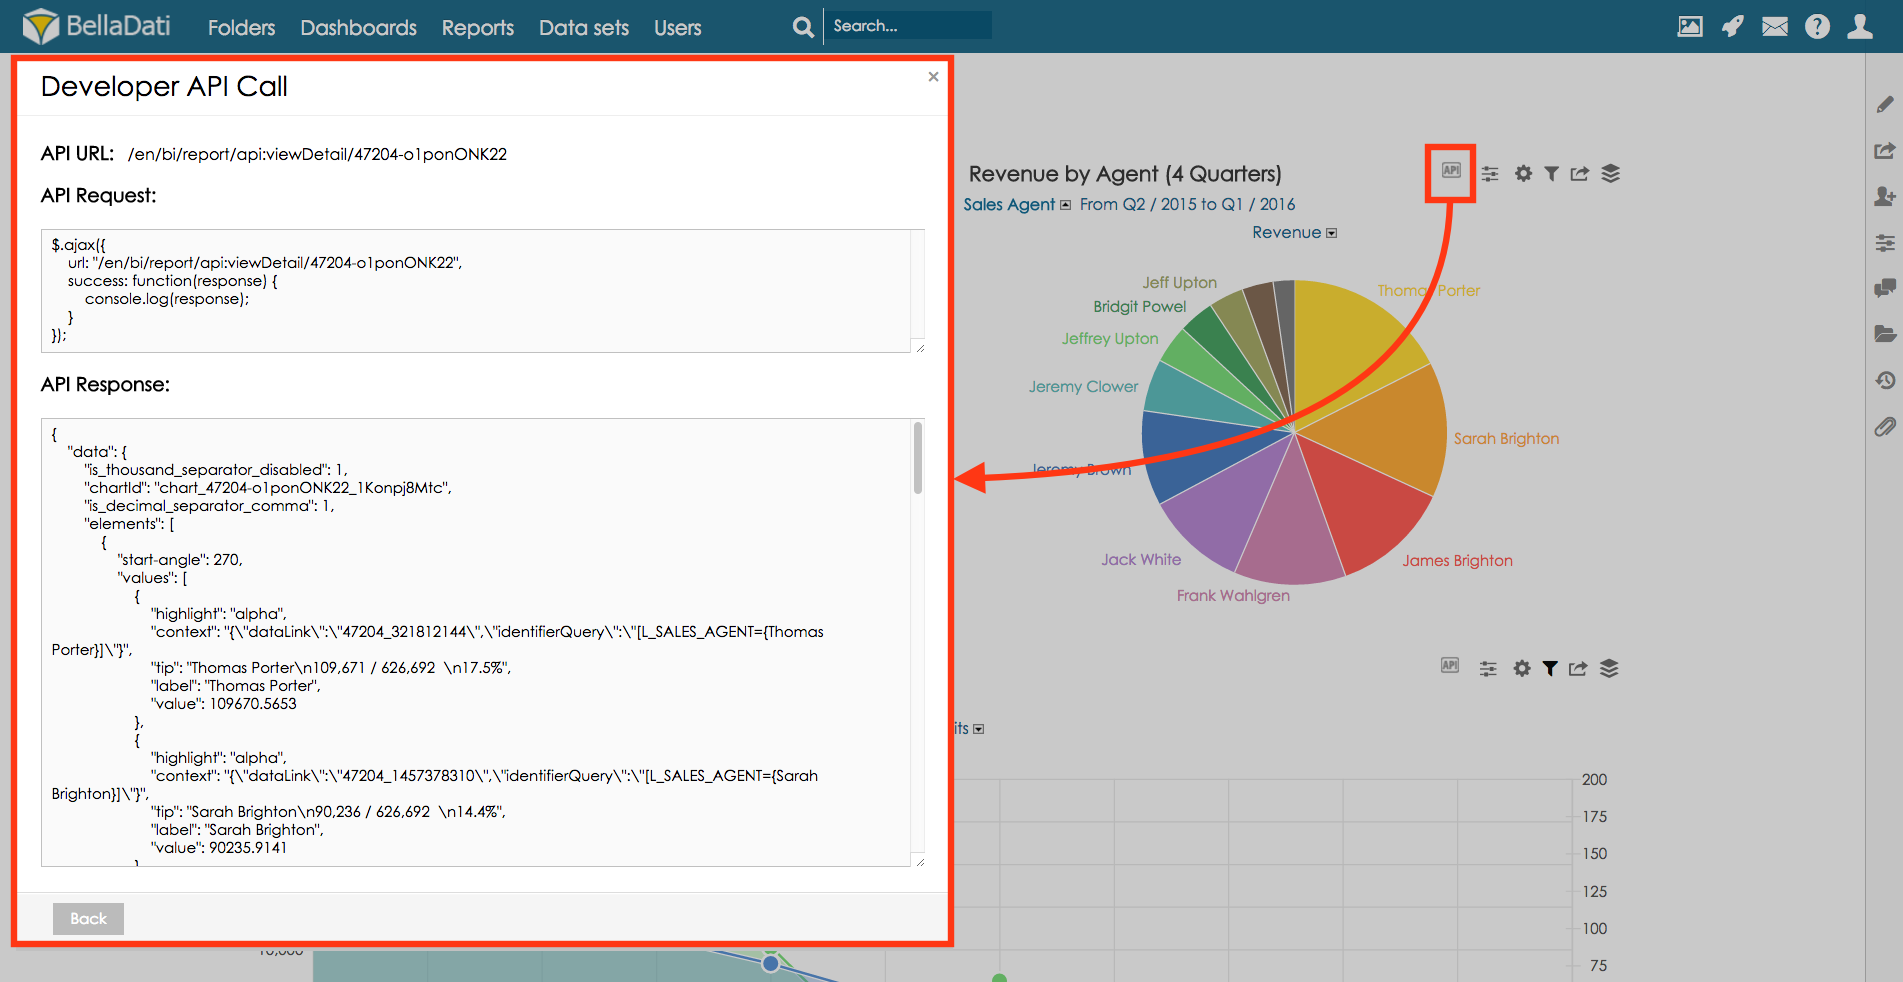
How to get API call overview from BellaDati GUIThe API call overview can be displayed directly in BellaDati GUI. This option is displayed only for users who have enabled the developer mode. Developer mode can be enabled in the user profile. After the developer mode is enabled, API call icon will be displayed for all related components:
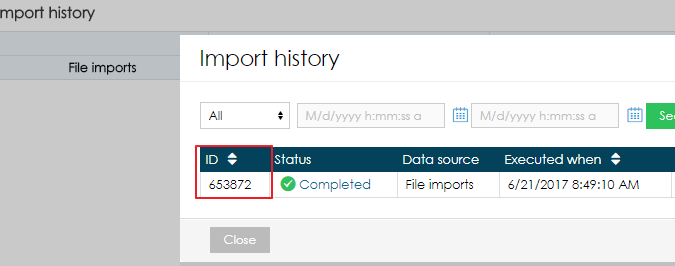
API call overview is displayed in: 1. Report detail -> for each type of the view (chart, table, KPI label, geo map, custom content view) In import history, the ID of each import execution is displayed.
|
| Sv translation | ||||||||||
|---|---|---|---|---|---|---|---|---|---|---|
| ||||||||||
起動方法次の手順を使用して、お気に入りのWebブラウザで開発コンソールをアクティブにする。
例 - 署名したユーザを取得BellaDatiにログインします。起動された開発コンソールで以下のスクリプトを書き込みます:
結果は、現在ユーザーのユーザー名がコンソールに表示されます。
How to get API call overview from BellaDati GUIThe API call overview can be displayed directly in BellaDati GUI. This option is displayed only for users who have enabled the developer mode. Developer mode can be enabled in the user profile. After the developer mode is enabled, API call icon will be displayed for all related components:
API call overview is displayed in: BellaDati GUIからAPIコール概要を取得する方法APIコールの概要をBellaDati GUIに直接表示することができます。このオプションは、開発者モードを有効にしているユーザーのみ表示されます。開発者モードは、 user profile で有効にすることができます。 開発者モードを有効にすると、関連するすべてのコンポーネントにAPIコールアイコンが表示されるようになります:
APIコールの概要が表示されます: 1. レポート詳細 -> ビューの種類ごと(チャート、テーブル、KPIラベル、ジオマップ、カスタムコンテンツビュー)に表示されます。 |
Overview
Content Tools