Page History
| Sv translation | ||||||||||||||||
|---|---|---|---|---|---|---|---|---|---|---|---|---|---|---|---|---|
| ||||||||||||||||
Before You BeginPlease read the following important notes before you begin installing BellaDati:
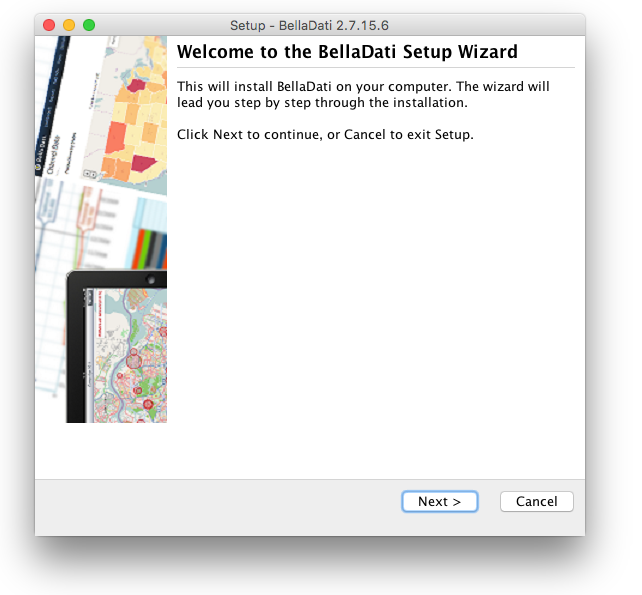
1. Welcome and InformationThis window will check your machine against the minimal system requirements. Upgrade to a higher-performance machine in case your configuration does not meet the criteria, to avoid experiencing a decreased performance of BellaDati.
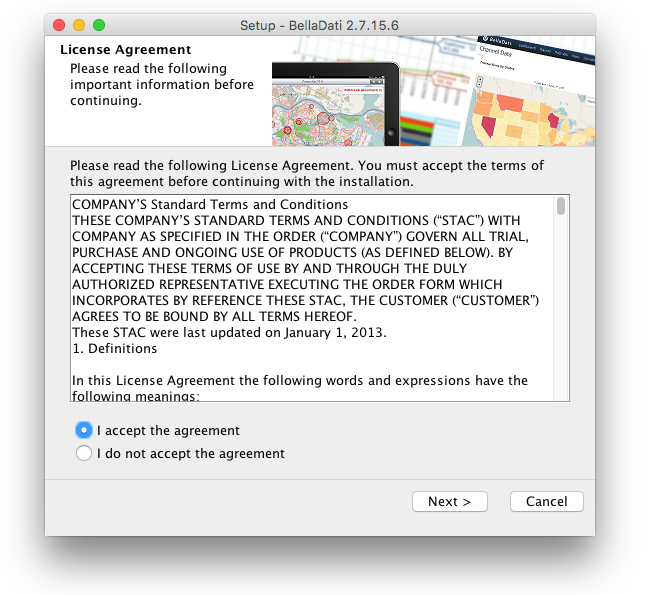
Click Next to proceed with the installation. 2. License TermsRead and Accept the license agreement.
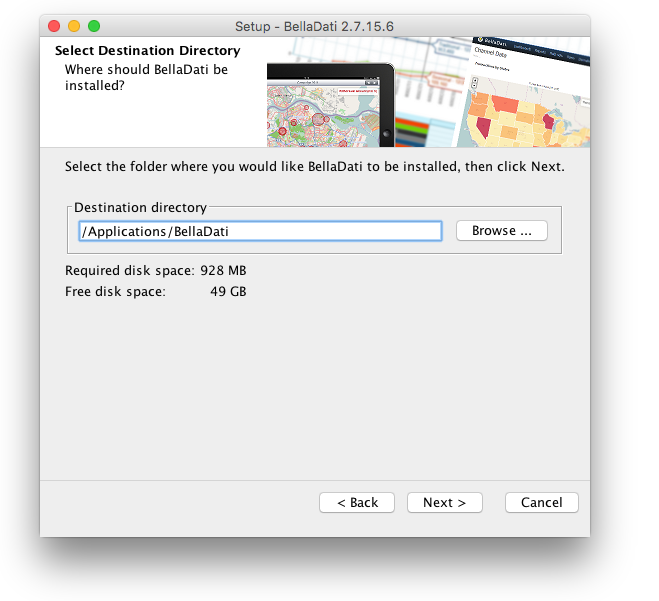
Click Next to proceed with the installation. 3. Select Destination DirectoryBy default, BellaDati is installed into a predefined installation directory. Click browse to navigate to different folder if you want to modify these settings. BellaDati will check your free disk capacity to ensure enough space is available.
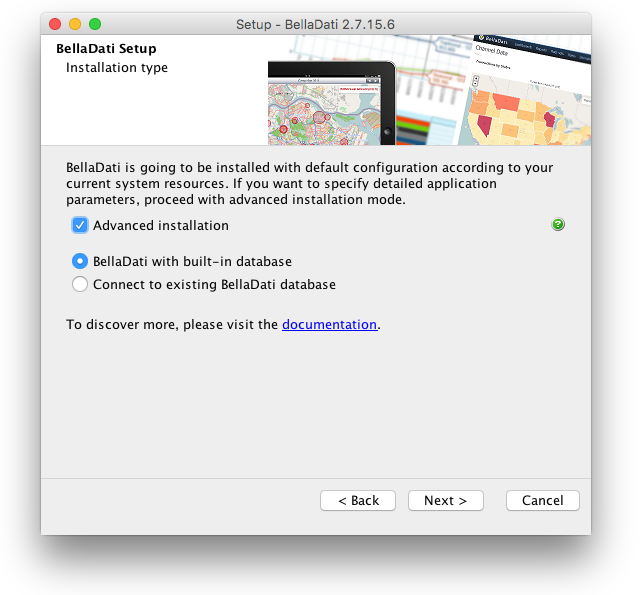
Click Next to proceed with the installation. 4. Select Installation TypeCheck Advanced Installation if you want to specify custom settings. Leave it blank to perform installation with default settings. In advanced settings BellaDati allows you to connect to existing database or create one for you automatically. Choose the desired action and continue to:
Click Next to proceed with the installation.
5.1. Installing with a Built-in Database.Approve or edit the following default settings:
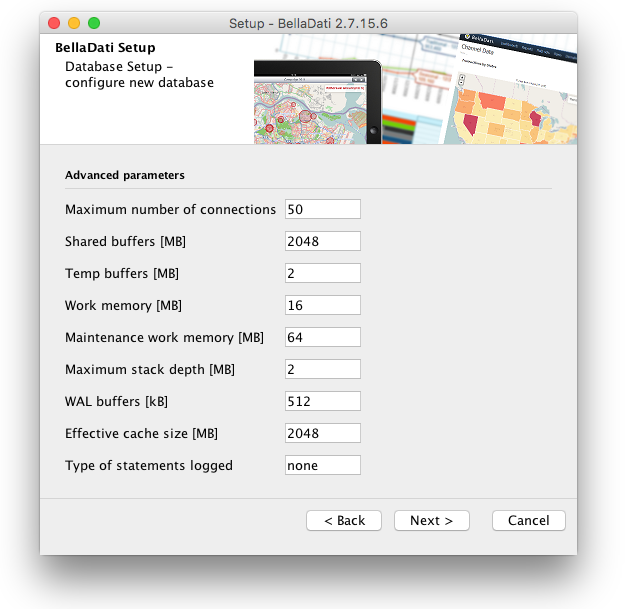
Click Next to proceed with the installation. Approve or edit the following advanced default settings:
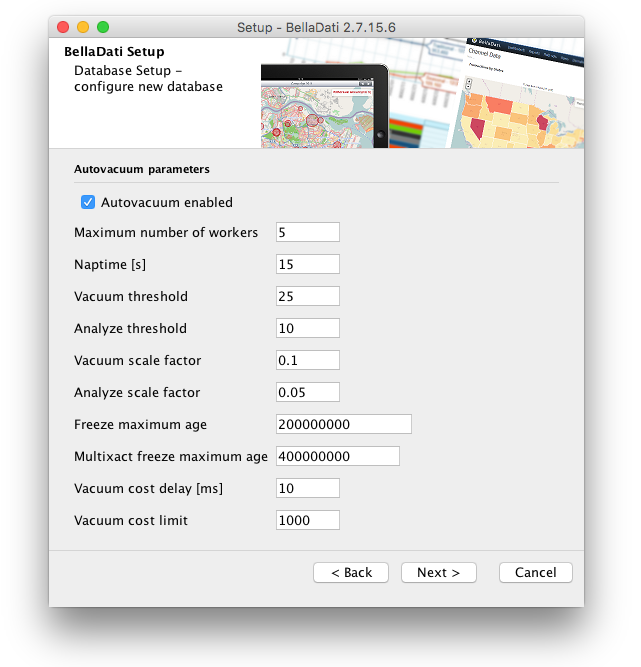
Click Next to proceed with the installation. Approve or edit the following autovacuum default settings:
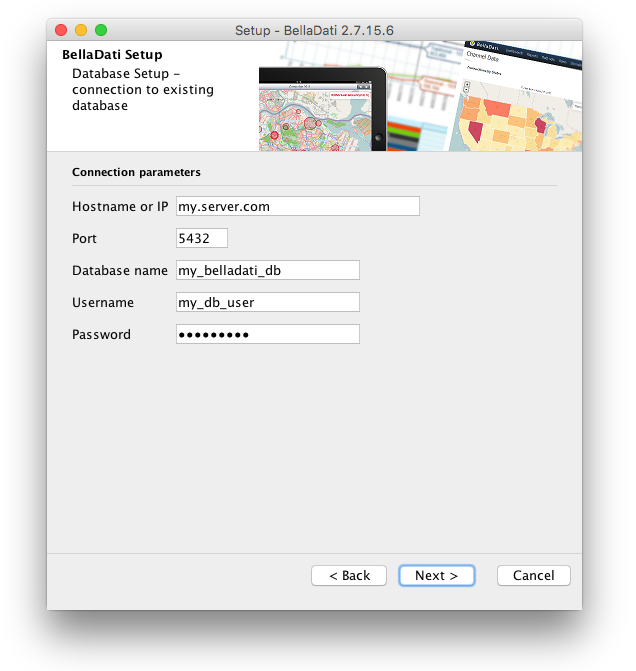
Click Next to proceed with the installation. 5.2. Connecting to an Existing DatabaseSpecify the following connection parameters:
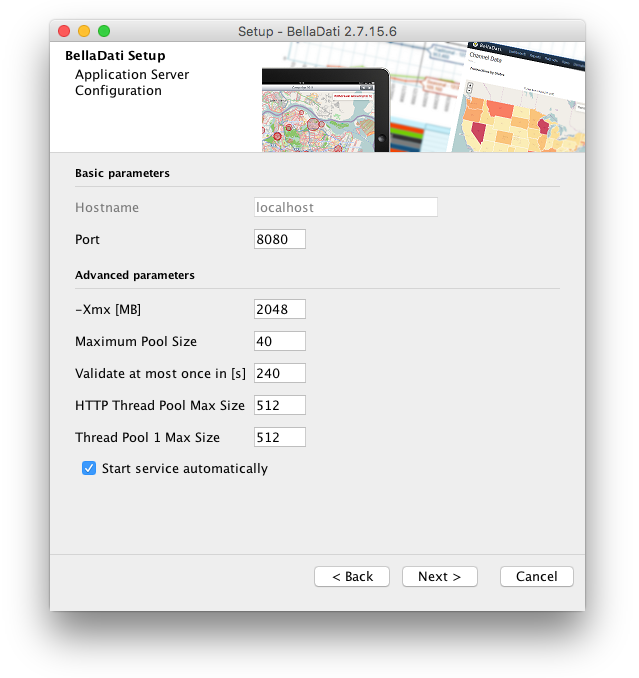
Click Next to proceed with the installation. 6. Application Server ParametersApprove or edit the following default settings:
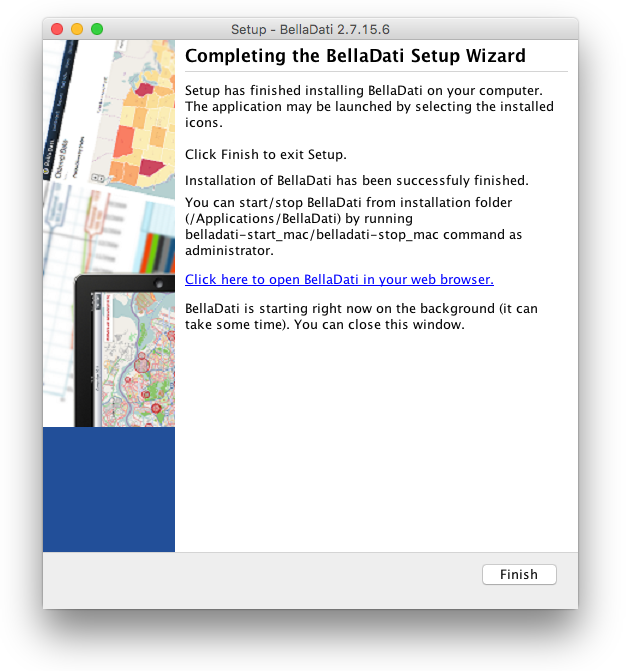
Click Next and wait while BellaDati is installed on your computer. 7. Finishing InstallationThe installation is complete. Close the window or click the link to open BellaDati in your web browser.
It could take some time to start BellaDati for a first time. Then continue with the BellaDati Setup Wizard. Advanced installation notes
Troubleshooting
Next Steps |

| Sv translation | ||||||||||||||||
|---|---|---|---|---|---|---|---|---|---|---|---|---|---|---|---|---|
| ||||||||||||||||
始める前にBellaDatiのインストールを開始する前に、次の重要な注意事項をお読みください
1. ようこそと情報このウィンドウには、最小限のシステム要件によってマシンをチェックする。お使いの設定がBellaDatiのパフォーマンス低下させて回避するために、基準を満たさない場合により高性能なマシンにアップグレードしてください。
インストールを続行するには[次へ]をクリックする。 2. License TermsRead and Accept the license agreement.
Click Next to proceed with the installation. 3. Select Destination DirectoryBy default, BellaDati is installed into a predefined installation directory. Click browse to navigate to different folder if you want to modify these settings. BellaDati will check your free disk capacity to ensure enough space is available.
Click Next to proceed with the installation. 4. Select Installation TypeCheck Advanced Installation if you want to specify custom settings. Leave it blank to perform installation with default settings. In advanced settings BellaDati allows you to connect to existing database or create one for you automatically. Choose the desired action and continue to:
Click Next to proceed with the installation.
5.1. Installing with a Built-in Database.Approve or edit the following default settings:
Click Next to proceed with the installation. Approve or edit the following advanced default settings:
Click Next to proceed with the installation. Approve or edit the following autovacuum default settings:
Click Next to proceed with the installation. 5.2. Connecting to an Existing DatabaseSpecify the following connection parameters:
Click Next to proceed with the installation. 6. Application Server ParametersApprove or edit the following default settings:
Click Next and wait while BellaDati is installed on your computer. 7. Finishing InstallationThe installation is complete. Close the window or click the link to open BellaDati in your web browser.
It could take some time to start BellaDati for a first time. Then continue with the BellaDati Setup Wizard. Advanced installation notes
Troubleshooting
Next Steps |
Overview
Content Tools