Page History
| Sv translation | |||||||||||||||||||||||||||||||||||||||||||||||||||||
|---|---|---|---|---|---|---|---|---|---|---|---|---|---|---|---|---|---|---|---|---|---|---|---|---|---|---|---|---|---|---|---|---|---|---|---|---|---|---|---|---|---|---|---|---|---|---|---|---|---|---|---|---|---|
| |||||||||||||||||||||||||||||||||||||||||||||||||||||
With this tutorial we aim to show you how to build .NET application using BellaDati analytics features through REST API. Main focus is on
We will use C# programming language to allow us to experiment lavishly with our code. Tutorial pre-requisites are
このチュートリアルでは、どのようにREST APIを介してBellaDati分析機能を使用して.NETアプリケーションを構築する方法をお見せすることを目指しています。主な焦点は:
私たちは私たちのコードで贅沢に試すことができるようにC#プログラミング言語を使用する。 チュートリアルの前提条件がある。
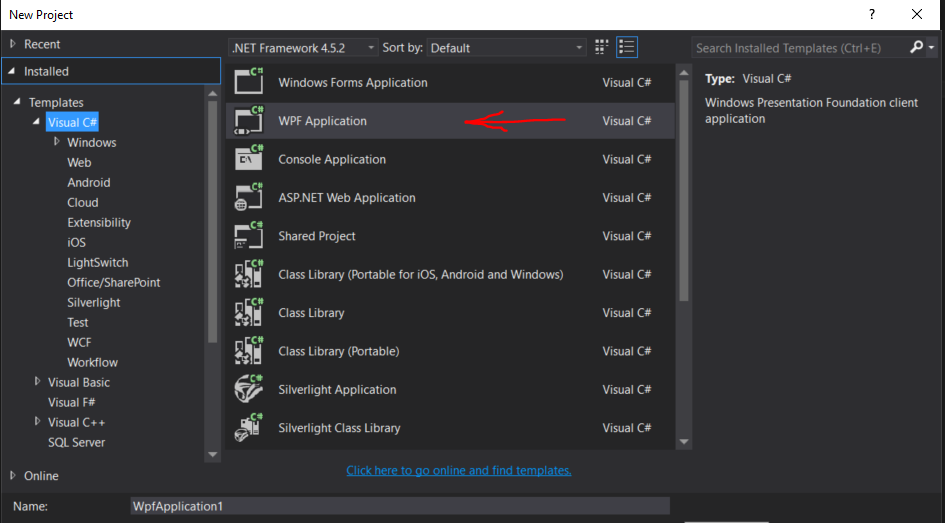
Firstly, we need to create a project in Visual Studio. It is WPF app in ourexample.まず、Visual Studioでプロジェクトを作成する。私達の例にWPFアプリです。
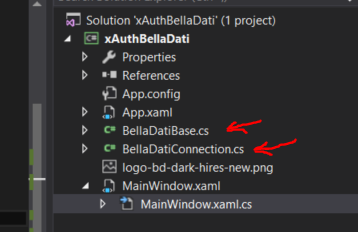
あなたのソリューションにBellaDatiBase.csとBellaDatiConnection.csを貼り付ける。
Paste the BellaDatiBase.cs and BellaDatiConnection.cs to your solution.
After that, you can start with writing a code to the その後、MainWindow.xaml.cs. へのコードを書き込んで始める。あなたの創造によりXamlを作成できる。And you can create your xaml, base to your fantasy. 1.Obtain accessToken from BellaDati REST APIからaccessTokenを取るAppropriate BellaDati endpoint for getting the oauth次のようにoauth_access_tokenを取得するための適切なBellaDatiエンドポイントが定義されている。token is defined as follows:
このThis oauth_access_token はBellaDatiプラットフォームに対するすべての必然的な呼び出しのために必要とされる。それはis required for all consequent calls against BellaDati Platform. It is implemented in BellaDatiConnection.csに実装されている。. In this example, let's assume that we have set up a domain with a consumer key mykey and a consumer secret apisecret. These keys set up to your App.config see below.この例では、我々はコンシューマキーにmykeyとコンシューマシークレットapisecret APIでドメインを設定していると仮定しましょう。これらのキーがあなたのApp.configファイルに設定する。以下を参照してください。
今、あなたは私たちのサーバに接続し、認証できる。Now you can connect to our server and authenticate:
2. Access REST API using HTTP GET方法を使用ことでREST APIをアクセスmethodAfter the authentication you have an 認証後は、oauth_access_tokenを持っていて、使用可能なすべての保護されたREST APIのリソースにアクセスできる。例えば、レポート、ダッシュボード、ビューなどをGET。ここではGET Reportsについての例です。REST API Resourcesの下にすべての見つけるREST API。 and you can access all available protected REST API resources, e.g. GET reports, dashboards, views etc. Here is an example for GET Reports. All REST API you can find under REST API Resources.
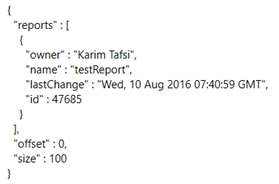
いくつか作成したレポートを持っている場合、この関数は、JSONでのREST APIからデータを返す以下を参照される。 If you have some created report, this function will return data from REST API in JSON see below. 私たちは、次の例に示すようにtry catch句を持つWe recommend to surround the function connection.doGet関数を囲むようにお勧めします。 with try catch clause as shown in example below.
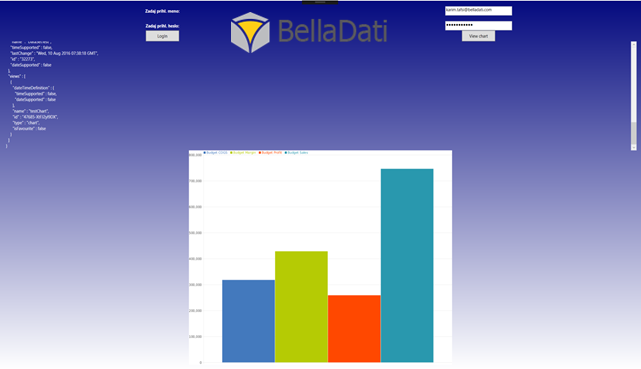
エラーがあれば、いくつかのエラーボックスに表示される。 So If there is some error you will see it in some error box. As a next step, you can display some chart as image次のステップとして、あなたは画像のようないくつかのチャートを表示できる:
このRESTAPIのレスポンスは、PNG画像です。それはchart.pngに保存されて、それをPictureBoxにロードできる。The response of this REST API is png image. It will save it to chart.png and than you can load it to you pictureBox see below.
全体の例では、あなたが必要とするクラスが含まれている The whole example includes the classes you need... |
| Sv translation | |||||||||||||||||||||||||||||||||||||||||||||||||||||
|---|---|---|---|---|---|---|---|---|---|---|---|---|---|---|---|---|---|---|---|---|---|---|---|---|---|---|---|---|---|---|---|---|---|---|---|---|---|---|---|---|---|---|---|---|---|---|---|---|---|---|---|---|---|
| |||||||||||||||||||||||||||||||||||||||||||||||||||||
このチュートリアルでは、どのようにREST APIを介してBellaDati分析機能を使用して.NETアプリケーションを構築する方法をお見せすることを目指しています。主な焦点は:
私たちは私たちのコードで贅沢に試すことができるようにC#プログラミング言語を使用する。 チュートリアルの前提条件がある。
まず、Visual Studioでプロジェクトを作成する。私達の例にWPFアプリです。
あなたのソリューションにBellaDatiBase.csとBellaDatiConnection.csを貼り付ける。
その後、MainWindow.xaml.cs.へのコードを書き込んで始める。あなたの創造によりXamlを作成できる。 1. BellaDati REST APIからaccessTokenを取る次のようにoauth_access_tokenを取得するための適切なBellaDatiエンドポイントが定義されている。
このoauth_access_tokenはBellaDatiプラットフォームに対するすべての必然的な呼び出しのために必要とされる。それはBellaDatiConnection.csに実装されている。 この例では、我々はコンシューマキーにmykeyとコンシューマシークレットapisecret APIでドメインを設定していると仮定しましょう。これらのキーがあなたのApp.configファイルに設定する。以下を参照してください。
今、あなたは私たちのサーバに接続し、認証できる。
2. HTTP GET方法を使用ことでREST APIをアクセス認証後は、oauth_access_tokenを持っていて、使用可能なすべての保護されたREST APIのリソースにアクセスできる。例えば、レポート、ダッシュボード、ビューなどをGET。ここではGET Reportsについての例です。REST API Resourcesの下にすべての見つけるREST API。
いくつか作成したレポートを持っている場合、この関数は、JSONでのREST APIからデータを返す以下を参照される。 私たちは、次の例に示すようにtry catch句を持つconnection.doGet関数を囲むようにお勧めします。
エラーがあれば、いくつかのエラーボックスに表示される。 次のステップとして、あなたは画像のようないくつかのチャートを表示できる:
このRESTAPIのレスポンスは、PNG画像です。それはchart.pngに保存されて、それをPictureBoxにロードできる。
全体の例では、あなたが必要とするクラスが含まれている |
Overview
Content Tools