Versions Compared

Key

  • This line was added.
  • This line was removed.
  • Formatting was changed.
Comment: Removed translated content for 'zh'
Sv translation
languageen
Info

This document describes how to migrate the BellaDati application server or database to a different system.

Application Server

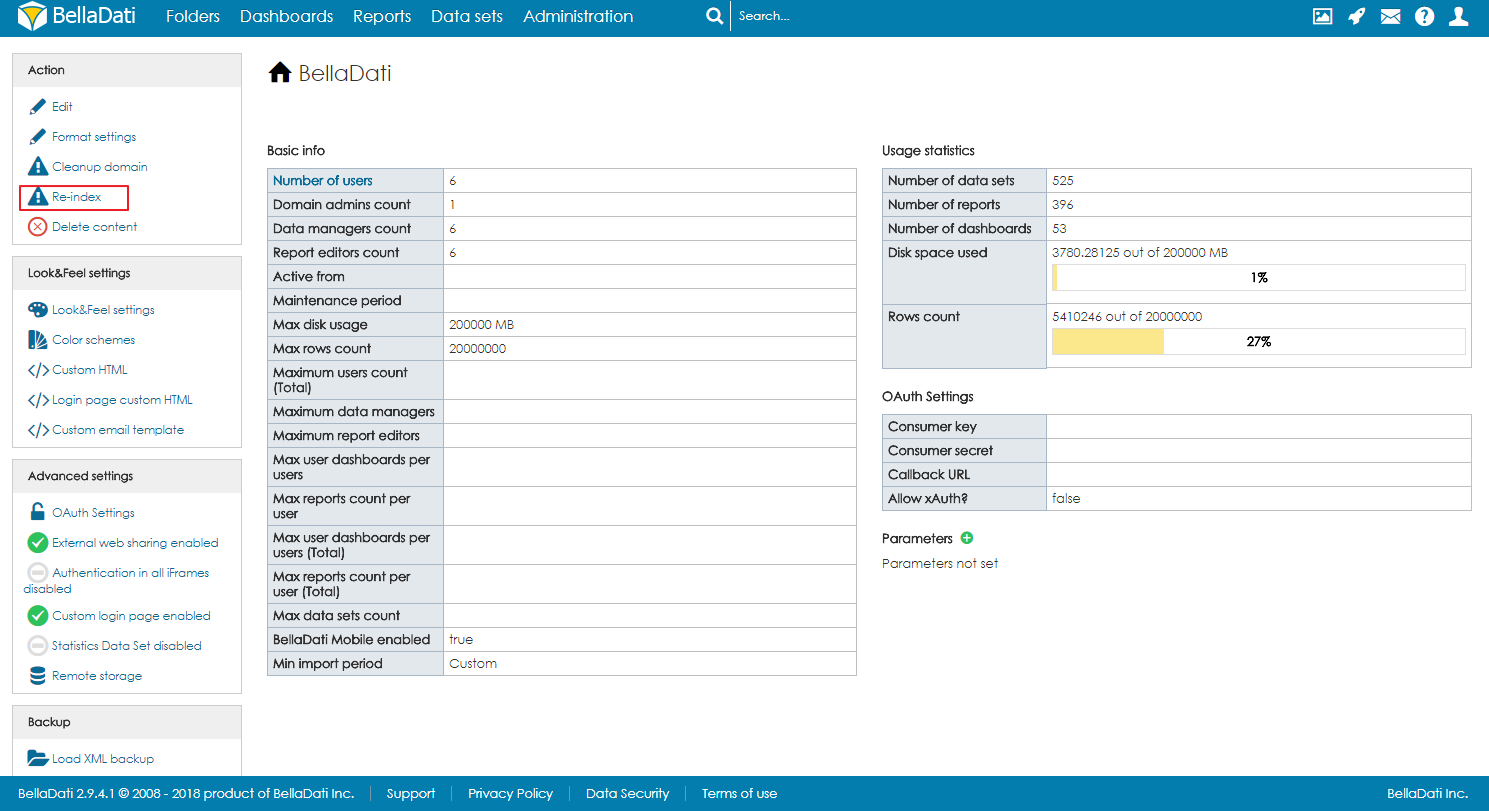
To migrate only the application server without changing the database, follow the appropriate installation instructions to set up your new application server. Configure it to connect to your existing database. After starting the server and logging in, move the mouse over your username and click the link to your domain. On the left side, reindex your reports and data sets.

Database

To migrate BellaDati to a different database installation, backup the database contents using the PostgreSQL dump command:

Code Block
pg_dump -U user -F c -v -f "path_to_dump/dump.backup" belladati_db

Copy the backup file to your new system and restore it in the target database:

Code Block
pg_restore -v -c -O -d belladati_db -U user path_to_dump/dump.backup

Different Application Server and Database Server

To migrate both your database and application server:

  1. Migrate old database to new database as described above.
  2. Install a new application server following the appropriate installation instructions, using your new database.
  3. Delete the current indexes directory from the file system.
  4. Re-index your reports and data sets in the new installation.
  5. Restart BellaDati

Different Database Server

If you continue using your existing application server, configure it to use the new database.

Installer

If you used Windows installerMac installer or Linux Instlaller, follow the instructions below:

  1. Login to the administration console (by default running on 4848 or see Installing BellaDati on GlassFishPayara).
  2. Open Resources->JDBC->Connection Pools and click on the connection pool you configured for BellaDati.
  3. On the right side, click Additional Properties.
  4. Update the ServerNameDatabaseNameUser and Password to match your new database and click Save.

Optionally, you can modify directly configuration file BELLADATI_INSTALLATION_DIRECTORY/glassfish4/glassfish/domains/domain1/config/domain.xml.

Standalone

If you used the BellaDati Standalone, update the application.properties file in your BellaDati installation directory and set new database connection parameters.

GlassFish

Use the GlassFish administration console as described in Installing BellaDati on GlassFishPayara and follow the same process as installing BellaDati using installer.

Jetty

When running in a custom Jetty instance, you can find the configuration inside the WAR archive at the path WEB-INF/classes/conf/application.properties. Follow the instructions from Installing BellaDati on Jetty for detailed steps to update the configuration file.

Tomcat

Configure the BellaDati context defined in your Tomcat installation.

  1. Open the file conf/Catalina/localhost/belladati.xml.
  2. In the Resource tag, update the url, username and password to match your new database.
  3. Restart Tomcat.
Sv translation
languageja


Info

このドキュメントでは、BellaDatiアプリケーションサーバーまたはデータベースを別のシステムに移行する方法について説明します。

アプリケーションサーバー

データベースを変更せずにアプリケーションサーバーのみを移行するには、適切なインストール手順に従って、新しいアプリケーションサーバーをセットアップします。既存のデータベースに接続するように構成します。サーバーを起動してログインしたら、ユーザー名の上にマウスを移動し、ドメインへのリンクをクリックします。左側で、レポートデータセットインデックスを再作成します。

データベース

BellaDatiを別のデータベースインストールに移行するには、PostgreSQLのdumpコマンドを使用してデータベースの内容をバックアップします:

Code Block
pg_dump -U user -F c -v -f "path_to_dump/dump.backup" belladati_db

バックアップファイルを新しいシステムにコピーし、ターゲットデータベースに復元します:

Code Block
pg_restore -v -c -O -d belladati_db -U user path_to_dump/dump.backup

異なるアプリケーションサーバーとデータベースサーバー

データベースとアプリケーションサーバーの両方を移行するには:

  1. 上記のように、古いデータベースを新しいデータベースに移行します。
  2. 新しいデータベースを使用して、適切なインストール手順に従い、新しいアプリケーションサーバーをインストールします。
  3. ファイルシステムから現在のインデックスディレクトリを削除します。
  4. 新規インストールでレポートとデータセットのインデックスを再作成します。
  5. BellaDatiを再起動します。

別のデータベースサーバー

既存のアプリケーションサーバーを引き続き使用する場合は、新しいデータベースを使用するように構成します。

インストーラ

 WindowsインストーラMacインストーラ Linuxインストーラを使用した場合は、以下の手順に従ってください:

  1. 管理コンソールにログインします(デフォルトでは4848で実行されているか、 Installing BellaDati on GlassFishPayaraを参照してください)。
  2. Resources->JDBC->Connection Pools を開き、BellaDati用に構成した接続プールをクリックします。
  3. 右側で、Additional Propertiesをクリックします。
  4. ServerNameDatabaseNameUserPasswordを新しいデータベースと一致するように更新し、[保存]をクリックします。

オプションで、構成ファイルを直接変更できます。
BELLADATI_INSTALLATION_DIRECTORY/glassfish4/glassfish/domains/domain1/config/domain.xml.

スタンドアロン

BellaDati Standaloneを使用した場合は、BellaDatiインストールディレクトリのapplication.propertiesファイルを更新し、新しいデータベース接続パラメーターを設定します。

GlassFish

Installing BellaDati on GlassFishPayaraで説明されているようにGlassFish管理コンソールを使用し、インストーラーを使用してBellaDatiをインストールするのと同じプロセスに従います。

Jetty

カスタムJettyインスタンスで実行する場合、構成はWARアーカイブ内のパス WEB-INF/classes/conf/application.propertiesにあります。構成ファイルを更新する詳細な手順については、 Installing BellaDati on Jettyの指示に従ってください。

Tomcat

Tomcatインストールで定義されたBellaDatiコンテキストを構成します。

  1. conf/Catalina/localhost/belladati.xmlファイルを開きます。
  2. Resourceタグで、新しいデータベースと一致するようにURLユーザ名パスワードを更新します。
  3. Tomcatを再起動します。