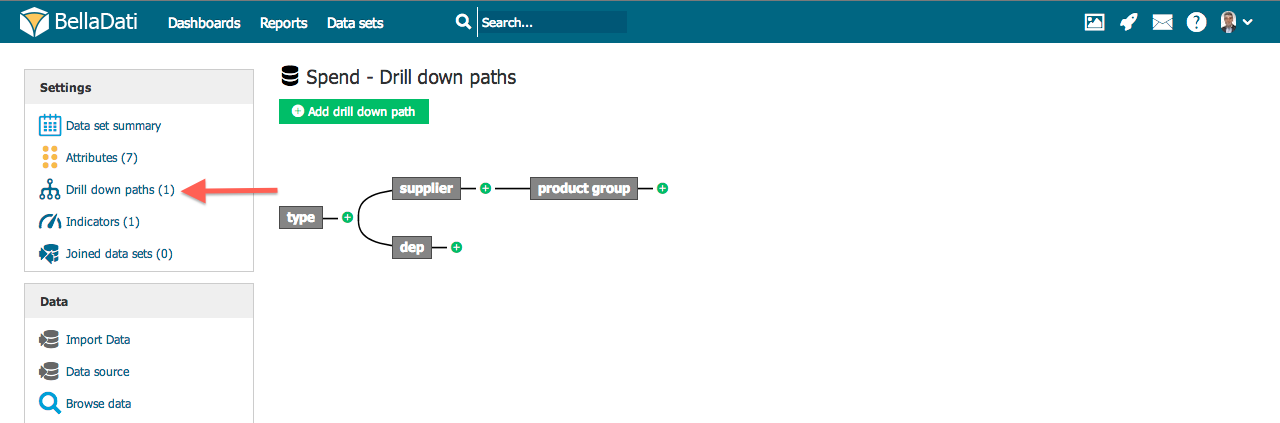
Predefined drill-down path specifies the meaningful sequence might by useful for further drill-down operation in report (see attached video tutorial below). Each data set can contain more drill-down paths. The simplest drill-down path is linear, however BellaDati supports more complex structures like trees. | Info |
|---|
Predefined drill-down paths are available int the report when performing ad-hoc drill-down (by clicking on + in the table), or in the drill-down settings. |
- Go to desired data set via data set menu.
- Select "Attributes" in the left submenu.
| Info |
|---|
Predefined drill-down paths significantly simplifies creating reports by analysts and performing drill-down operation in reports and on dashboards. Therefore we recommend defining these paths on the data set level. |
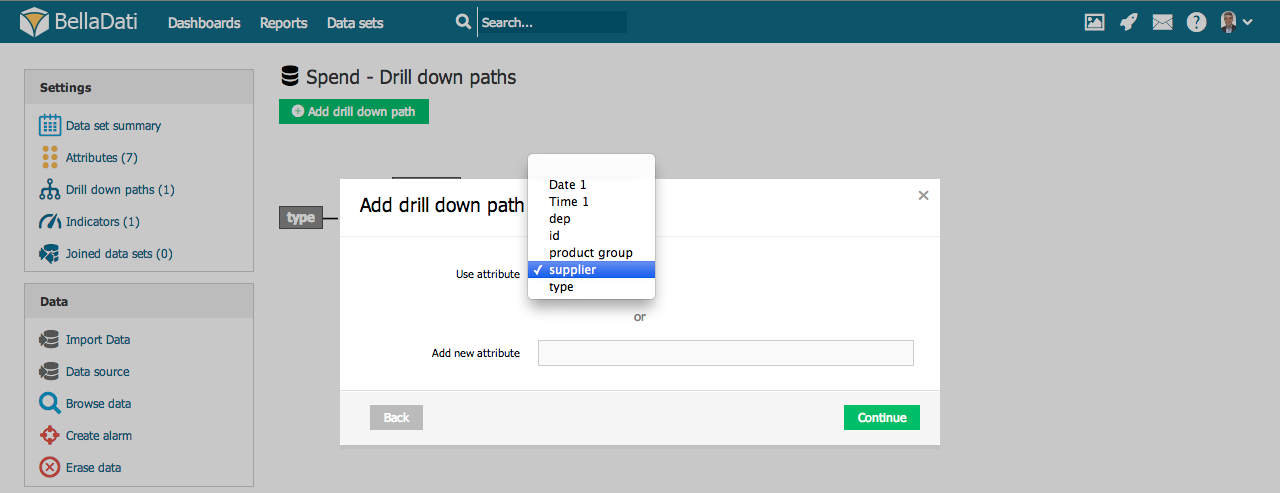
Adding new drill-down path- Click "Add drill down path" at the top of the page. A popup will appear.
- Select first attribute in "Use attribute" drop-down box and click on "Save" button.
- Drill-down path can be also defined by formula. The formula has to return either list of values or map of value/caption.
- When using formula, you can allow "Reset context with current value". That will reset current selected classifiers and will replace them with current value.
- Click the green plus icon on the right of existing attribute in drill-down path to add another attribute and repeat steps above to create whole drill-down path.
| Note |
|---|
By clicking on green plus icon in the middle of existing drill-down path, you can branch out current drill-down path to more sub-paths. |
| Tip |
|---|
You can create an new attribute during drill-down path definition by filling in the field "Add new attribute" in the popup. See managing attributes for details. |
Editing drill-down path- Removing attribute: Hoover over the desired attribute, click on the right top left cross symbol and confirm this action in popup.
Tutorial videowidget |