Joined data sets allow you to analyze data from more data sets together and therefore use data from more data sources in a single report. | Tip |
|---|
The principle is similar to joining SQL database tables. |
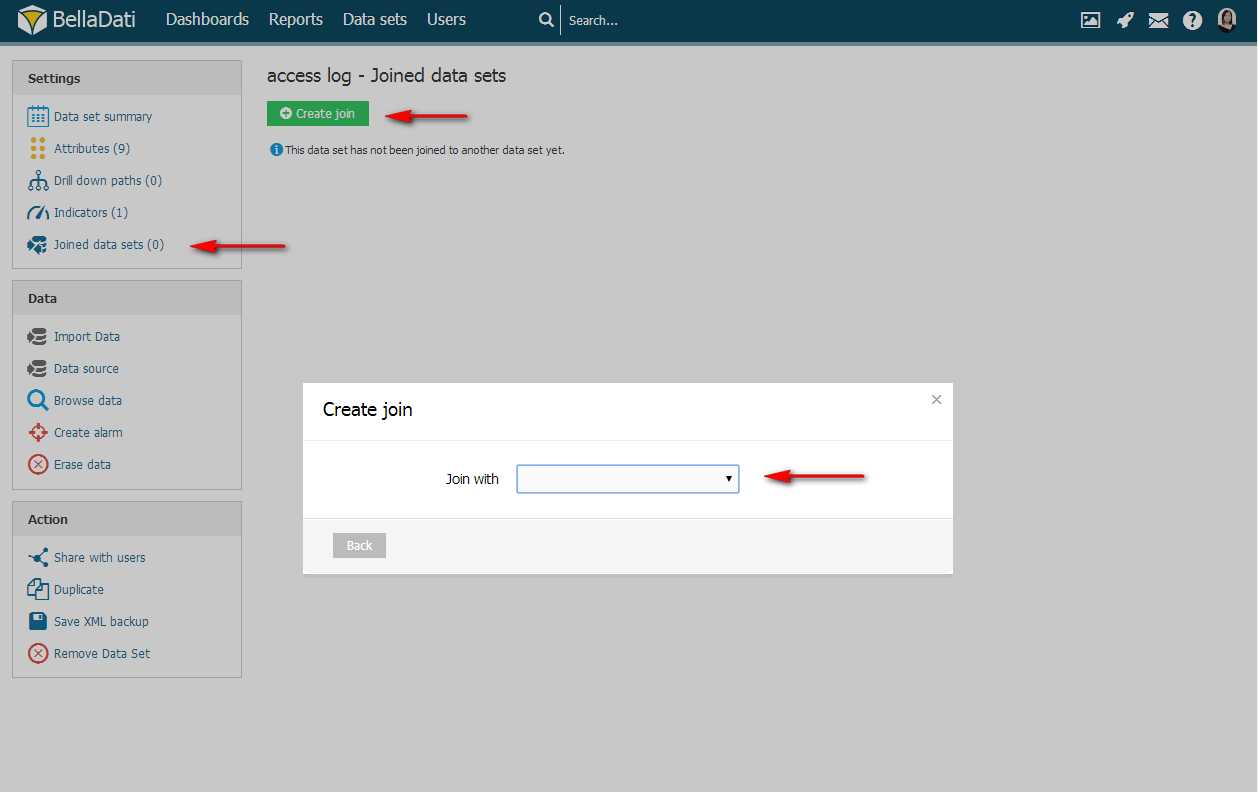
Creating JoinTo create join in BellaDati: - Navigate to one of the Data Sets you want to use in join
- Click on Joined Data Sets in Settings section of the left action bar
- Choose Create Join
- Select Data Set to be joined with
Join conditionEach join has to have specified following parameters: - Name: Joined data set name.
- Join with: Name of the source data set to join with.
- Join type: Standard join types available - match always depends on attributes.
- Left outer join: Record in the target data set is not mandatory. An optional custom condition can be used.
- Inner join: Record in the target data set is mandatory. An optional custom condition can be used.
- Custom join: User can define own joining condition. If not specified, no attribute match is required (Cross join).
 Image Removed Image Removed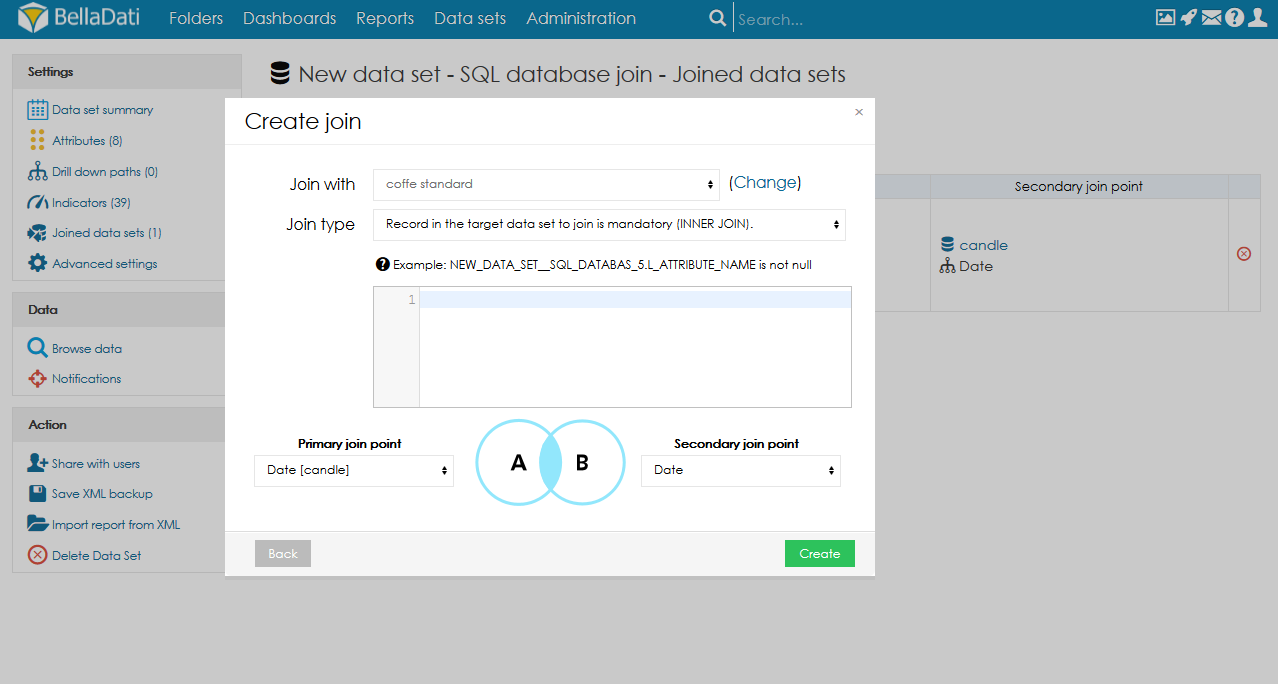 Image Added Image Added
| Info |
|---|
The resulting joined data set will contain all the attributes and indicators from all source data sets. |
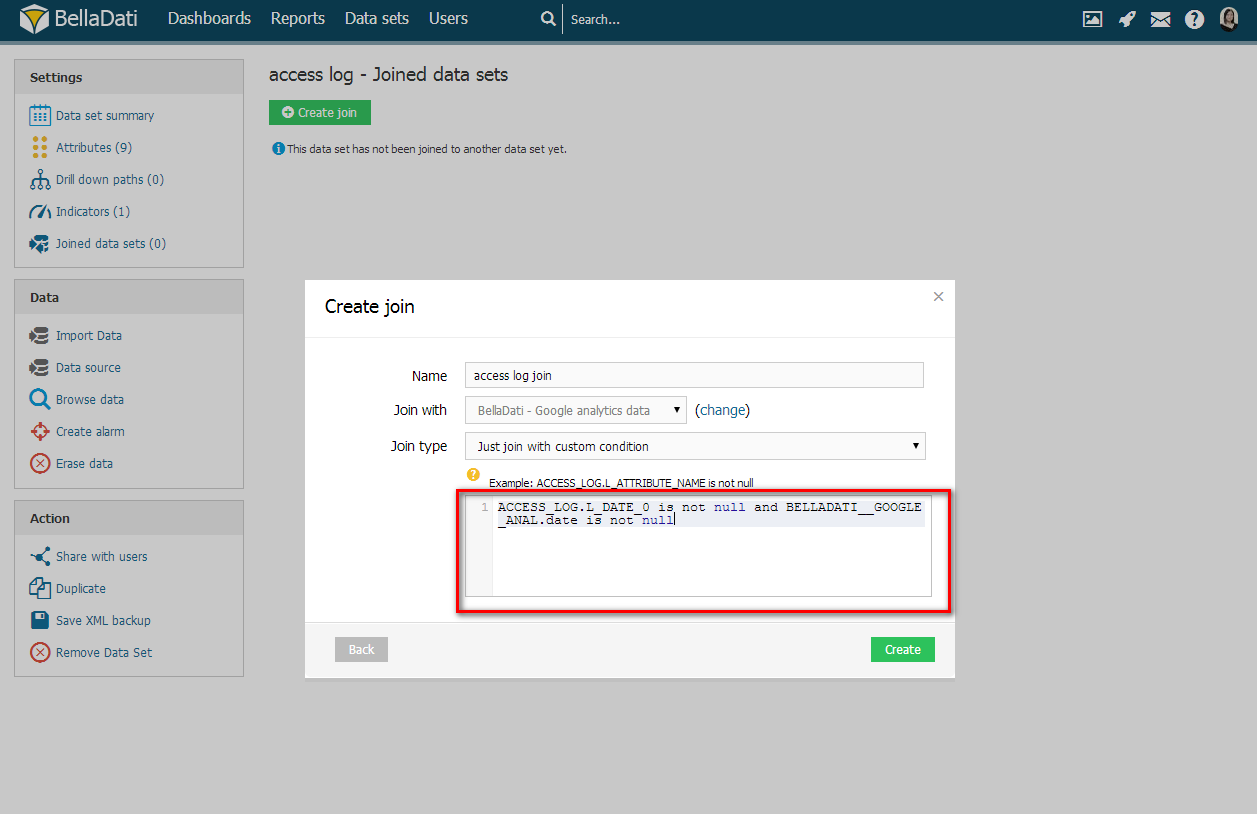
Custom Join ConditionBellaDati allows you to define you own joining condition. To do so: - Select Custom in Join ConditionCross join will be automatically appliedthe Join type. If the Custom join is selected, no attribute match is required (Cross join).
- Type joining condition to restrict the output
| Tip |
|---|
BellaDati offers you autocomplete to easily construct joining conditions. |
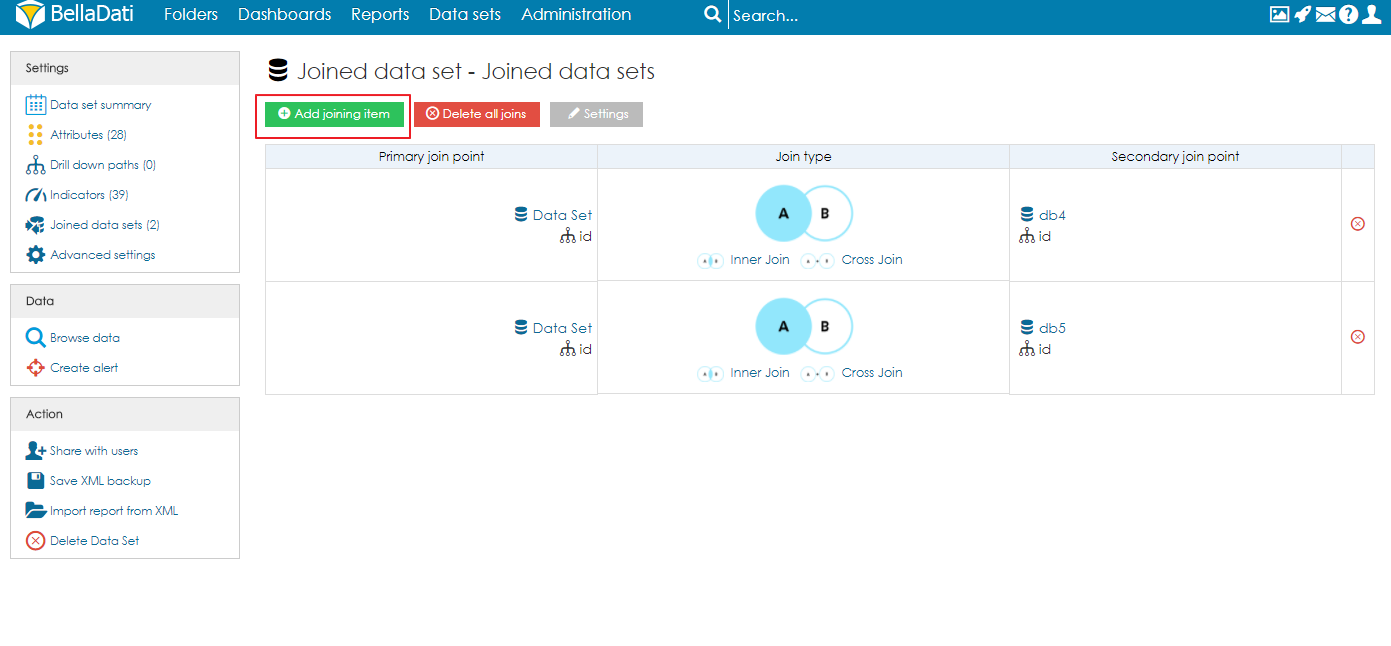
Multiple Join PointsOne data set could be joined with more data sets (eg. join by department ID to get department full name, address, country, total sales and then join by product ID to get products name, price, weight and mass). Each join is called join point. To add another joining point into existing join: - Click on add joining item
- Select desired Data Set
- Continue with Join Conditions
Joining Facts and Restrictions| Info |
|---|
- Data in the joined data set will be the intersection of all joins.
- Data in joined data sets are updated automatically when data are changed or imported to the source data sets. You cannot import data directly to the joined data sets.
|
| Note |
|---|
- Please note, that the permissions setting based on data filter has to be set for both (source and joined) data sets!
- Data join is also available on data source level (database). Please consider this option when you plan to analyze millions records of data. Joining on database level may provide better performance.
- Joined data set is rebuilt after the import into one of the data sets which is joined. All data sets which are used in this joined are locked during this time - import into these data sets will not run.
User can add join when: - User can edit data set (Domain Admin, Data Set Owner, Data Set Editor). Data set editor needs to have enabled the edit access as user or user group.
- No data filters are set in sharing (USER nor USER_GROUP nor ATTRIBUTE_FILTER).
- On-demand synchronization is disabled.
Available data sets to join: - All the user can access (even in read-only mode).
- Must have the same storage type (local or remote, if remote, location must be the same).
- No data filters are set in sharing.
- Partitioning must be disabled.
- Cannot be joined data set or big data set.
|
Joined data set supports these functions the same way like in ordinary data set: Tutorial video| HTML |
|---|
<iframe width="560" height="315" src="https://www.youtube.com/embed/Q5awkTjZsE0" frameborder="0" allow="accelerometer; autoplay; encrypted-media; gyroscope; picture-in-picture" allowfullscreen></iframe> |
Next Steps |