Page History
| Sv translation | ||||||||||||||||||||||
|---|---|---|---|---|---|---|---|---|---|---|---|---|---|---|---|---|---|---|---|---|---|---|
| ||||||||||||||||||||||
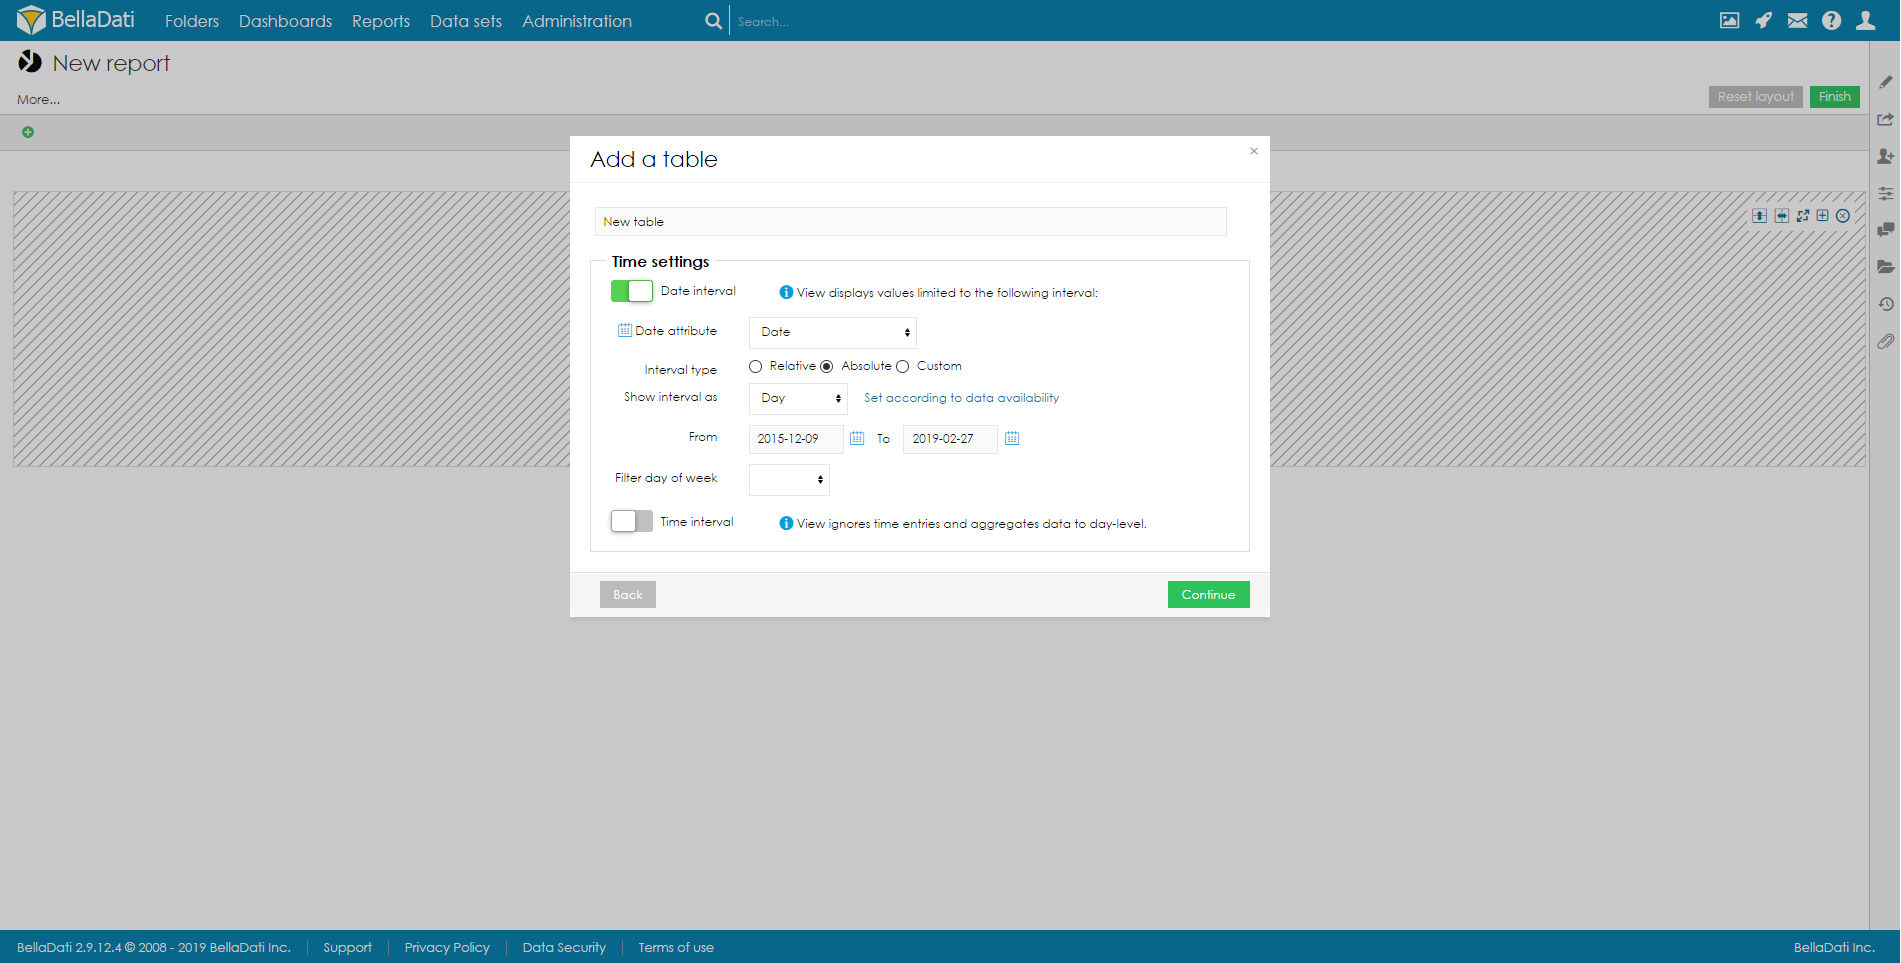
To add a new Table, hover over free place and click on Table view type. The Add a table dialog box will appear.
Confirm new Table view by clicking on a green Continue button. BellaDati will guide you through additional setup.
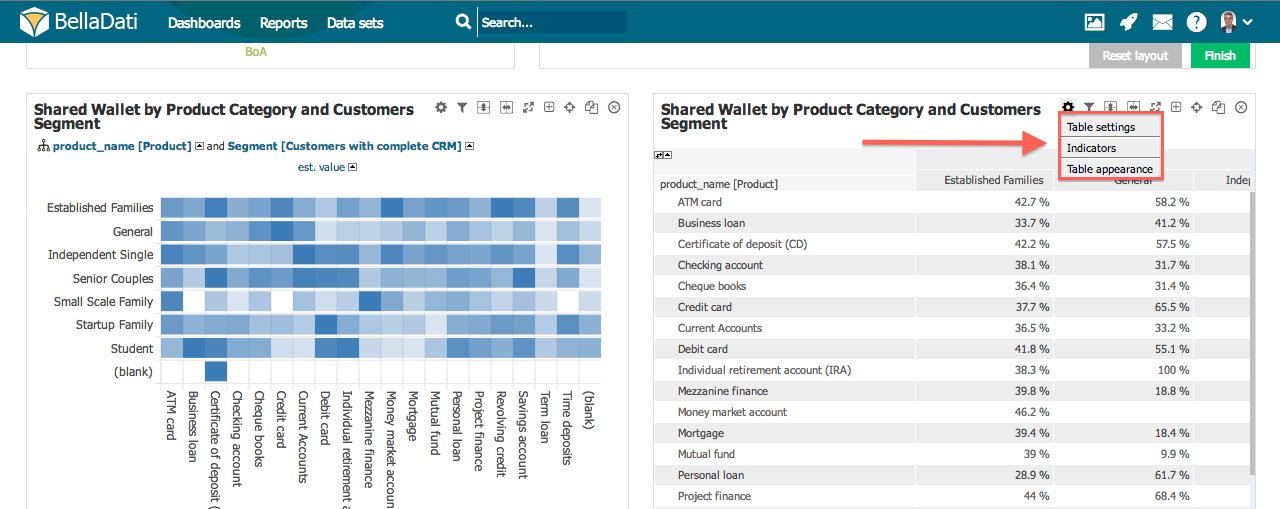
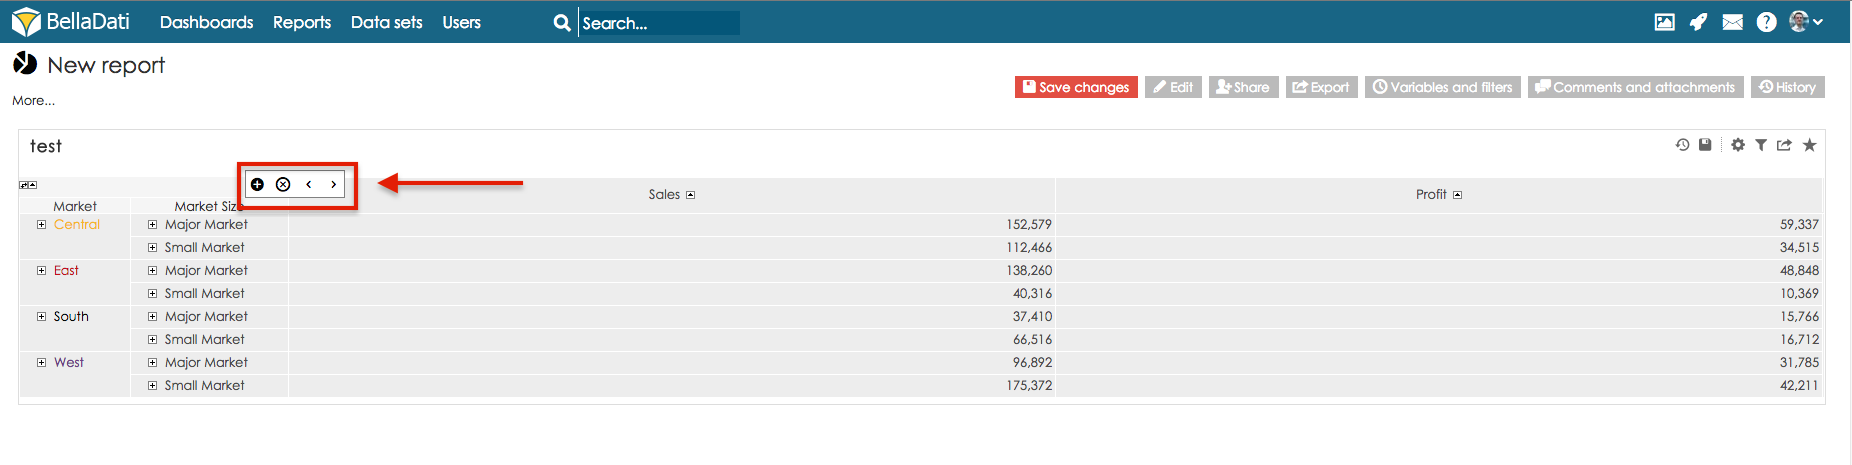
Table managementYou can perform additional operations in the upper right corner of the inserted Table view:
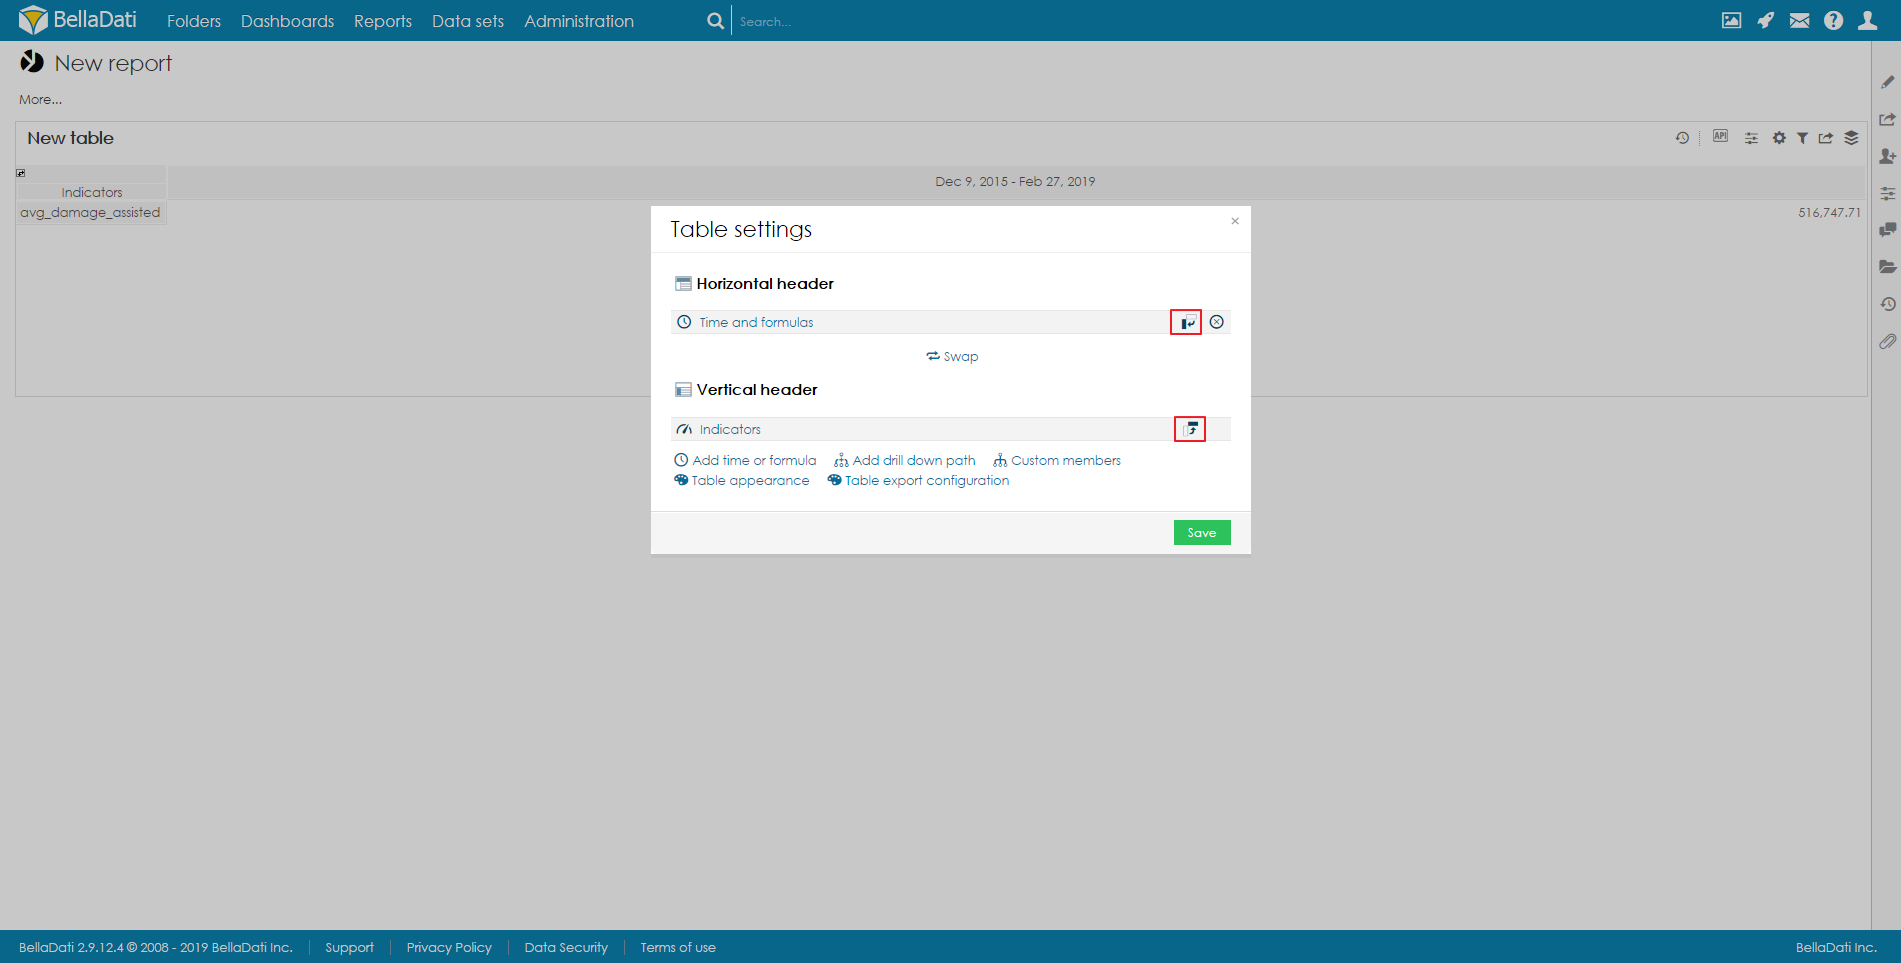
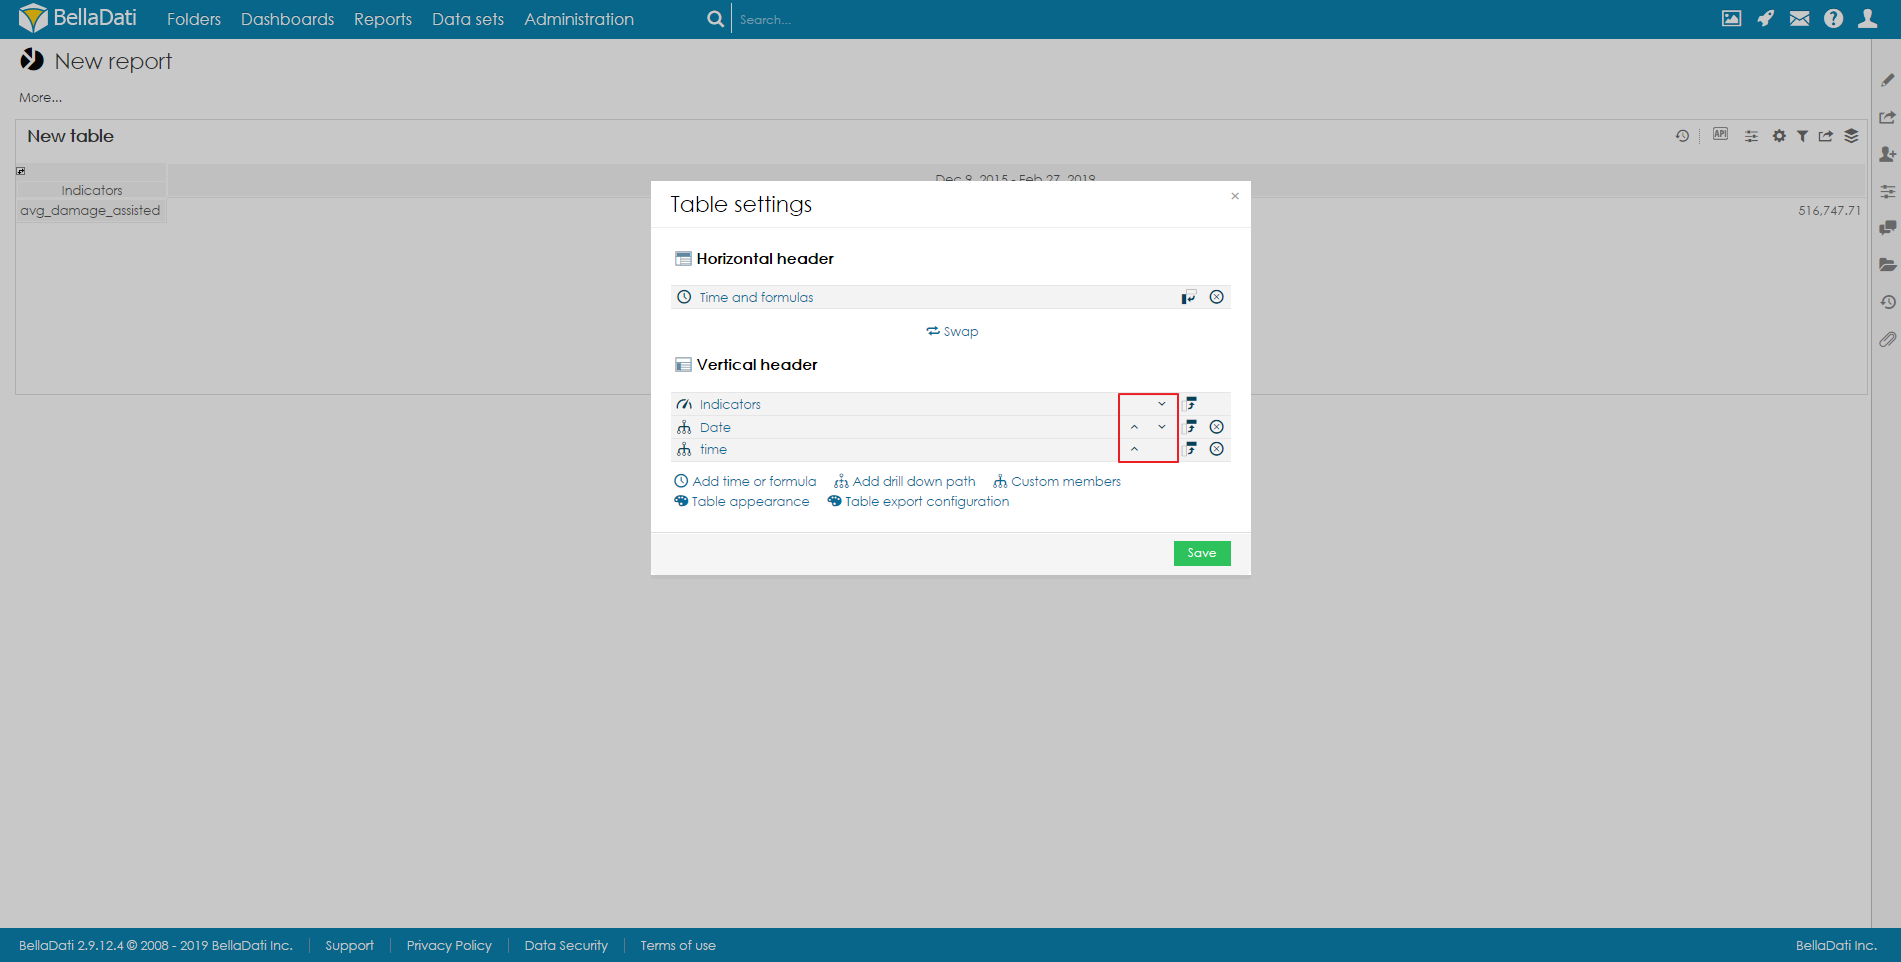
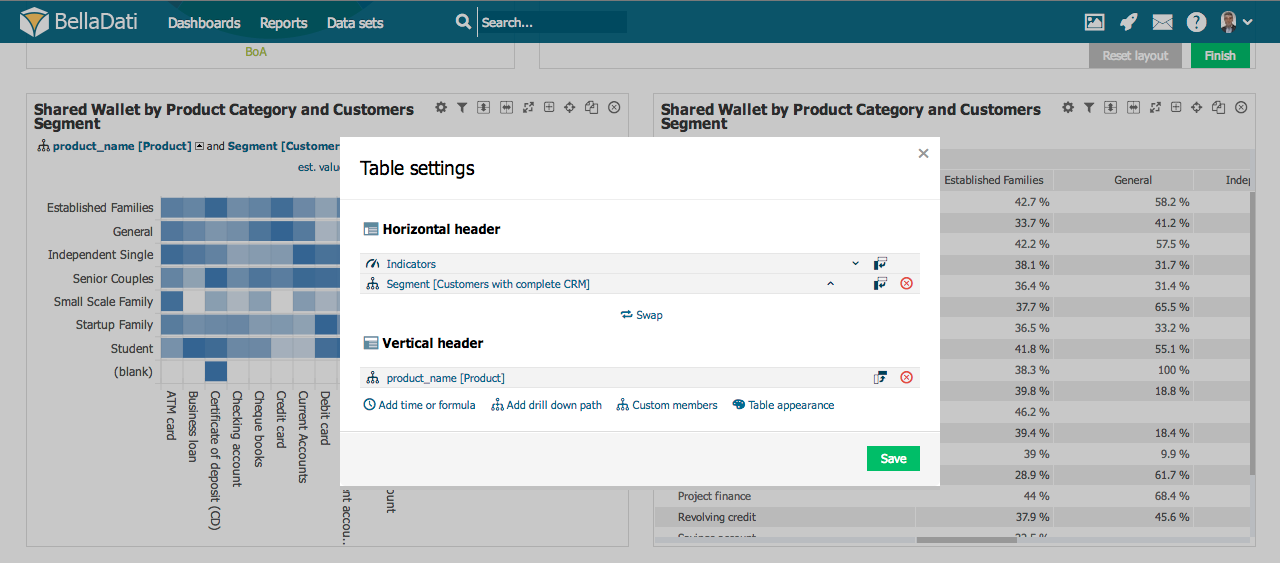
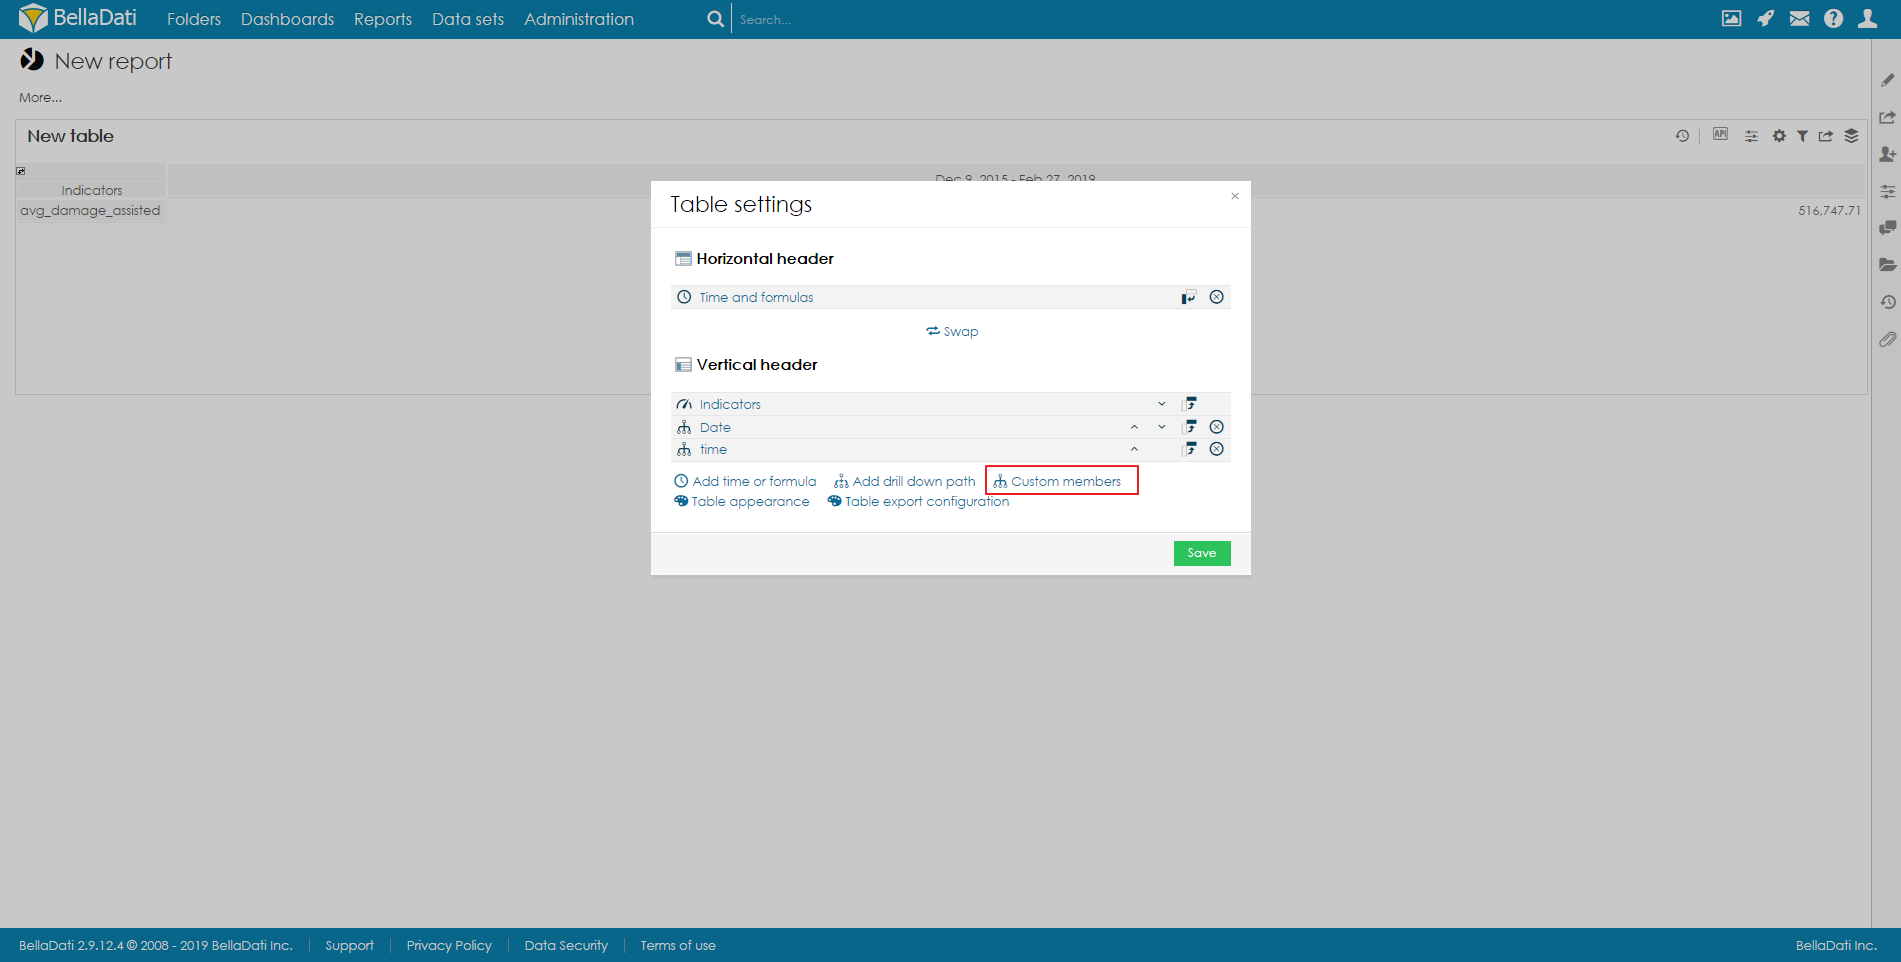
Table settingsClick on toolbox icon or select Table settings from the toolbox list to enter Table settings dialog. Table settings dialog shows Time, Indicators and Drill down paths currently positioned at X and Y axes (horizontal and vertical header). BellaDati allows you to:
Managing drill-downsHover your mouse over the drill-down header to display drill-down management box. This box allows you to:
|
| Info |
|---|
You can delete created nodes in Custom member dialog. |
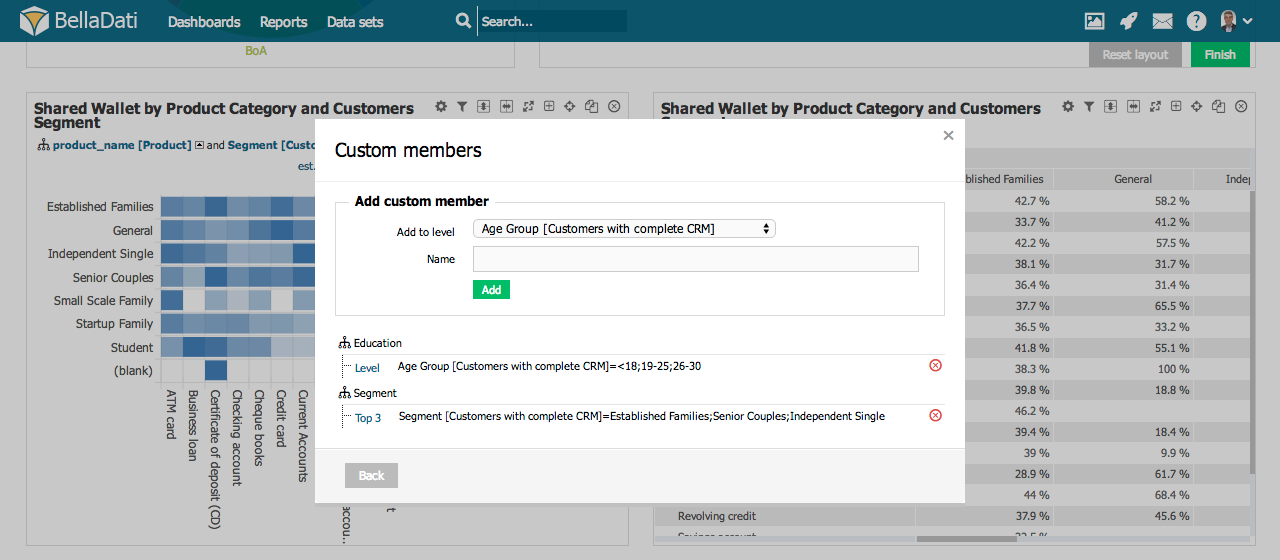
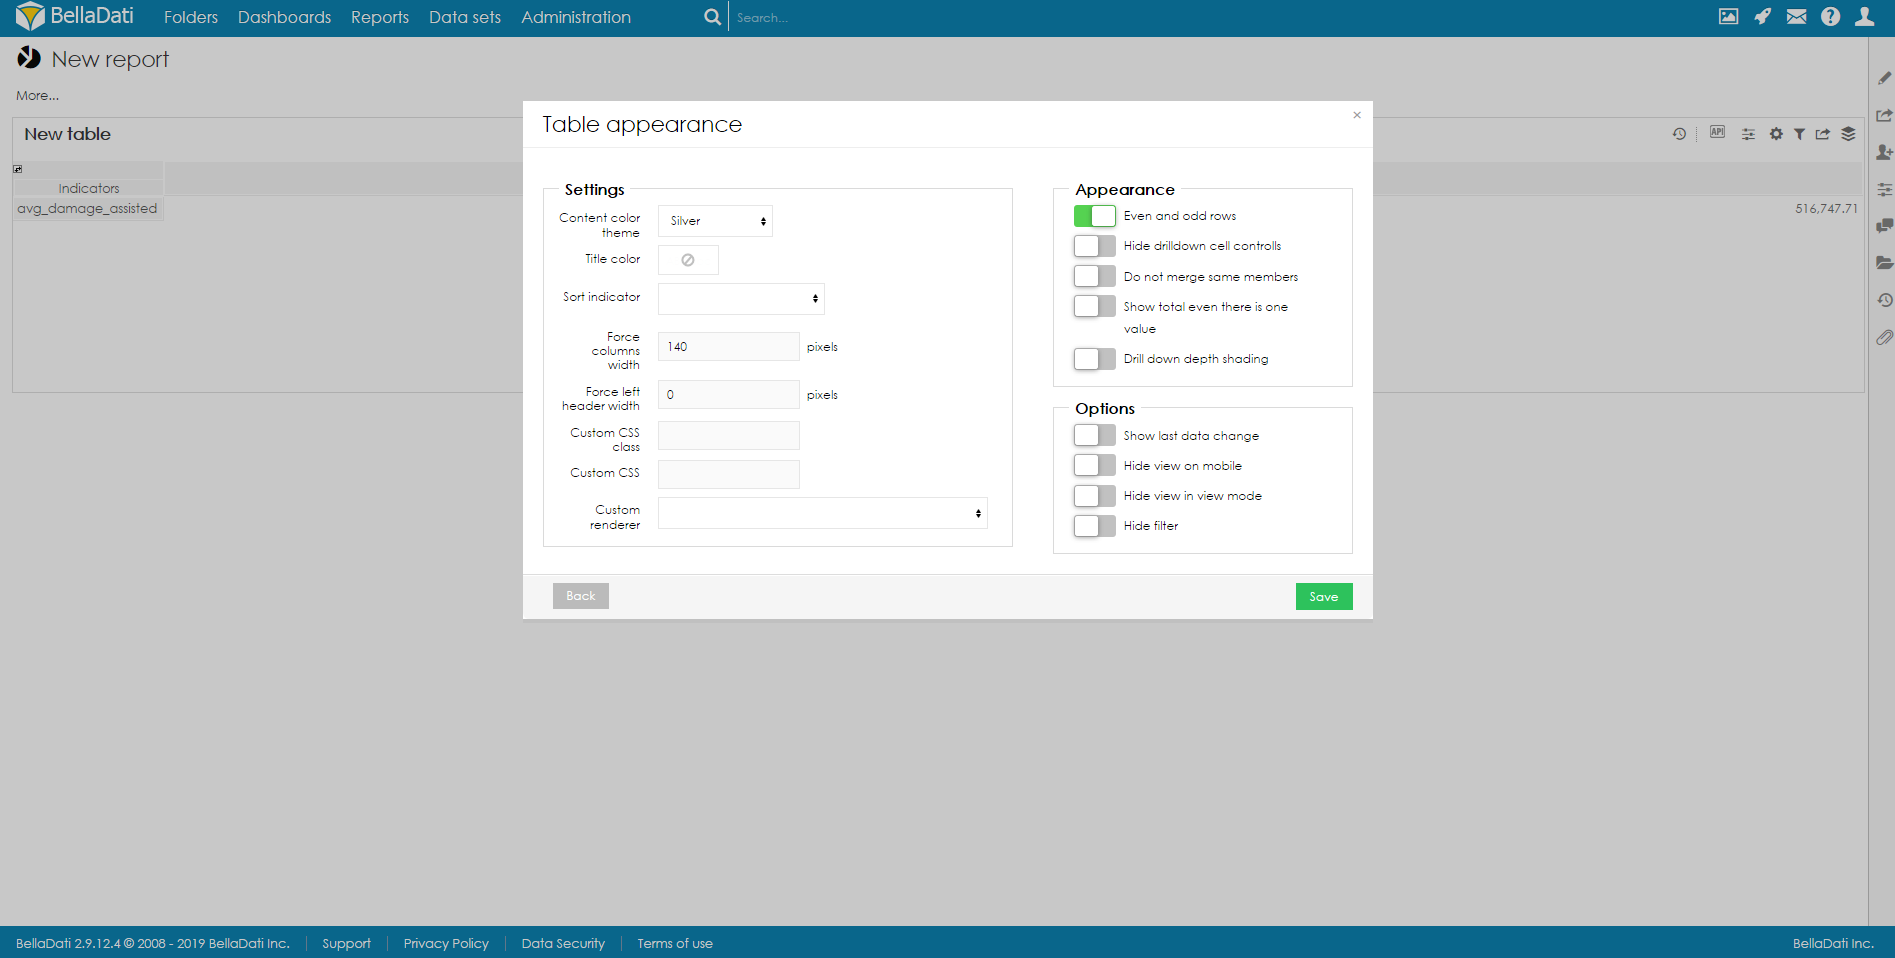
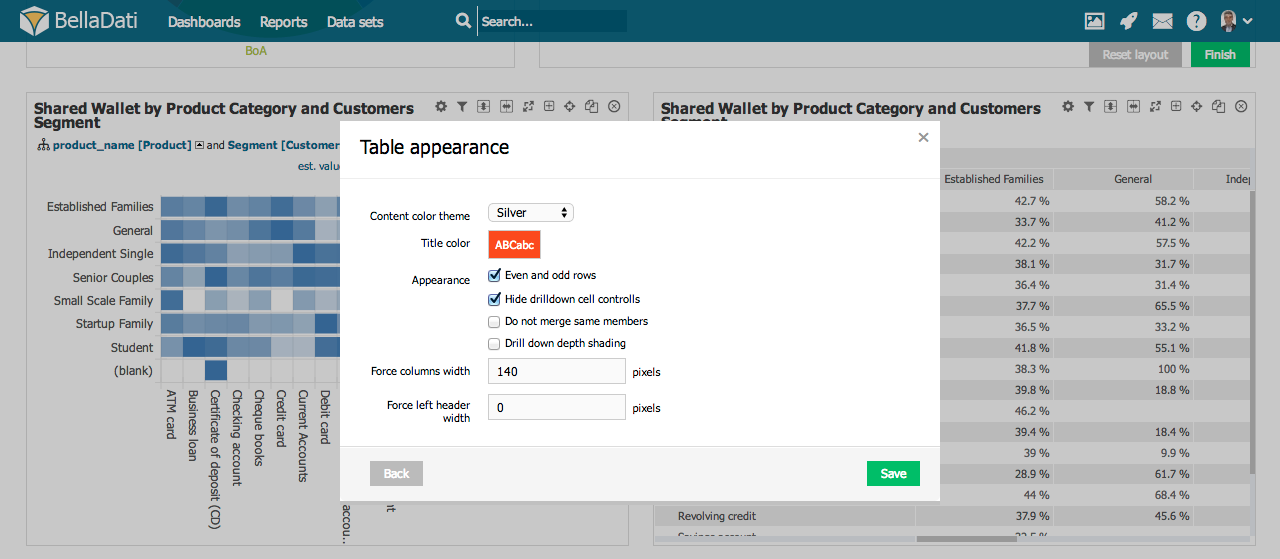
Table Appearance
You can access Table Appearance from the Table Settings dialog or the from toolbox drop down list.
Table Appearance dialog allows:
- Applying predefined Content color themes.
- Setting Title Color.
- Checking Even and odd rows differentiation.
- Hide drilldown cell controlls: Drill-down "+" signs will be disabled for all drill-downs in the table (useful for "static" item lists etc.).
- Selecting Drill down depth shading. When enabled, each drill-down level is highlighted with a different color shade.
- Force column width sets the width of each indicator column. In case the total width of the columns exceeds the width of the screen, a scrollbar is displayed. If the table has too much space, data columns will be wider to take up the remaining space.
- Force left header width allows the user to set the width of the whole drilll-down area when standard drill-down (not date or time) is used. When there are multiple drill-down attributes in the table, the width is applied to all of them together. In case the width of the columns exceeds the width set in the table appearance, a scrollbar is displayed.
- Set sort indicator and its aggregation.
- Using Custom renderer which is defined in a BellaDati extension (available since BellaDati 2.9.4). See Using Custom Table Renderer for more details.
| Tip |
|---|
Hover over Table Appearance in toolbox list to quickly apply Title Color. |
Displaying Source Data
See how it works.
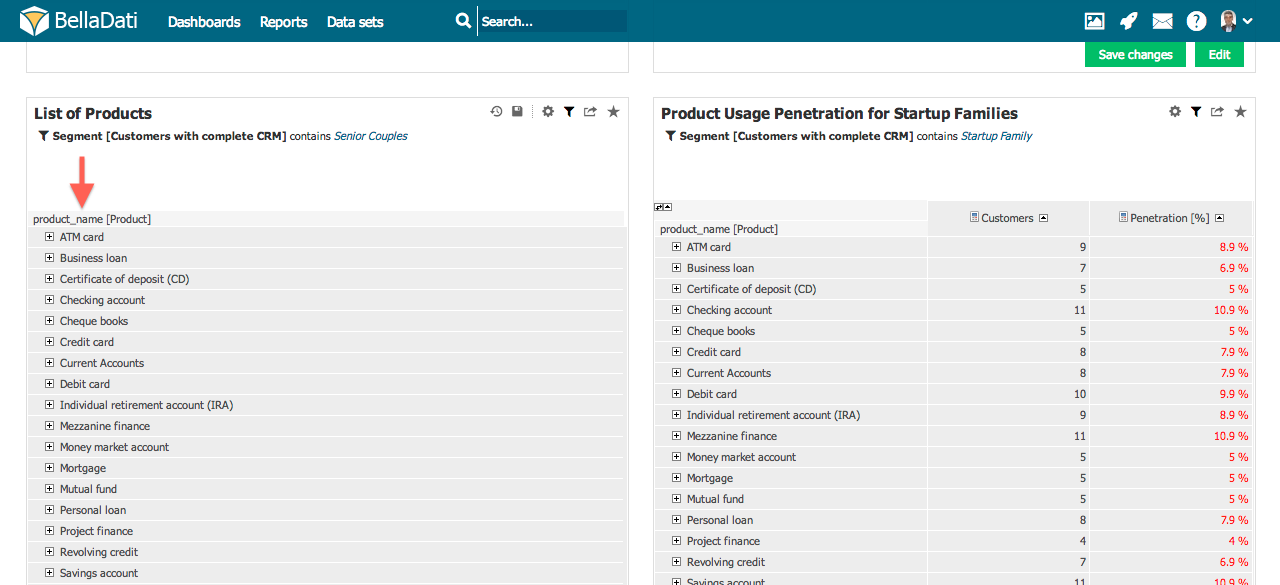
Static Lists
BellaDati allows you to list attribute members without any indicators in form of a static lists. In order to create static lists:
- Create new Table
- Select arbitrary Indicator.
- Choose desired Attributes.
- Remove Indicator from the table.
- Optionally hide drill-down controlls in Table Appearance.
- Optionally prevent BellaDati from merging same members in Table Appearance.
Setup export layout
To see how setup your own export layout (custom row height, column width, table header, data formatting or merged regions), proceed to separate page.
Next Steps | Related content | ||||||||
|---|---|---|---|---|---|---|---|---|---|
|
| Sv translation | ||||||||||
|---|---|---|---|---|---|---|---|---|---|---|
| ||||||||||
Pre pridanie novej Tabuľky, prejdite nad prázdnym miesto v reporte a vyberte Tabuľku ako nový pohľad. Zobrazí sa nové okno so základnými nastaveniami:
Potvrďte novú tabuľku kliknutím na zelené tlačidlo pridať. BellaDati Vás prevedie ďalšími nastaveniami.
Správa tabuľkyĎalšie operácie môžete vykonať z pravého rohu tabuľky:
Nastavenia tabuľkyKliknite na ikonu nástrojov a zo zoznamu vyberte Nastavenia tabuľky. Zobrazené okno ukazuje pozície Času, Ukazovateľov a Vetvenia na X a Y osy. BellaDati Vám umožňuje:
Správa vetveniaPrejdite myšou ponad hlavičku vetvenia pre zobrazenie menu nastavení. Toto menu Vám umožní:
|

| Info |
|---|
Vytvorené uzly môže byť zmazané v okne Vlastných hodnôt atribútu |
Vzhľad tabuľky
Nastavenia vzhľadu tabuľku sú dostupné v okne Nastavenia tabuľky alebo priamo z menu na hornej lište pohľadu.
Okno nastavení vzhľadu umožňuje:
- Aplikovať preddefinované farebné témy.
- Nastaviť farbu názvu.
- Zaškrtnúť rozdielne zobrazovanie párnych a nepárnych riadkov
- Skryť zobrazovanie možnosti vetvenia: Znak vetvenia "+" bude deaktivovaný pre všetky vetvenia v tabuľke (vhodné pre statické zoznamy)
- Vybrať spôsob zafarbenia hĺbky vetvenia
- Pevne nastaviť šírku stĺpca
- Pevne nastaviť šírku ľavej hlavičky
| Tip |
|---|
Pre rýchlo zmenu farby názvu prejdite myšou ponad ikonu "koliečka" a z menu vyberte požadovanú farbu. |
Zobrazenie zdrojových dát
Pozrite sa ako to funguje.
Statický zoznam
BellaDati Vám umožňuje vytvoriť zoznam atribútov bez akýchkoľvek ukazovateľov vo forme statického listu. Pre vytvorenie takéhoto zoznamu:
- Vytvorte tabuľku.
- Pri tvorbe vyberte ľubovoľný ukazovateľ.
- Vyberte požadované atribúty.
- Z tabuľky odstráňte ukazovateľ.
- V nastaveniach vzhľadu tabuľky je taktiež možné nastaviť skrytie ovládania vetvenia.
- Ďalej je možné pomocou nastavenia vo vzhľade tabuľky zabrániť BellaDati aby automaticky spájala totožné hodnoty.
Kam ďalej
...
Overview
Content Tools