Page History
| Sv translation | ||||
|---|---|---|---|---|
| ||||
When data reaches selected condition, data-driven notification automatically sends an email or push notification to the people you specify. You can set data-driven notifications in the data sets.
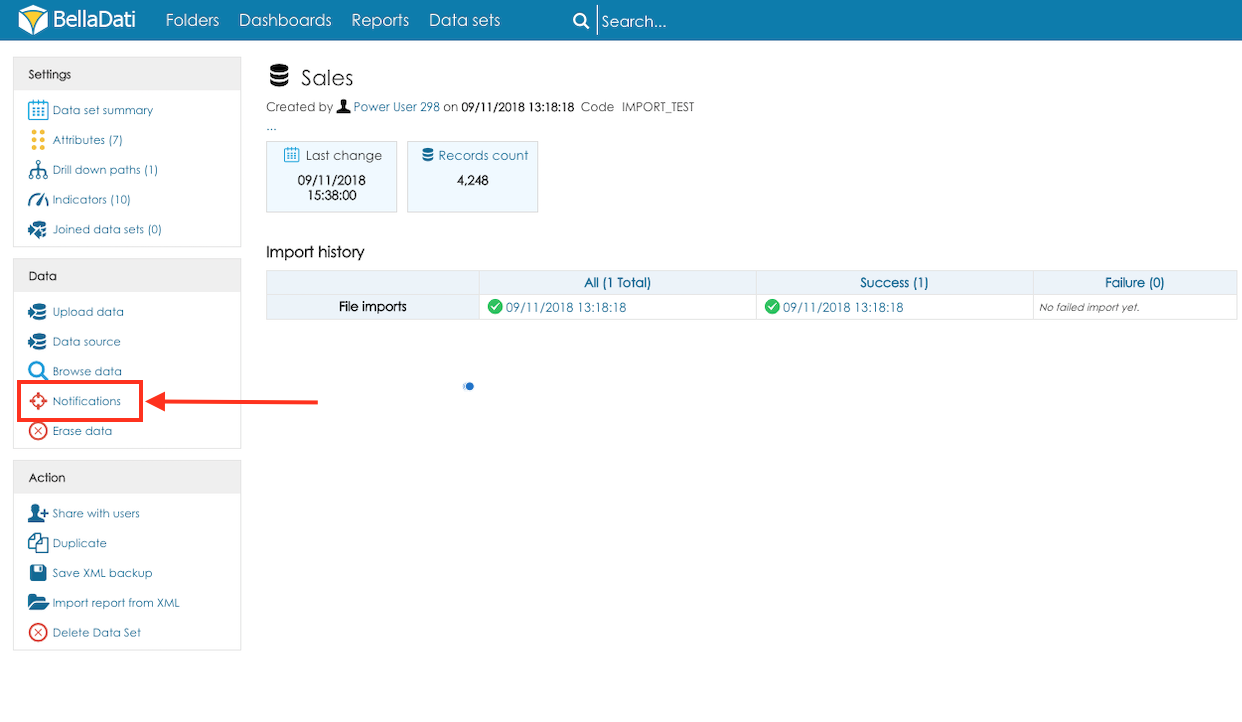
Creating notificationNotifications can be created from the data set details. Click the option Notification in the section Data to create new notification and list existing notifications from the selected data set.
Click the button New notification to open the Notification wizard.
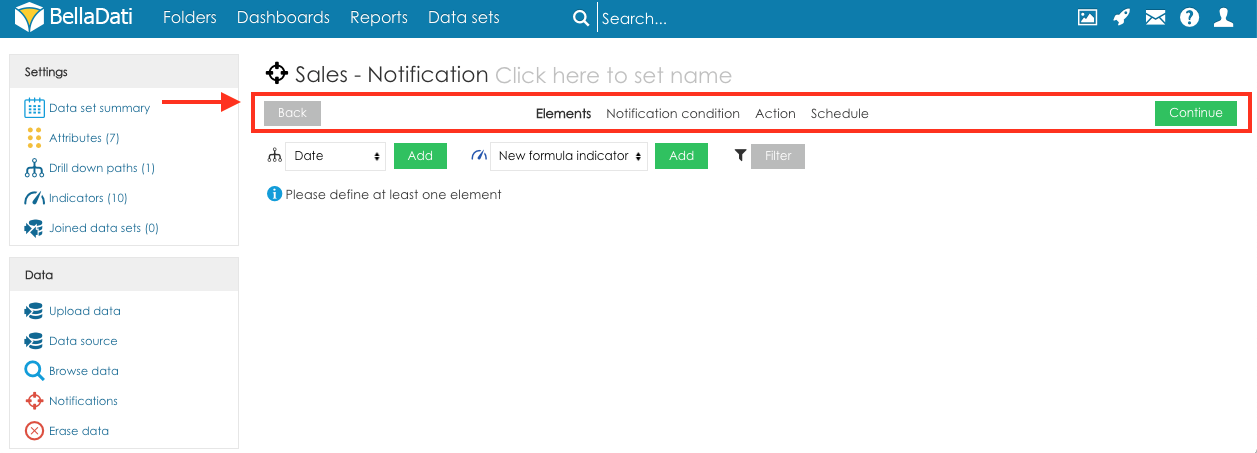
The notification wizard will guide you through the steps required for creating a new notification. Each step is displayed as a separate tab. Use the navigation at the top of the screen to navigate in the notification wizard:
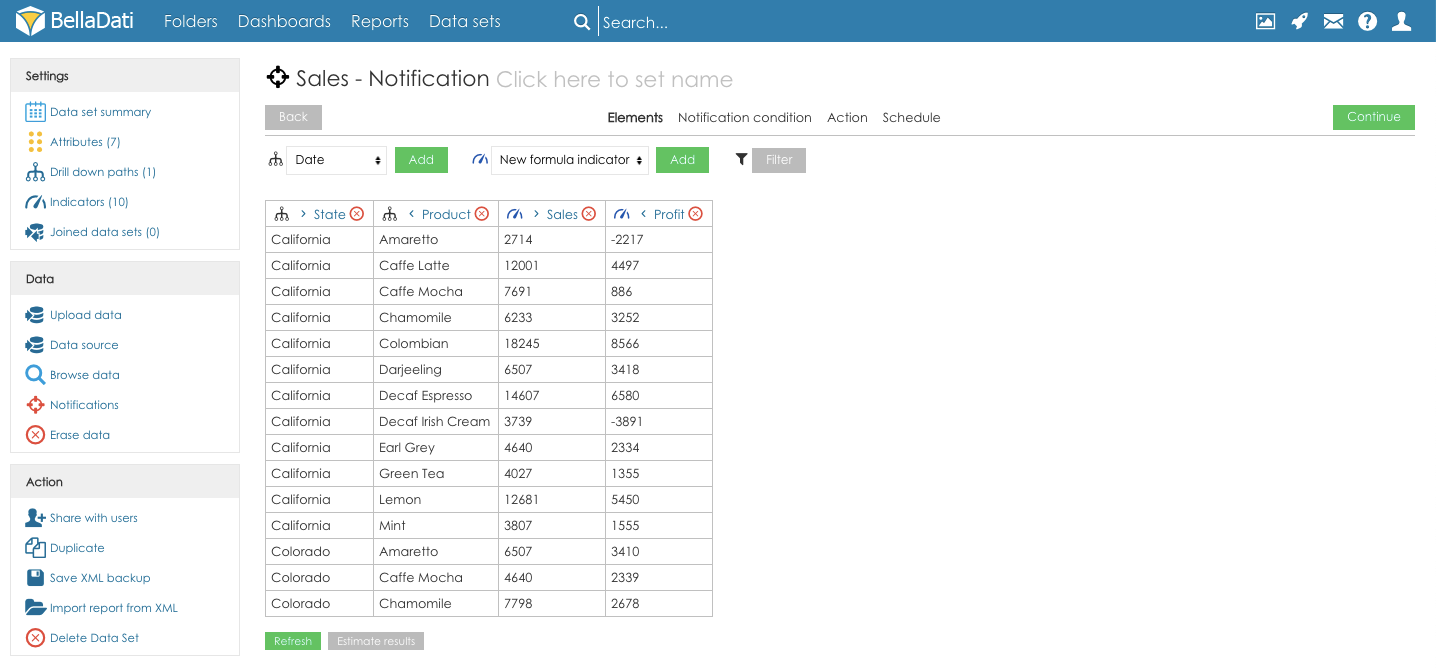
1. ElementsThe elements are columns which will be used for the evaluation of the designated condition. The tab elements is used to select the columns will be used for the evaluation of the designated condition. You can add attributes, indicators, formula indicators or filters. Attributes define the aggregation of the condition. For example, if the user selects column Country, the data will be aggregated for each country (one row = one country). The condition will be checked for every country. Users can also create formula indicators (the process is the same as when creating formula indicators in the report). The preview of the table which will be used for the evaluation of the condition is displayed below the panel for adding the elements. Please note that the preview is built on the data sample only, which means that it can be empty, although some data will be validated. It is possible to change the order of the attributes and dates by using the arrows displayed next to the names of the columns in the header of the preview.
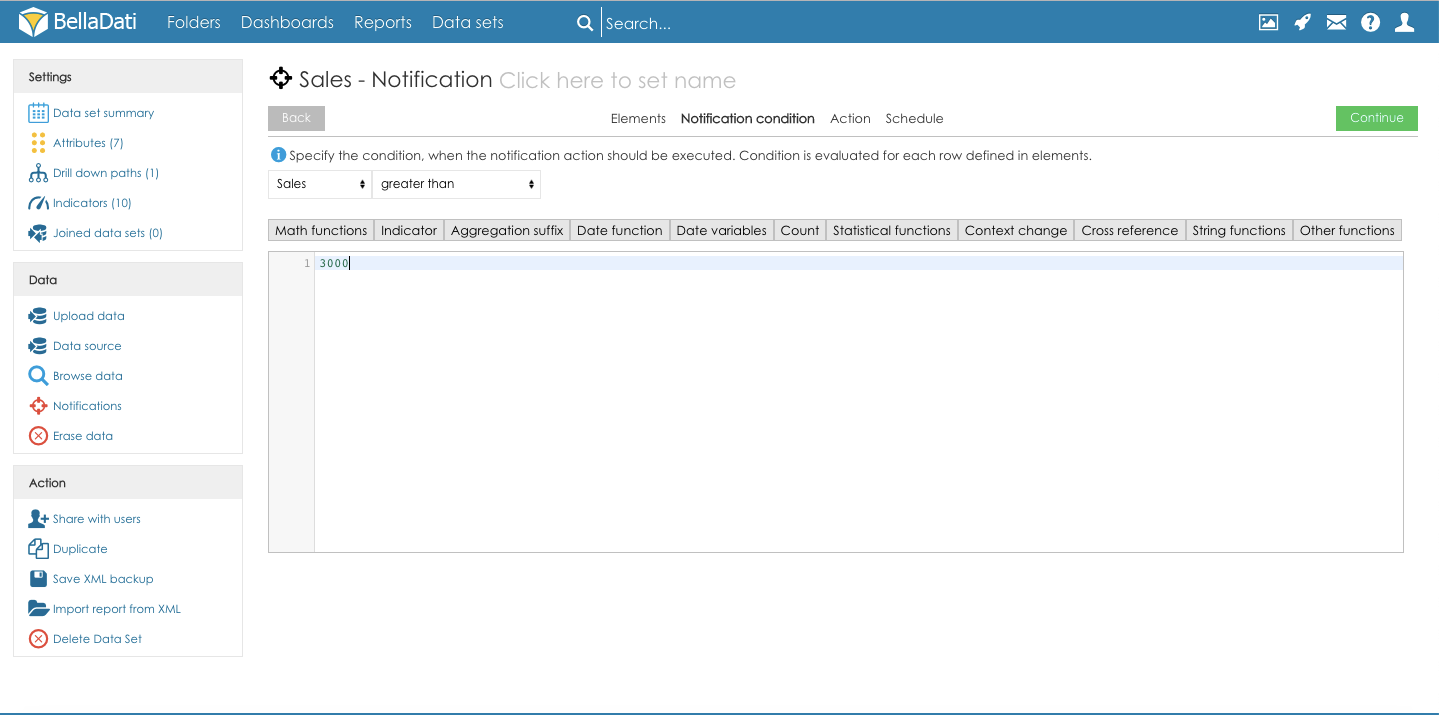
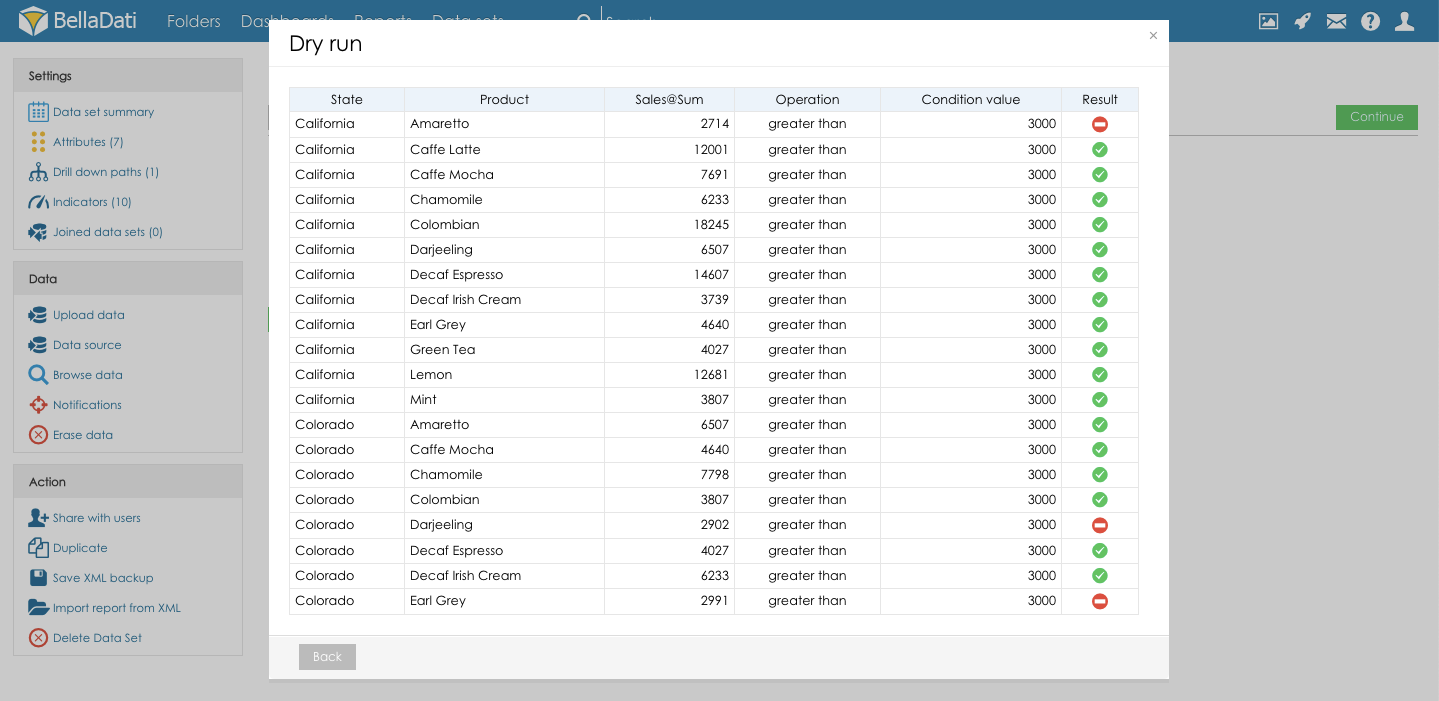
Click the button Continue to proceed to the next step of the Notification configuration: 2. Notifications conditionThe condition defined on the tab Notification condition will be used for the notification evaluation. Elements available for the condition evaluation:
The value can be compared against a static value or formula. The condition is evaluated for each row defined on the tab Elements
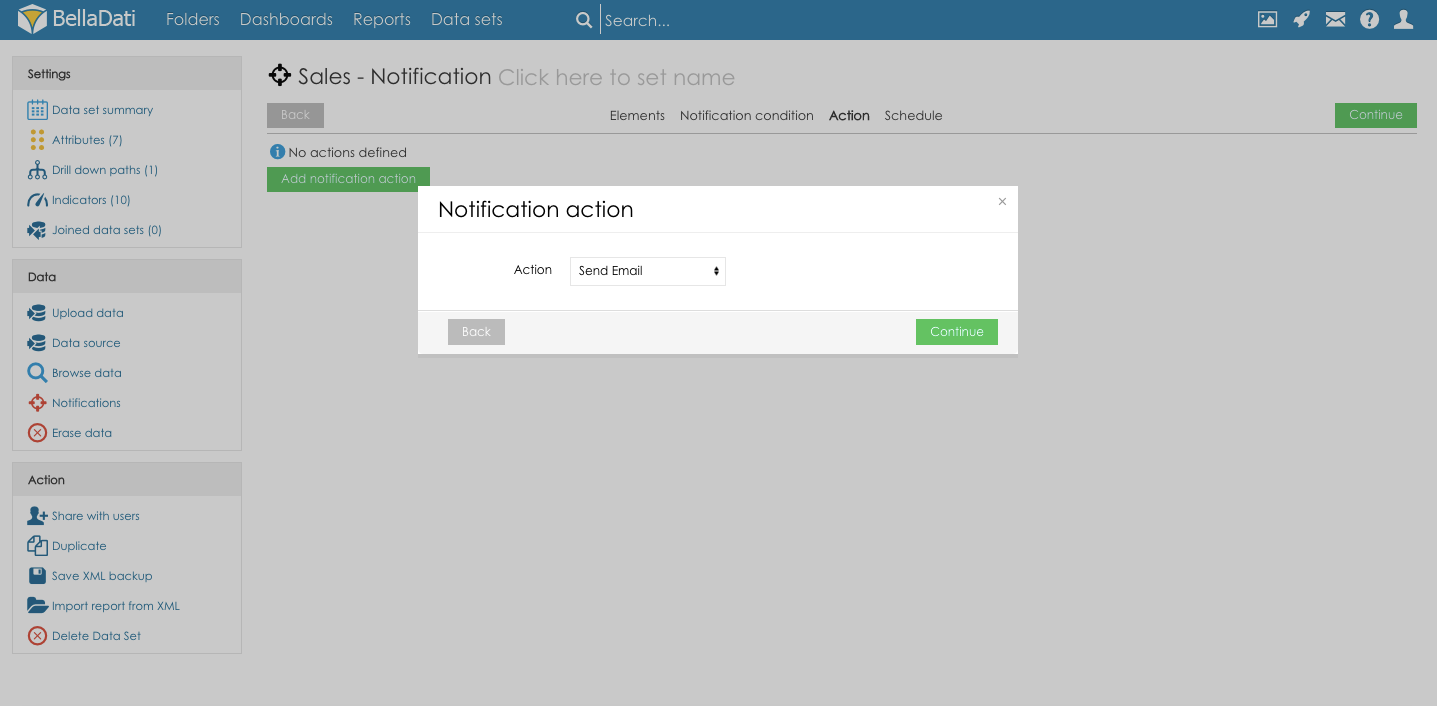
Click the button Continue to proceed to the next step of the Notification configuration: 3. ActionSelected action will be used to send the notification in case the Notification condition is met.
4. ScheduleThe notification schedule defines the date interval in which the notification will be executed. Following options are available:
Click the button Continue to schedule the notification. Managing notificationsNotifications associated with the selected data setNotifications associated with the data set can be accessed from the data set details. Click the option Notification in the section Data to create new notification and list existing notifications from the selected data set.
The notifications overview provides the details of the notification and the following actions:
All notificationsAll the notifications can be managed from the screen Data sets - click the action Notifications to open the list of all the Notifications.
Screen Notifications provides details about:
|


| Sv translation | ||||
|---|---|---|---|---|
| ||||
Wenn die Daten den ausgewählten Zustand erreichen, sendet die datengesteuerte Benachrichtigung automatisch eine E-Mail oder Push-Benachrichtigung an die von Ihnen angegebenen Personen. In den Datensätzen können Sie datengesteuerte Benachrichtigungen einstellen.
Benachrichtigung anlegenAus den Datensatzdetails können Benachrichtigungen erstellt werden. Klicken Sie im Abschnitt Daten auf die Option Benachrichtigung, um eine neue Benachrichtigung zu erstellen und bestehende Benachrichtigungen aus dem ausgewählten Datensatz aufzulisten.
Klicken Sie auf die Schaltfläche Neue Benachrichtigung, um den Benachrichtigungsassistenten zu öffnen.
Der Benachrichtigungsassistent führt Sie durch die Schritte, die zum Erstellen einer neuen Benachrichtigung erforderlich sind. Jeder Schritt wird als separate Registerkarte angezeigt. Verwenden Sie die Navigation oben auf dem Bildschirm, um im Benachrichtigungsassistenten zu navigieren:
1. ElementeDie Elemente sind Spalten, die für die Bewertung der vorgesehenen Bedingung verwendet werden. Das Tab-Element dient zur Auswahl der Spalten, die für die Auswertung der vorgesehenen Bedingung verwendet werden. Sie können Attribute, Kennzeichen, Formelkennzeichen oder Filter hinzufügen. Attribute definieren die Aggregation der Bedingung. Wenn der Benutzer beispielsweise die Spalte Land auswählt, werden die Daten für jedes Land zusammengefasst (eine Zeile = ein Land). Die Bedingung wird für jedes Land überprüft. Benutzer können auch Formelkennzeichen anlegen (der Prozess ist derselbe wie beim Anlegen von Formelkennzeichen im Bericht). Die Vorschau der Tabelle, die für die Bewertung der Bedingung verwendet wird, wird unterhalb des Fensters zum Hinzufügen der Elemente angezeigt. Bitte beachten Sie, dass die Vorschau nur auf der Datenprobe basiert, d.h. sie kann leer sein, obwohl einige Daten validiert werden. Es ist möglich, die Reihenfolge der Attribute und Daten zu ändern, indem Sie die Pfeile verwenden, die neben den Namen der Spalten im Kopf der Vorschau angezeigt werden.
Klicken Sie auf die Schaltfläche Weiter, um mit dem nächsten Schritt der Konfiguration der Benachrichtigung fortzufahren: 2. BenachrichtigungsbedingungDie auf der Registerkarte Benachrichtigungsbedingung definierte Bedingung wird für die Auswertung der Benachrichtigung verwendet. Elemente, die für die Zustandsbewertung zur Verfügung stehen:
Klicken Sie auf die Schaltfläche Weiter, um mit dem nächsten Schritt der Konfiguration der Benachrichtigung fortzufahren: 3. AktionDie ausgewählte Aktion wird verwendet, um die Benachrichtigung zu senden, falls die Benachrichtigungsbedingung erfüllt ist.
4. ZeitplanDer Benachrichtigungsplan definiert das Datum, in dem die Benachrichtigung ausgeführt wird. Folgende Optionen sind verfügbar:
Klicken Sie auf die Schaltfläche Fortfahren, um die Benachrichtigung zu planen. Verwaltung von BenachrichtigungenBenachrichtigungen, die dem ausgewählten Datensatz zugeordnet sindBenachrichtigungen, die dem Datensatz zugeordnet sind, können über die Datensatzdetails abgerufen werden. Klicken Sie im Abschnitt Daten auf die Option Benachrichtigung, um eine neue Benachrichtigung zu erstellen und bestehende Benachrichtigungen aus dem ausgewählten Datensatz aufzulisten.
The notifications overview provides the details of the notification and the following actions:
Alle BenachrichtigungenAll the nAlle Benachrichtigungen können über den Bildschirm Datensätze verwaltet werden - klicken Sie auf die Aktion Benachrichtigungen, um die Liste aller Benachrichtigungen zu öffnen.
Bildschirm Benachrichtigungen enthält Details zu:
|
Overview
Content Tools