PrerequisitesThere are 2 or 3 servers available for BellaDati installation. The hardware configuration of all servers follows BellaDati system requirements. All servers are running Windows OS. BellaDati is installed on server No1, Server No2 will be used as an additional cluster node server. PostgreSQL database engine is installed on one of the servers or on a server No3. | Code Block |
|---|
| title | Example for the Cluster |
|---|
| Server No1: IP 172.31.11.239 names: belladati-main, EC2AMAZ-MF3ICV0
Server No2: IP 172.31.8.248 names: node1, EC2AMAZ-CJSA0TO
Server No3: not used in this example, the Database is installed locally with the BellaDati instance
All servers are in internal private network. |
The installation process consists of five blocks:1. Preparation of the Environment| Info |
|---|
Control Panel > User Accounts > Manage Accounts |
- Set up PATH to the glassfish bin directories (...glassfish5\bin and ...glassfish5\glassfish\bin) for belladati-main server
- Set up PATH to the pgsql bin for the database server PostgreSQL (e.g. C:\Program Files\BellaDati\pgsql\bin)
| Info |
|---|
Control Panel > System and Security > System > Advanced system setting > Environment Variables > System Variables > Path |
- Install Java on node1
- Set up PATH to the JAVA bin directories on the node1 (...JAVA\jrexxxx\bin and ...JAVA\jdkxxxx\bin)
| Info |
|---|
It is recommended to use the same version of Java on all servers in the cluster environment |
- Set up hosts tables on both servers
| Info |
|---|
The hosts file is located at C:\Windows\System32\drivers\etc\hosts |
| Code Block |
|---|
| title | Hosts file example for node1 |
|---|
| 127.0.0.1 node1
172.31.8.248 node1
172.31.8.248 EC2AMAZ-CJSA0TO
172.31.11.239 belladati-main
172.31.11.239 EC2AMAZ-MF3ICV0 |
- Set up Windows Firewall on both nodes (firewalls need to allow connection between all servers and installed components in the cluster)
| Info |
|---|
Go to Control Panel > System and Security > Windows Firewall > Advanced settings > Inbound Rules If you are in an internal network, enable "All traffic". |
- Enable access to the Database server from all nodes (belladati-main and node1)
| Info |
|---|
Check / Edit files pg_hba and postgresql to enabled connection from both nodes: - pg_hba: connections from both servers to the BellaDati database need to be enabled
| Code Block |
|---|
| title | pg_hba hosts example |
|---|
| host all all 0.0.0.0/0 md5
Note: because we are in the internal network, we have allowed access to all databases for all users from all IPs |
- postgresql: listen_addresses - define IP addresses to listen on
| Code Block |
|---|
| title | Listen_addresses example |
|---|
| listen_addresses = '*'
|

| Info |
|---|
It is recommended to test the connection to the BellaDati database (belladati_db) from both nodes. |
|
- Application Properties set up
| Info |
|---|
- the Application Properties are set up via application.properties file which is located at path_to_your_BellaDati_instance\domains\domain1\applications\belladati\WEB-INF\classes\conf\application.properties
- in case there are 2 servers in the cluster (e.g. belladati-main & node1), add the following code to application.properties file:
| Code Block |
|---|
application.actor.server.port=2335
tapestry.clustered-sessions=true
application.servers=belladati-main:2335,node1:2335 |
Note: servers can be identified by name or IP |
- Restart BellaDati Application Server
2. Configuration of SSH Communication | Info |
|---|
| SSH communication on Windows is configured via the Cygwin tool. |
- Download the Cygwin installer (setup-x86_64.exe) to both servers (Install from Internet > All users > Local package directory > Select packages (Select Net/openssh/8.Op1-2))
- Run the Cygwin 64 Terminal as Administrator (Cygwin64 terminal icon should be displayed on the Desktop)
Configure Cygwin hosts | Code Block |
|---|
1. Use command ssh-host-config
2. //Should StrictModes be used: yes
3. //Do you want to install sshd as a service: yes |
Start the Cygwin service | Code Block |
|---|
| title | Cygwin service start |
|---|
| User command net start cygsshd start |
Test the Cygwin status (test for all nodes in the cluster) | Code Block |
|---|
| $ cygrunsrv --query cygsshd
Response:
Service : cygsshd
Display name : CYGWIN cygsshd
Current State : Running
Controls Accepted : Stop
Command : /usr/sbin/sshd -D |
Add Cygwin path to the Environment Variables | Info |
|---|
Control Panel > System and Security > System > Advanced System Settings > tab Advanced > Environment variables > System variables - Path > Edit environment variable > New: C:\cygwin64\bin > OK |
Test SSH connection from Windows command line (example use windows user account "glassfish/password" ) | Info |
|---|
Node1: C:\Users\glassfish>ssh -l glassfish belladati-main glassfish@belladati-main's password: glassfish@EC2AMAZ-MF3ICV0 ~ user glassfish can operate on node1 server via ssh communication
belladati-main: C:\Users\glassfish>ssh -l glassfish node1 glassfish@node1's password: glassfish@EC2AMAZ-CJSA0TO ~ user glassfish is ssh connected from node1 to belladati-main and can use the server |
Test Java commands from Windows command line | Info |
|---|
Use the following commands: - belladati-main: ssh node1 'java -version' , ssh node1 'jar' - node1: ssh belladati-main 'java -version', ssh belladati-main 'jar' | Code Block |
|---|
| title | Java Commands Test Example |
|---|
| C:\Users\glassfish>ssh node1 'java -version'
glassfish@node1's password:
java version "1.8.0_201"
Java(TM) SE Runtime Environment (build 1.8.0_201-b09)
Java HotSpot(TM) 64-Bit Server VM (build 25.201-b09, mixed mode)
|
|
Make installation directory on node1 (Cygwin Terminal) | Code Block |
|---|
| title | node1 installation directory |
|---|
| glassfish@EC2AMAZ-CJSA0TO ~
$ pwd
/home/glassfish
glassfish@EC2AMAZ-CJSA0TO ~
$ mkdir /home/glassfish/glassfish
$ ls
C: glassfish
cd glassfish
glassfish@EC2AMAZ-CJSA0TO ~/glassfish |
- Both cluster servers are now ready for the two node cluster installation
3. Cluster Installation| Info |
|---|
Server: belladati-main. Windows command prompt. User: glassfish. Tool : asadmin (GlassfFish server administration). |
Verify that asadmin is configured on belladati-main server | Code Block |
|---|
| C:\Users\glassfish> asadmin version
RESPONSE: Version = GlassFish Server Open Source Edition 5.0.1 (build 5) |
Create password alias | Code Block |
|---|
| title | Password Alias Configuration |
|---|
| C:\Users\glassfish\asadmin create-password-alias password
The password is the name of the alias, the password itself is the user glassfish password
Use notepad create text file C:\Users\glassfish\password.txt with one line:
AS_ADMIN-SSHPASSWORD=${ALIAS=password}
C:\Users\glassfish\asadmin list-password-aliases lists the aliases |
- Create node
Create SSH node named "node1" on the server node1 | Code Block |
|---|
C:\Users\glassfish\asadmin  create-node-ssh
                            --nodehost node1  --installdir /home/glassfish/glassfish --install=true
--sshuser glassfish --passwordfile c:\Users\glassfish\password.txt node1 |
Test node1 visibility | Code Block |
|---|
| C:\Users\glassfish\asadmin list-nodes-ssh
RESPONSE: node1 SSH node1
C:\Users\glassfish\asadmin ping-node-ssh node1
RESPONSE: Successfully made SSH connection to node node1(node1) |
Create cluster | Code Block |
|---|
C:\Users\glassfish\asadmin create-cluster belladati-cluster |
Create an instance named instance-node1 | Code Block |
|---|
| C:\Users\glassfish\asadmin create-instance
--node node1 --cluster belladati-cluster instance-node1
Port associated to the newly created JVM instance: 26666,28080,24848,28686,23700,29009,23820,23920,28181
To test instance visibility: C:\Users\glassfish\asadmin list-instances belladati-cluster |
Create the second instance of the cluster | Code Block |
|---|
| title | Creating second instance of the cluster |
|---|
| C:\Users\glassfish\asadmin create-local-instance --cluster belladati-cluster instance-local-node
To test instances visibility C:\Users\glassfish\asadmin list-instances belladati-cluster |
4. Cluster Setup & Start| Info |
|---|
Parameters of the Cluster can be accessed via Admin Console of Domain Admin Server (Configurations/default-config and Configurations/belladati-cluster-config) |
Preparation of the environment for cluster: Create resource references (Database) | Code Block |
|---|
| title | Database - Create Resource References |
|---|
| C:\Users\glassfish\asadmin create-resource-ref --target belladati-cluster jdbc/belladati_db
Check the resource references: ...\asadmin list-resource-refs belladati-cluster |
Create application references (BellaDati application) | Code Block |
|---|
| title | BellaDati Application References |
|---|
| C:\Users\glassfish\asadmin create-application-ref --target belladati-cluster belladati
Check the application references: ...\asadmin list-application-refs belladati-cluster |
Modify JVM parameters (-Xmx (heap space size) | Info |
|---|
The heap space size should be configured according to the BellaDati recommendation. See the Recommended JVM Options. | Code Block |
|---|
1. List JVM Options
C:\Users\glassfish\asadmin list-jvm-options --target belladati-cluster

2. Delete the default -Xmx value
C:\Users\glassfish\asadmin delete-jvm-options --target belladati-cluster -Xmx.....

3. Create a new -Xmx value (e.g. -Xmx5120m (5120 MB))
C:\Users\glassfish\asadmin create-jvm-options --target belladati-cluster -XmxNNNNNew |
|
- Modify thread pools settings (http-thread-pool & http-thread-pool-1)
List names of BellaDati Cluster configuration | Code Block |
|---|
C:\Users\glassfish\asadmin list-configs belladati-cluster |
List thread pools | Code Block |
|---|
C:\Users\glassfish>asadmin list belladati-cluster-config.thread-pools.*
belladati-cluster-config.thread-pools
belladati-cluster-config.thread-pools.thread-pool.admin-thread-pool
belladati-cluster-config.thread-pools.thread-pool.http-thread-pool
belladati-cluster-config.thread-pools.thread-pool.thread-pool-1 |
Get information about pools parameters | Code Block |
|---|
C:\Users\glassfish>asadmin get belladati-cluster-config.thread-pools.thread-pool.thread-pool-1*
belladati-cluster-config.thread-pools.thread-pool.thread-pool-1.classname=org.glassfish.grizzly.threadpool.GrizzlyExecutorService
belladati-cluster-config.thread-pools.thread-pool.thread-pool-1.idle-thread-timeout-seconds=900
belladati-cluster-config.thread-pools.thread-pool.thread-pool-1.max-queue-size=4096
belladati-cluster-config.thread-pools.thread-pool.thread-pool-1.max-thread-pool-size=400
belladati-cluster-config.thread-pools.thread-pool.thread-pool-1.min-thread-pool-size=5
belladati-cluster-config.thread-pools.thread-pool.thread-pool-1.name=thread-pool-1 |
Set max thread pool size | Info |
|---|
See the recommended thread pool size values in the documentation for Installing BellaDati on GlassFishPayara. | Code Block |
|---|
| title | Setting max thread pool size |
|---|
| C:\Users\glassfish>asadmin set belladati-cluster-config.thread-pools.thread-pool.http-thread-pool.max-thread-pool-size=512
C:\Users\glassfish>asadmin set belladati-cluster-config.thread-pools.thread-pool.thread-pool-1.max-thread-pool-size=512 |
|
Restart Application Server | Code Block |
|---|
C:\Users\glassfish\asadmin restart-domain |
Start Cluster | Code Block |
|---|
C:\Users\glassfish>asadmin start-cluster --verbose belladati-cluster
start-instance instance-node1
start-instance instance-local-node

Note: make sure that all the commands are executed successfully, cluster and all instances are running. Following commands can be used:

Checking cluster status:
C:\Users\glassfish>asadmin list-clusters

Checking status of instances:
C:\Users\glassfish>asadmin list-instances belladati-cluster |
5. BellaDati Application SettingsYou can now login to BellaDati running on both servers. Use a new port for accessing your BellaDati instance: e.g. localhost:28080/login instead of localhost:8080/login | Info |
|---|
| Cluster settings require a dedicated license key which needs to be applied on both nodes. Contact BellaDati support for obtaining a license key with this option enabled. |
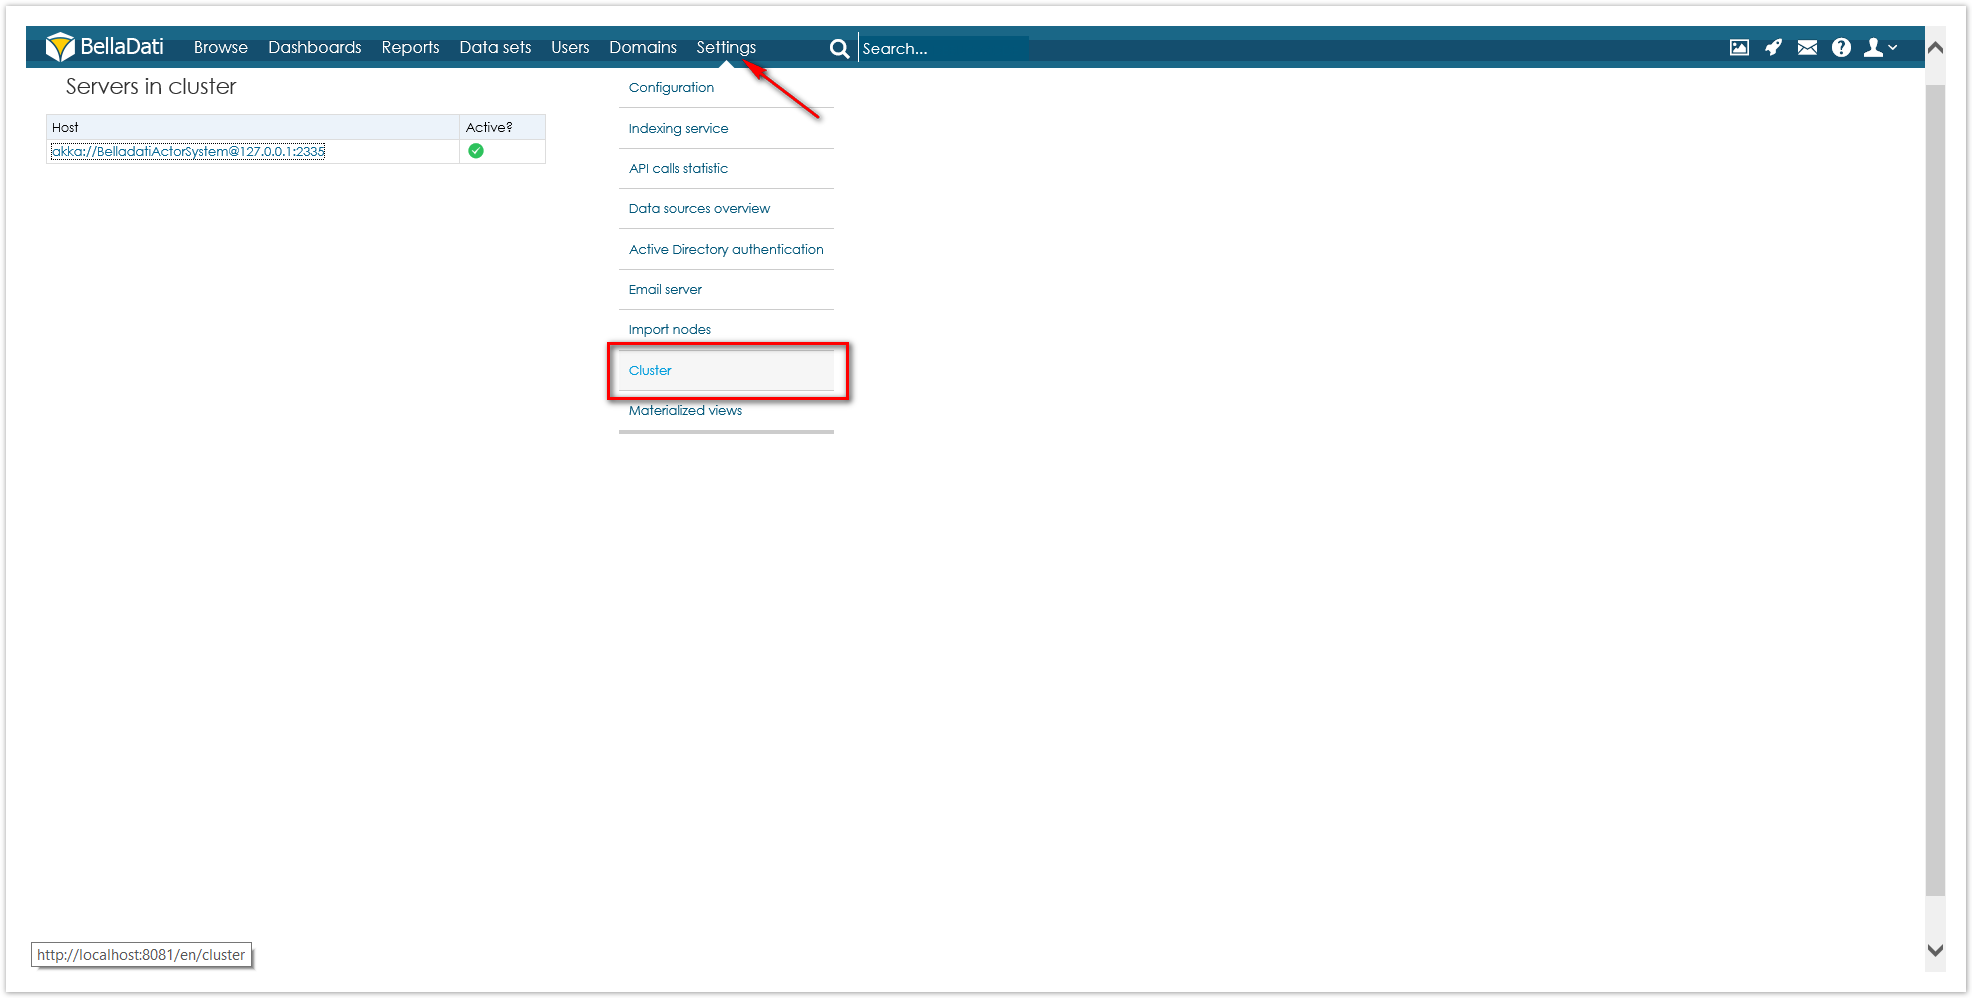
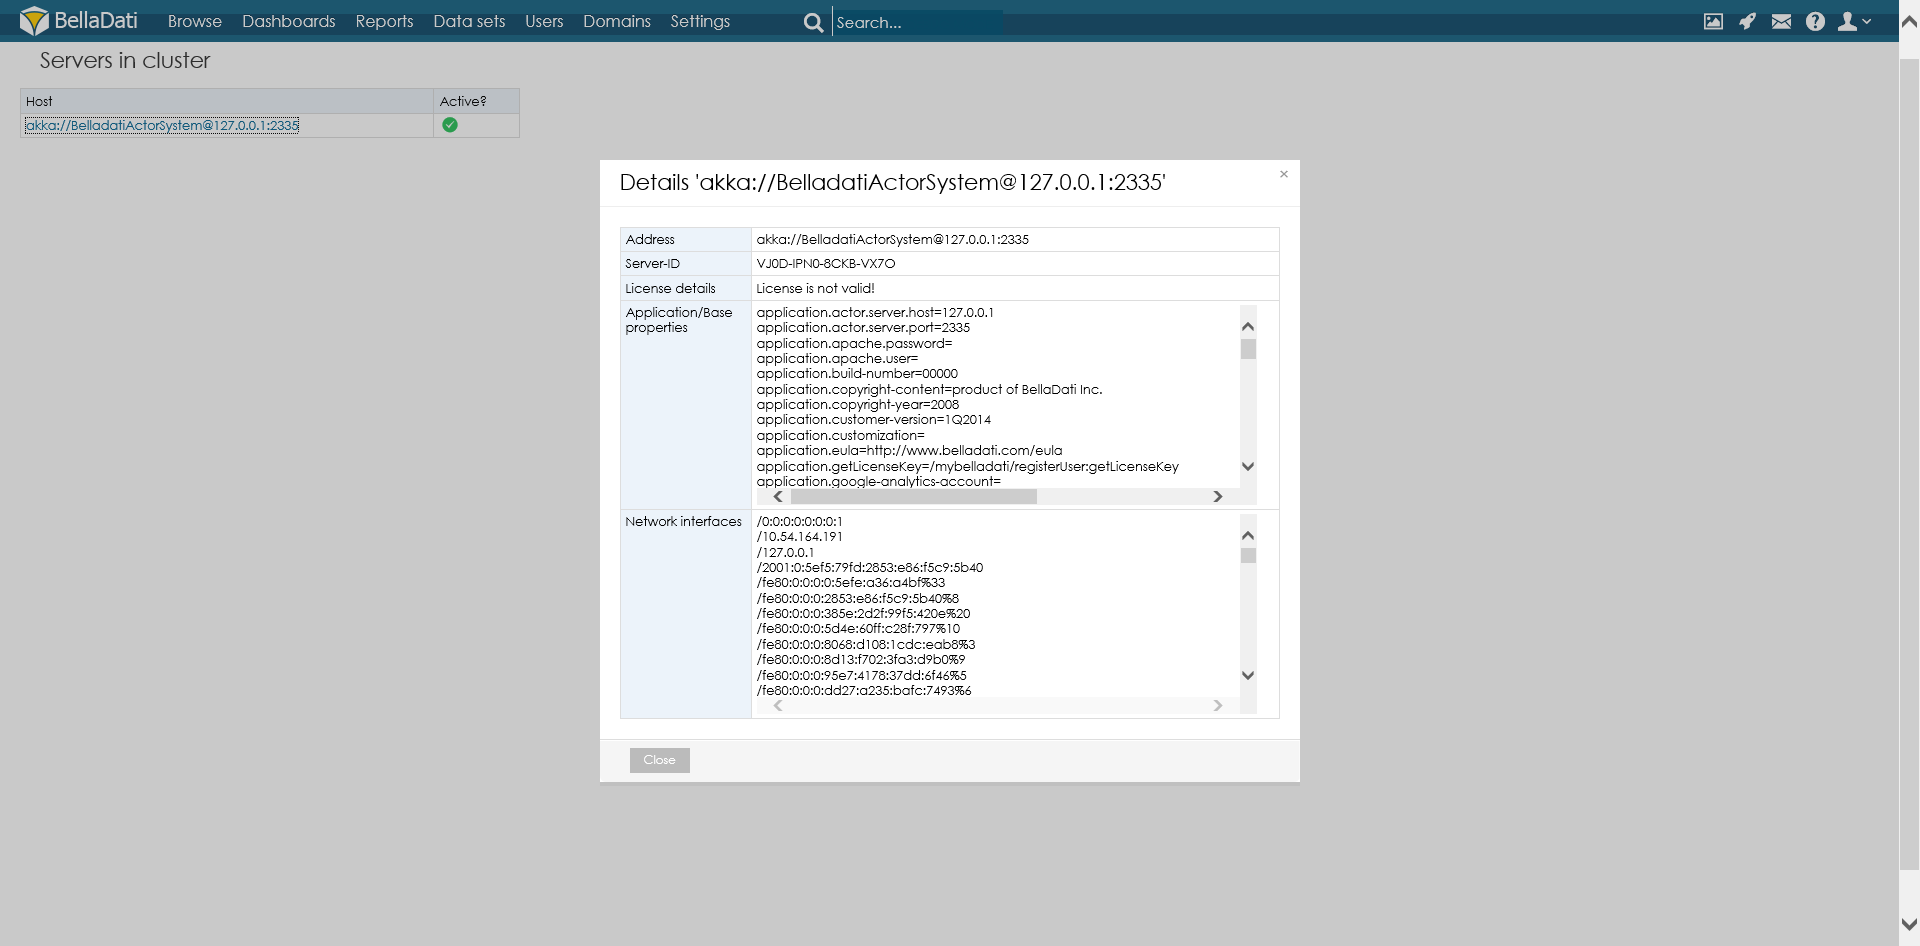
Monitoring servers in the cluster can be done via a dedicated BellaDati screen Cluster: e.g. localhost:28080/cluster Accessing the Cluster screen via the BellaDati Administration: Administration > Monitoring > Cluster (all nodes in the cluster are displayed) |