To be able to use this function, Remote storage has to be enabled by the license key.
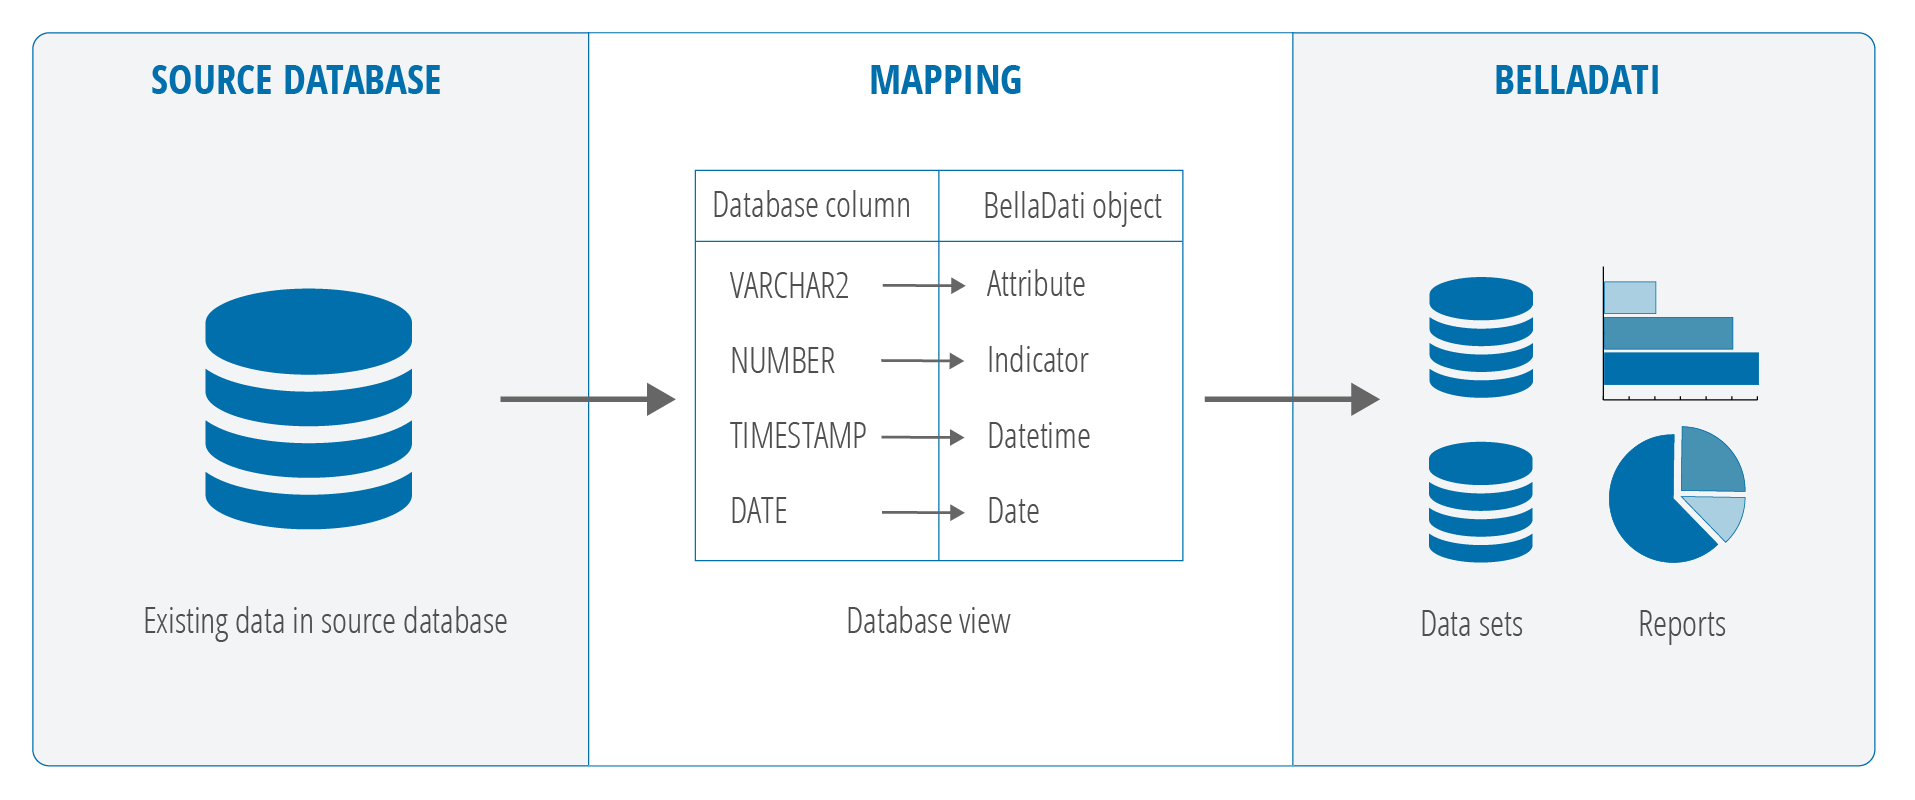
Remote data table mapping enables to store data in a remote database instead of the database used by BellaDati. In that case, data are stored only in the source database and the mapping between BellaDati and the source database table is done by a intermediate database view located on the remote storage. Currently, PostgreSQL and Oracle Database is supported.
Usage
To use Remote data table mapping, following prerequisites are required:
- Remote storage enabled
- Existing data set located on the remote storage with already configured structure (attributes and indicators). Once the remote mapping is set, it is not possible to add, edit or delete the attributes and indicators.
- For Oracle Database, it is necessary to modify the database access rights - see Remote storage. For remote data table mapping, additionall privileges has to be assigned to te user which is used for connecting to the database:
GRANT CREATE ANY VIEW TO NAME_OF_THE_USER;
GRANT SELECT ON sys.dba_tab_columns to NAME_OF_THE_USER;
Please note that the last query has to be executed by user with the sysdba role, e.g. via SQL Plus.
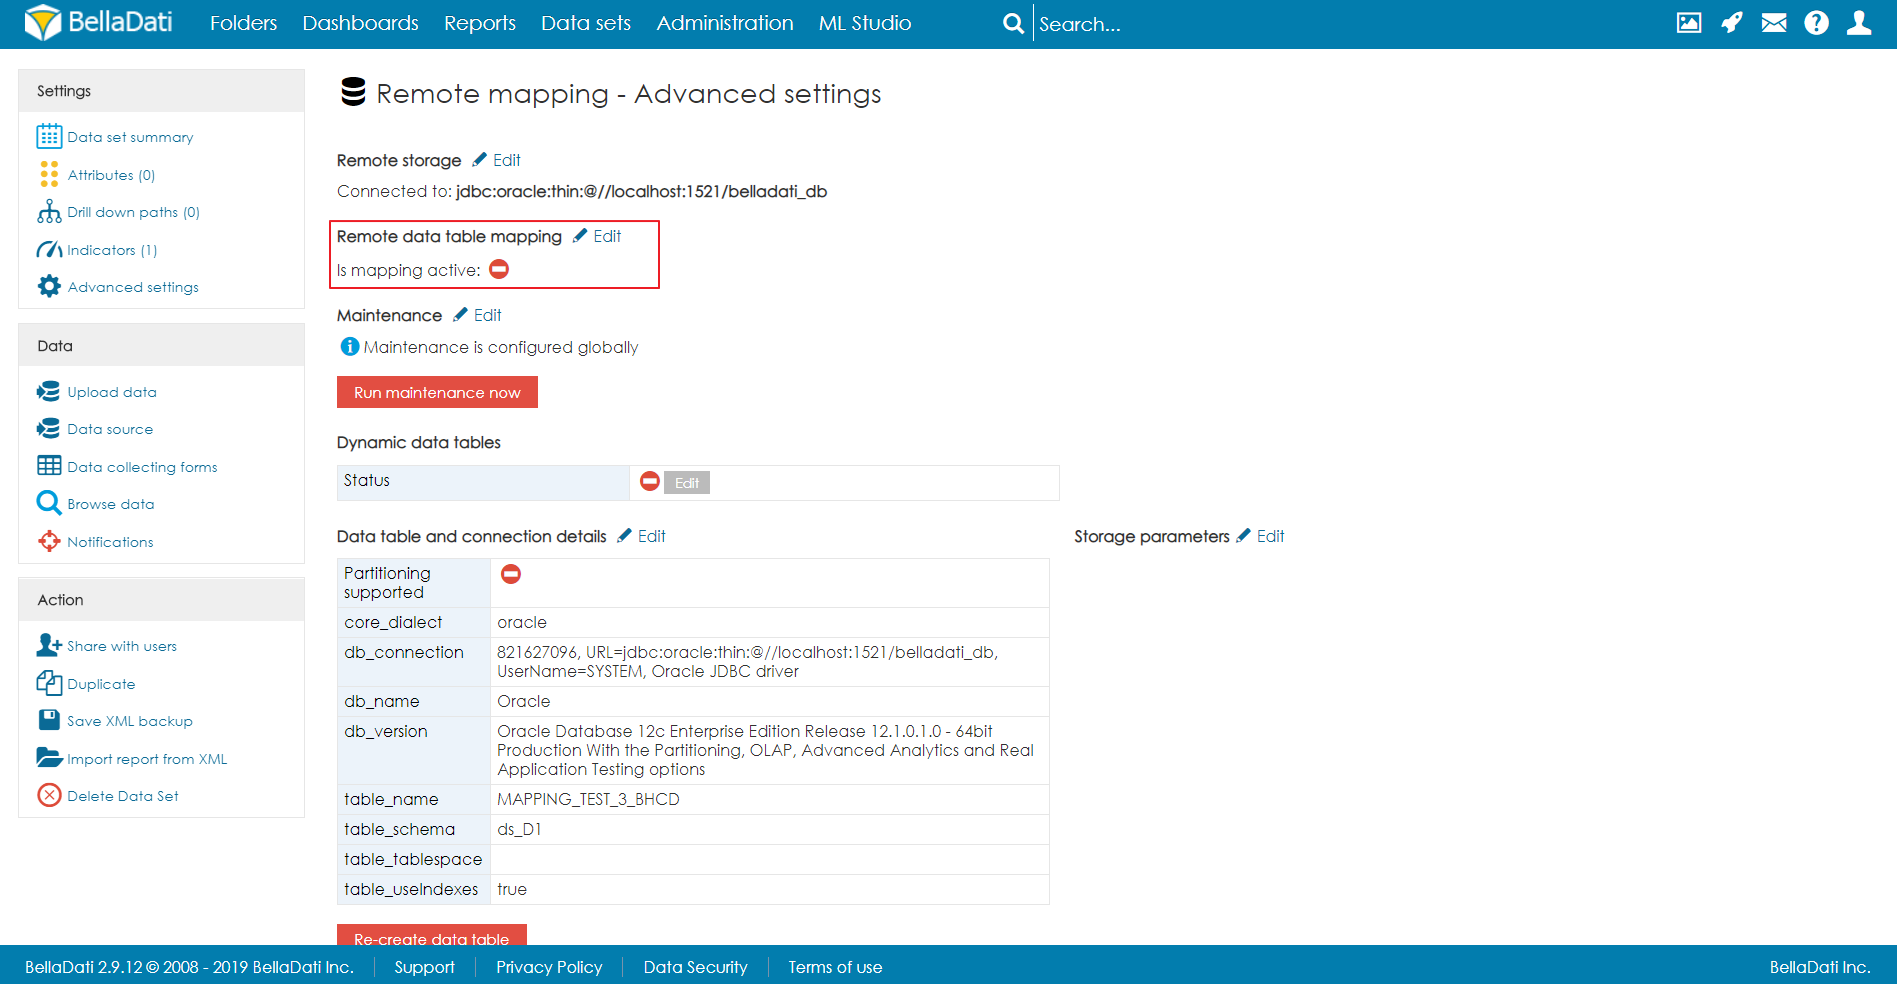
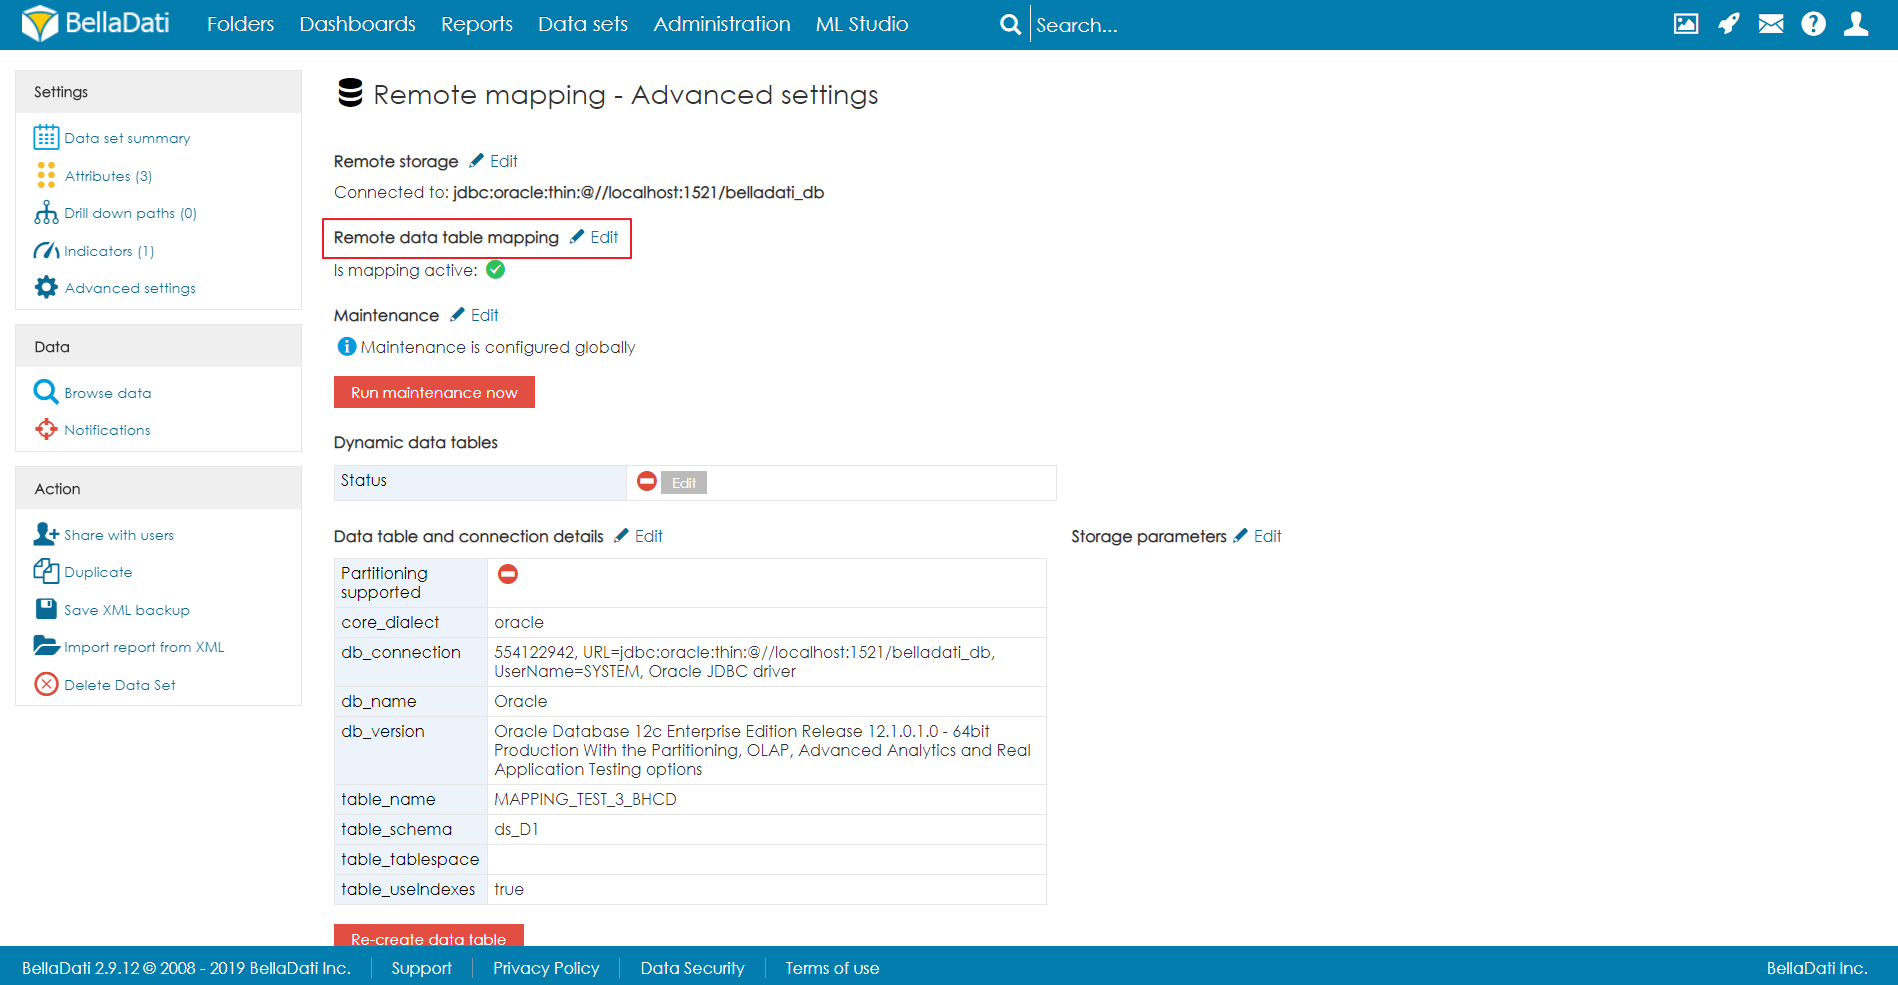
The Remote data table mapping is set in the Advanced settings of the data set. If all prerequisites are met, an option to configure the mapping is displayed.
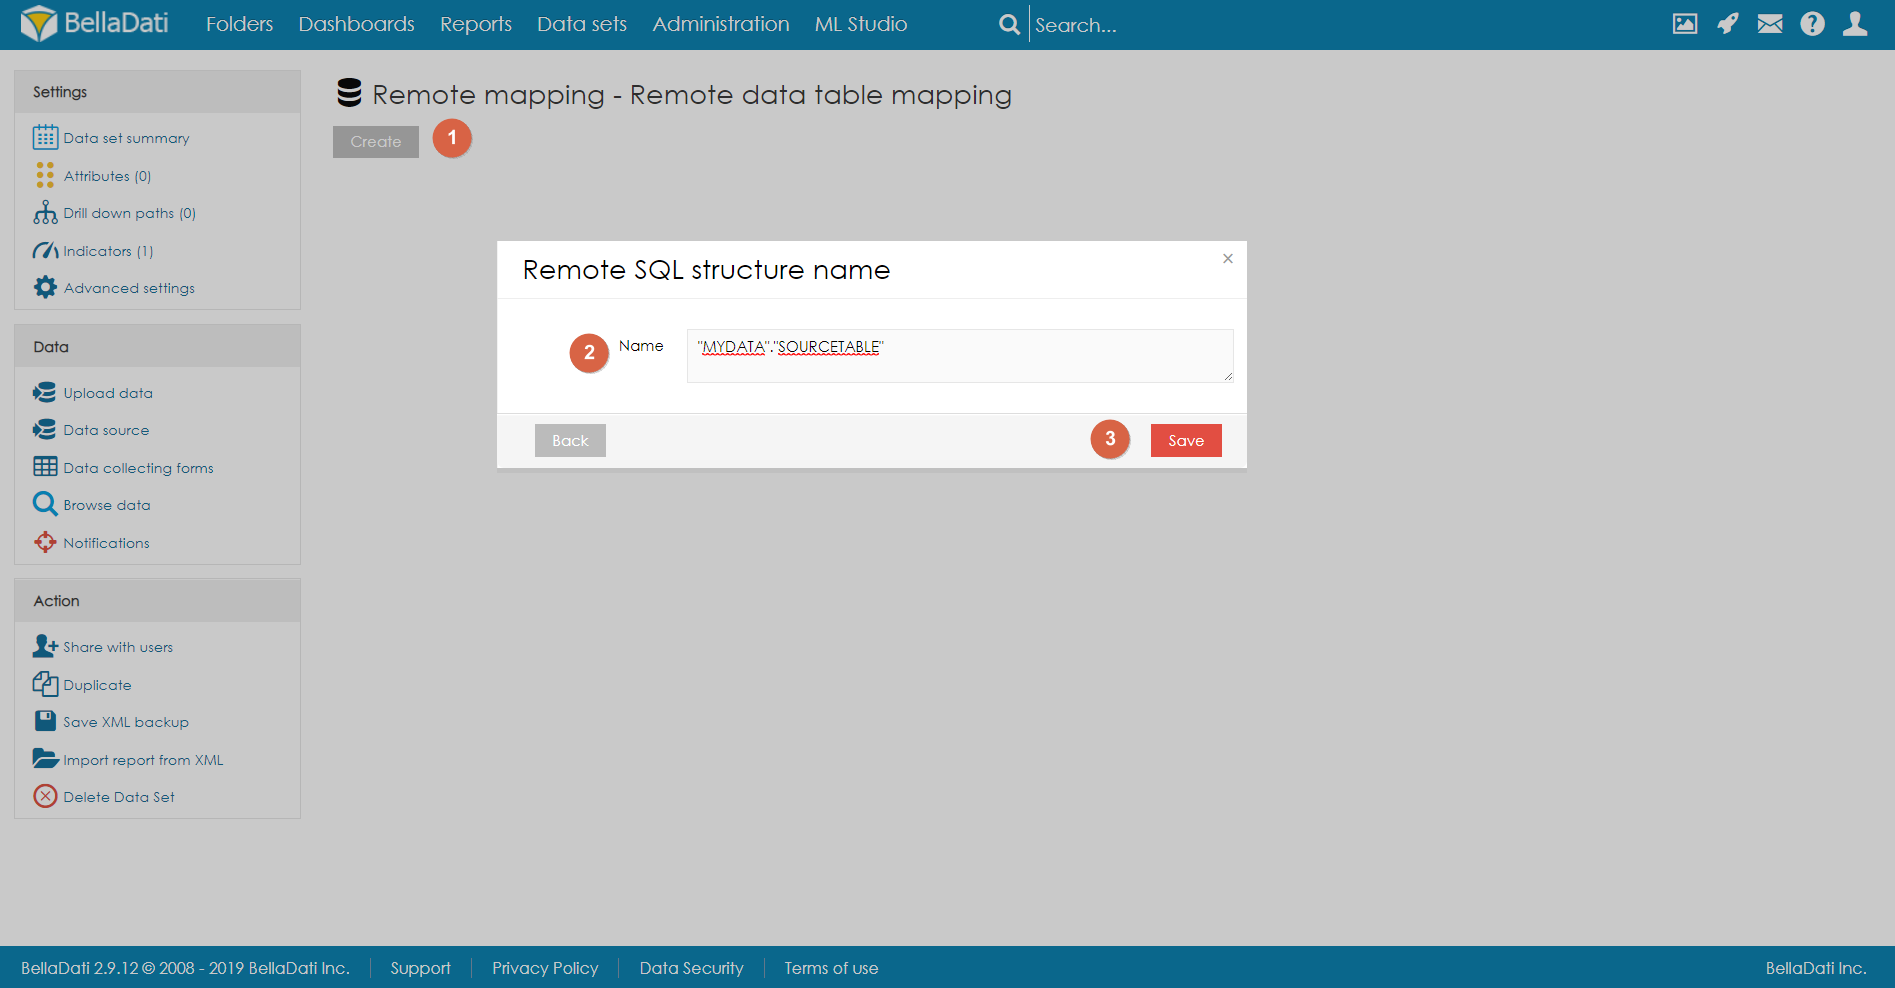
After clicking on Edit, the page for Remote mapping configuration is displayed. If the mapping is was not configured yet, there is a button to create a new mapping. Next, the user has to specify from which database table should BellaDati load the data. It is necessary to specify the name of the table with the tablespace (or user for Oracle) - e.g. "MYDATA"."SOURCETABLE". To confirm, user needs to click on Save.
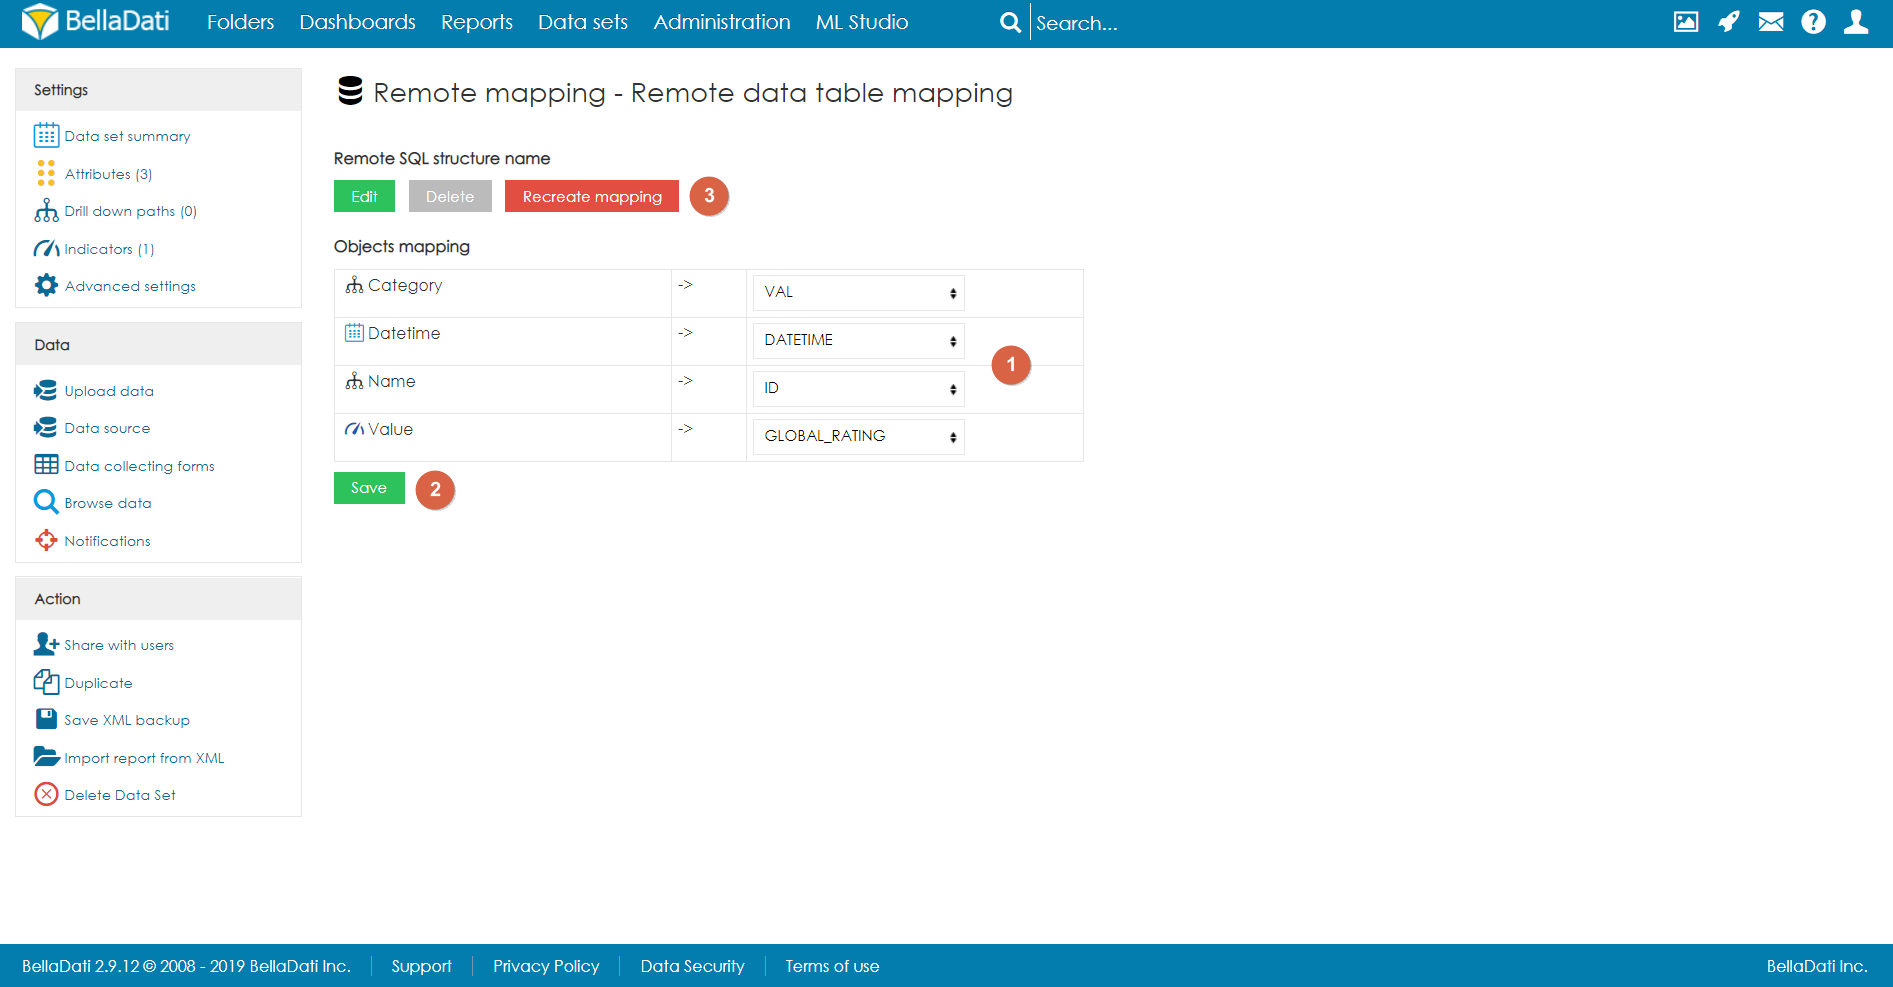
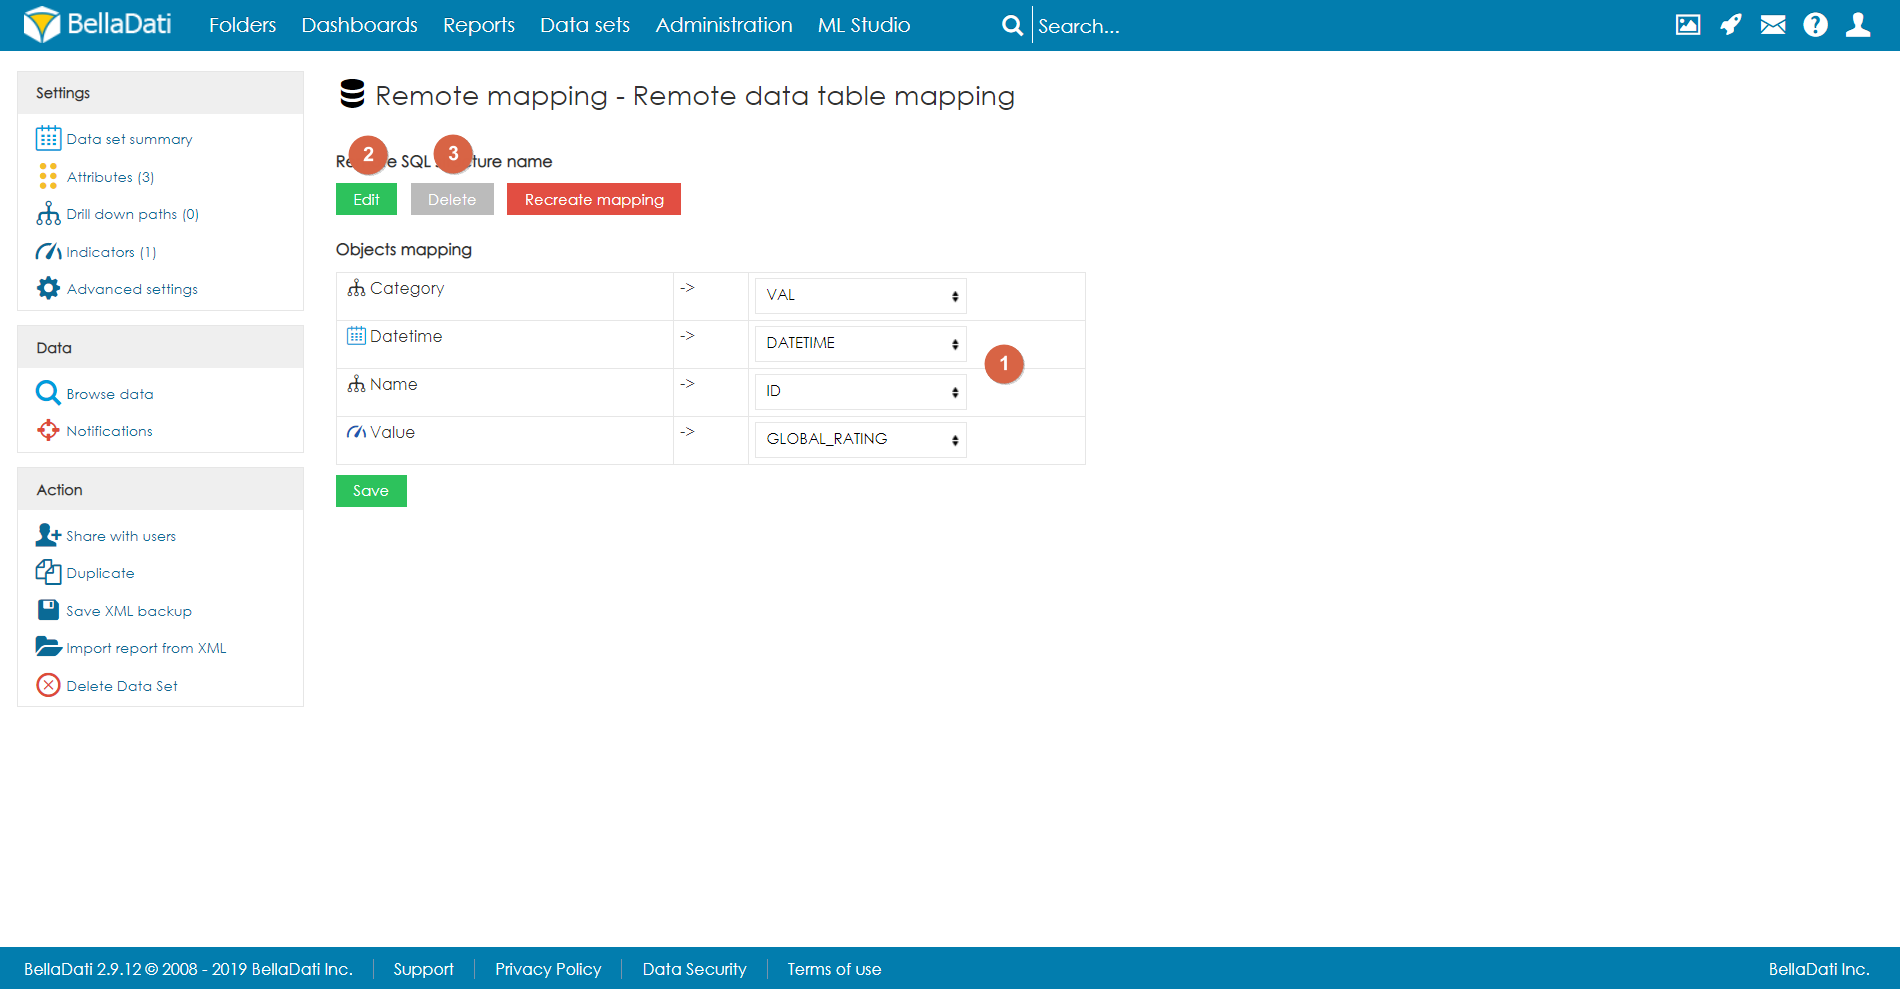
As the next step, user has to map the columns from the database table to the actual attributes and indicators of the data set. Once configured, user has to save the configuration and click on Recreate mapping. After confirming, the view is created (or updated) and data are available in the data set.
Editing existing mapping
To edit existing mapping, user has to click on Edit.
After that, the user can do following actions:
- Edit existing mapping.
- Choose a different database table by clicking on Edit.
- Delete the mapping.
Limitations
- Time column is currently not supported. Use datetime instead in both source database and the data set.
Overview
Content Tools