Page History
| Sv translation | |||||||||||||||
|---|---|---|---|---|---|---|---|---|---|---|---|---|---|---|---|
| |||||||||||||||
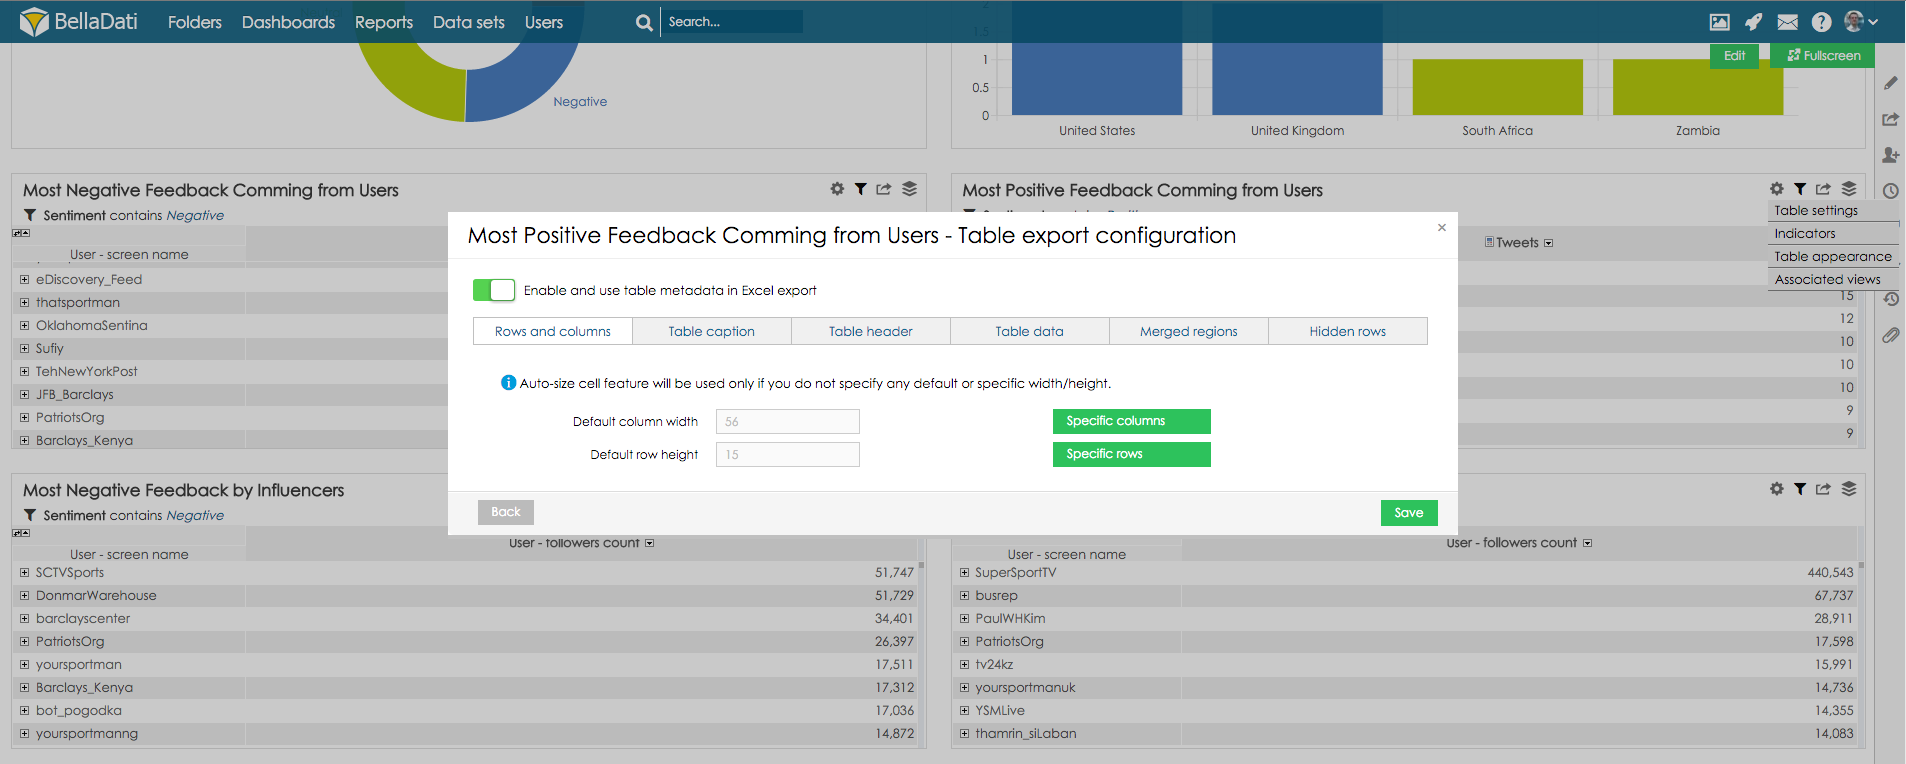
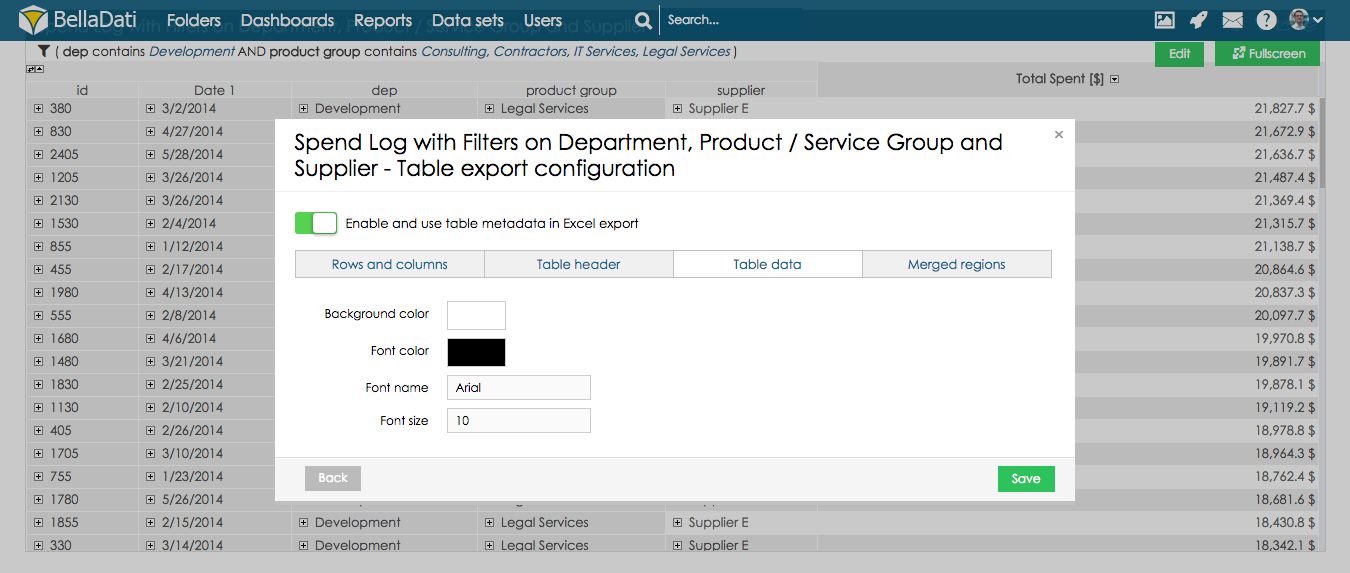
Click on toolbox icon in table view and click button Table export configuration. In newly displayed dialogue window select option Enable and use table metadata in Excel export - when this option is selected, custom table export settings will be used.
This dialogue window allows you to:
Setting column width and row height
Click on button Specific columns to set different column width for different columns. These columns are specified in the field Column index, which defines position of the column. First column has index 0. Example: First column should have column width set to 100px and third column will have column width set to 150px.
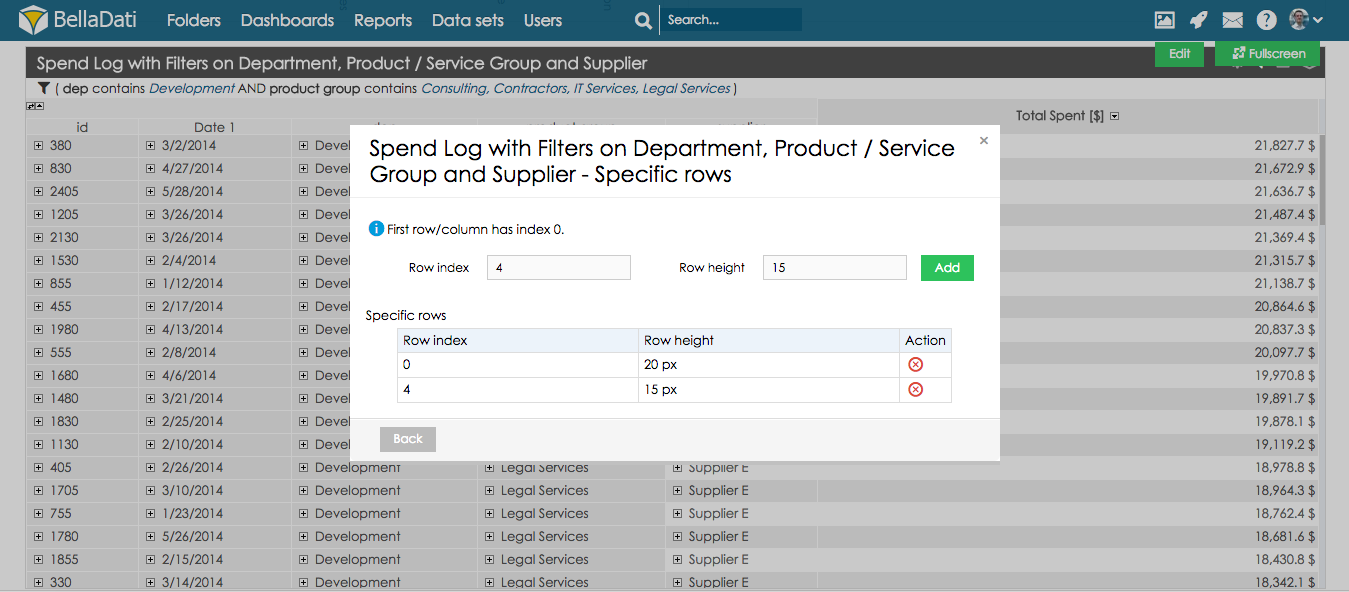
Click on button Specific rows to set different row height for different rows. These rows are specified in the field Row index, which defines position of the row. First row has index 0. Example: First row should have row height set to 20px and fifth column will have column width set to 15px.
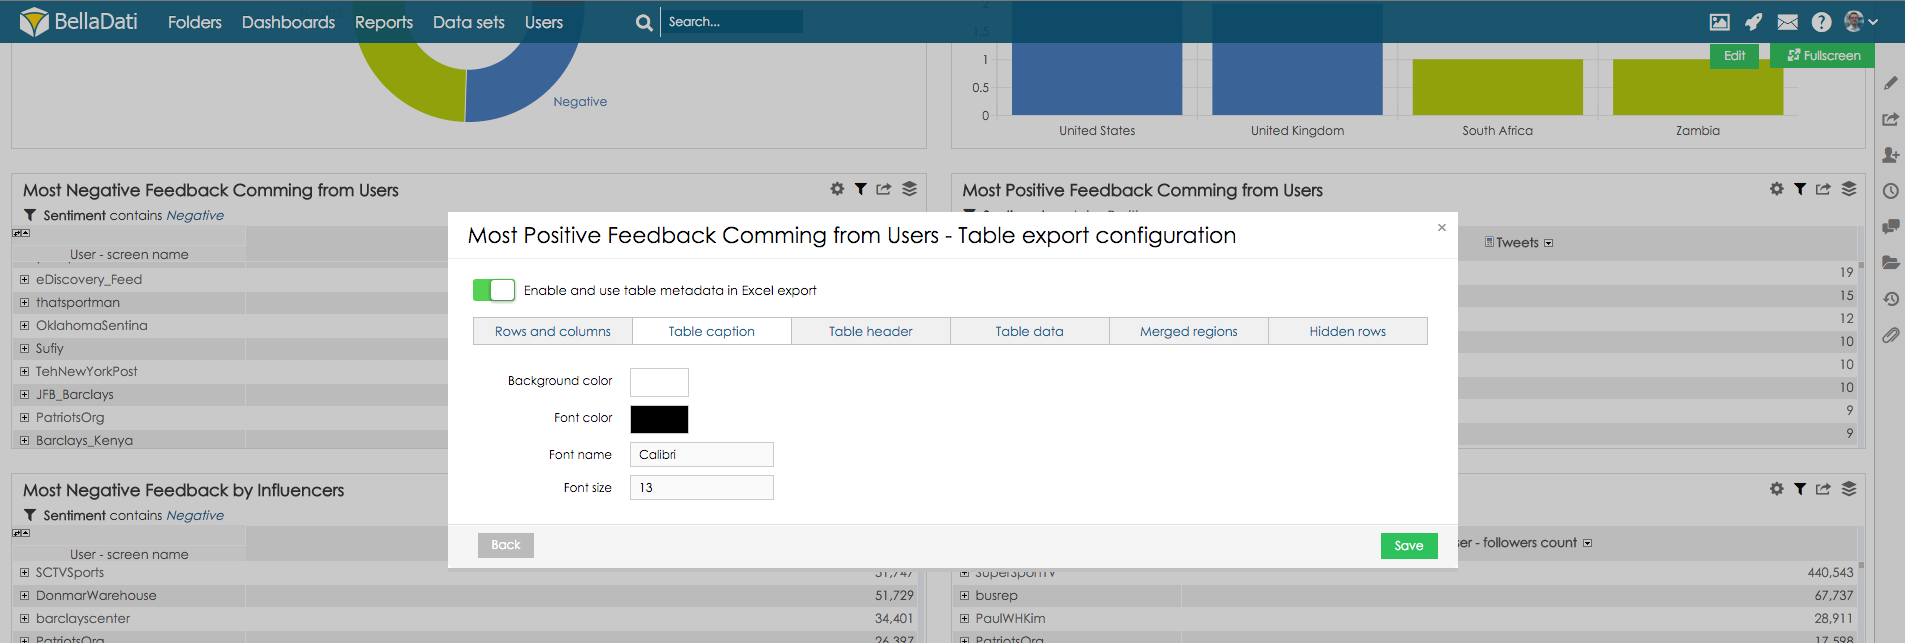
Setting table caption formattingClick button Table header to set custom formatting of table header. This section allows you to:
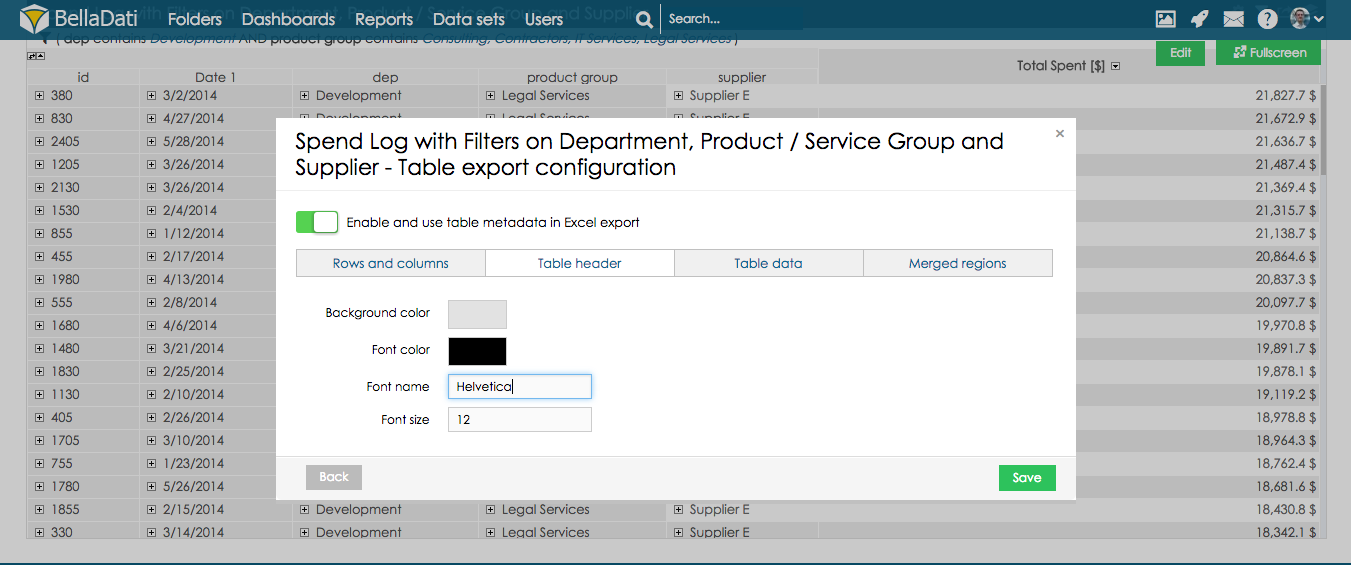
Setting table header formattingClick button Table header to set custom formatting of table header. This section allows you to:
Setting table data formattingClick button Table data to set custom formatting of table data. This section allows you to:
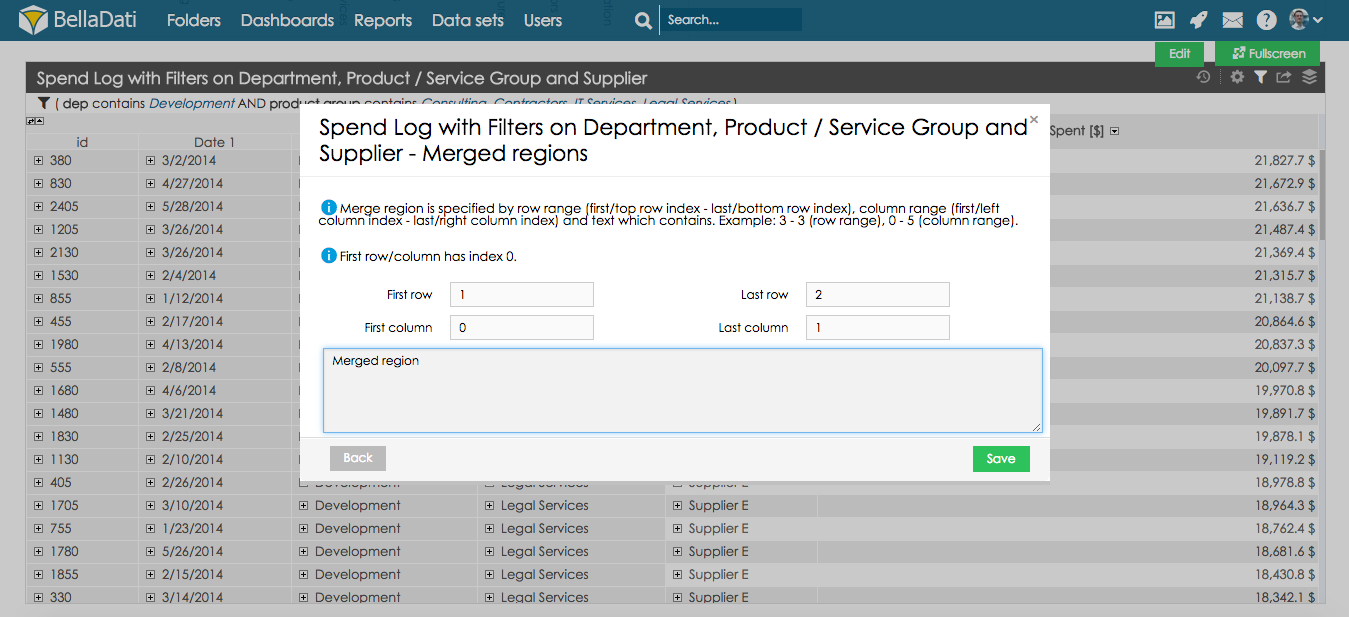
Setting merged regionsThis section allows you to merge column and rows into one field and set custom content for this region. Click button Add merged region to open settings of merged region. Merged region is defined by row and column ranges. First row and first column always have index 0.
Example: For row number 2 and 3 and columns number 1 and 2 should be displayed with custom text "Merged region":
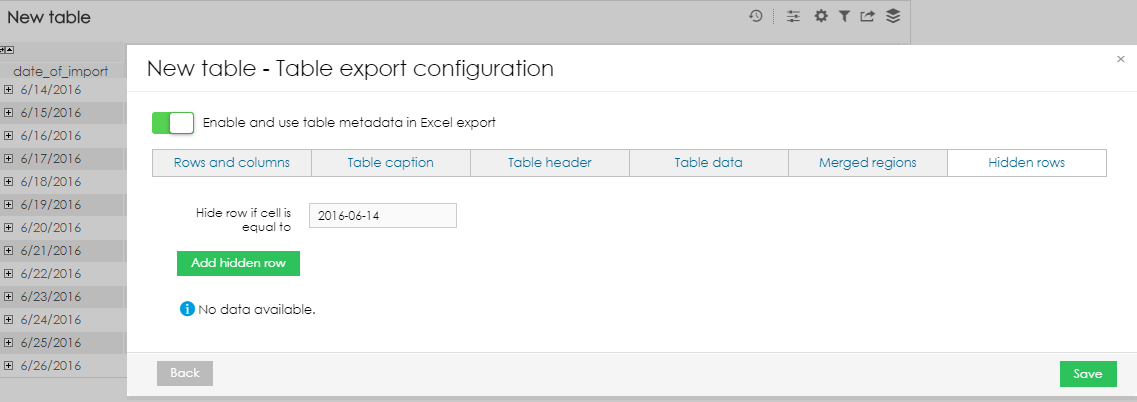
Settings Hidden RowsIt is possible to hide specific rows in the exported file. Users can specify a range of rows which will be hidden. Since BellaDati 2.9.4, it is also possible to hide all rows with a specific value.
|

| Sv translation | ||
|---|---|---|
| ||
表ビューでツールボックスアイコンをクリックし、[表のエクスポート設定]ボタンをクリックします。 新しく表示されるダイアログウィンドウで、[Excelエクスポートでテーブルメタデータの使用を可能にする]オプションを選択します - このオプションを選択すると、カスタム表エクスポート設定が使用されます。
このダイアログウィンドウでは、次のことができます:
列幅と行の高さの設定デフォルトの列幅とデフォルトの行の高さのフィールドを使用して、カスタムの列幅と行の高さをピクセル単位で設定します。 [特定の列]ボタンをクリックして、列ごとに異なる列幅を設定します。これらの列は、列の位置を定義する列インデックスフィールドで指定されます。最初の列のインデックスは0です。 例: 最初の列の列幅は100pxに、3番目の列の列幅は150pxに設定します。
[特定の行]ボタンをクリックして、行ごとに異なる行の高さを設定します。これらの行は、行の位置を定義する行インデックスフィールドで指定されます。最初の行のインデックスは0です。 例: 最初の行の高さは20pxに、5番目の行の高さは15pxに設定します。
表のキャプションの書式設定[表の説明]ボタンをクリックして、表の説明書きのカスタム書式を設定します。このセクションでは次のことができます:
ヘッダーの書式設定[ヘッダ行]ボタンをクリックして、表ヘッダーのカスタム書式を設定します。このセクションでは次のことができます:
データ部分の書式設定[テーブルデータ]ボタンをクリックして、表データのカスタム書式を設定します。このセクションでは次のことができます:
マージ領域の設定このセクションでは、列と行を1つのフィールドにマージし、この領域のカスタムコンテンツを設定できます。 [結合された領域を追加する]ボタンをクリックして、マージ領域の設定を開きます。 マージ領域は、行と列の範囲によって定義されます。最初の行と最初の列のインデックスは常に0です。
例: 行番号2と3、列番号1と2には、カスタムテキスト”Merged region"と表示する必要があります:
テーブルの特定の部分を非表示にするエクスポートするファイルの特定の行を非表示にすることができます。非表示にする行の範囲の指定が可能です。BellaDati 2.9.4以降、特定の値を持つすべての行を非表示にすることもできます。
|
...
Overview
Content Tools