Page History
| Sv translation | ||||||
|---|---|---|---|---|---|---|
| ||||||
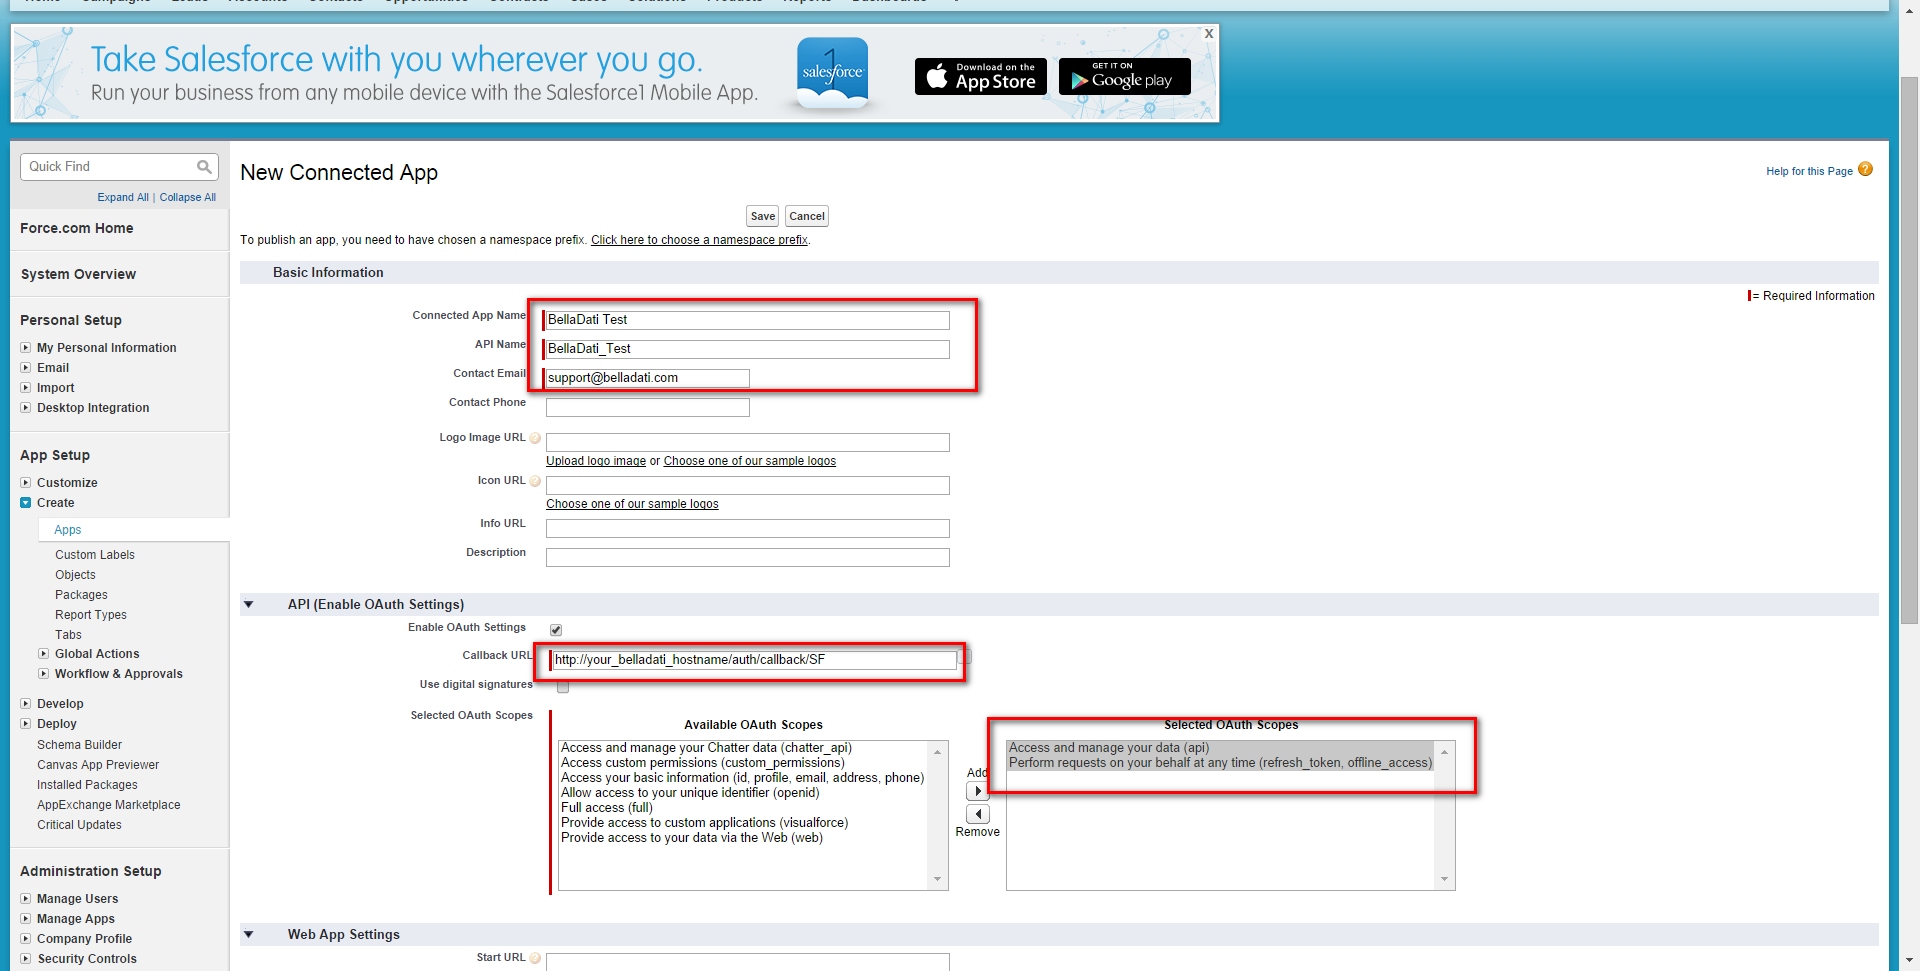
To be able to access the SalesForce API, you need to create new connected SalesForce Application. All you need is to configure the application callback URL, which corresponds to the URL, where your BellaDati instance is running. For example
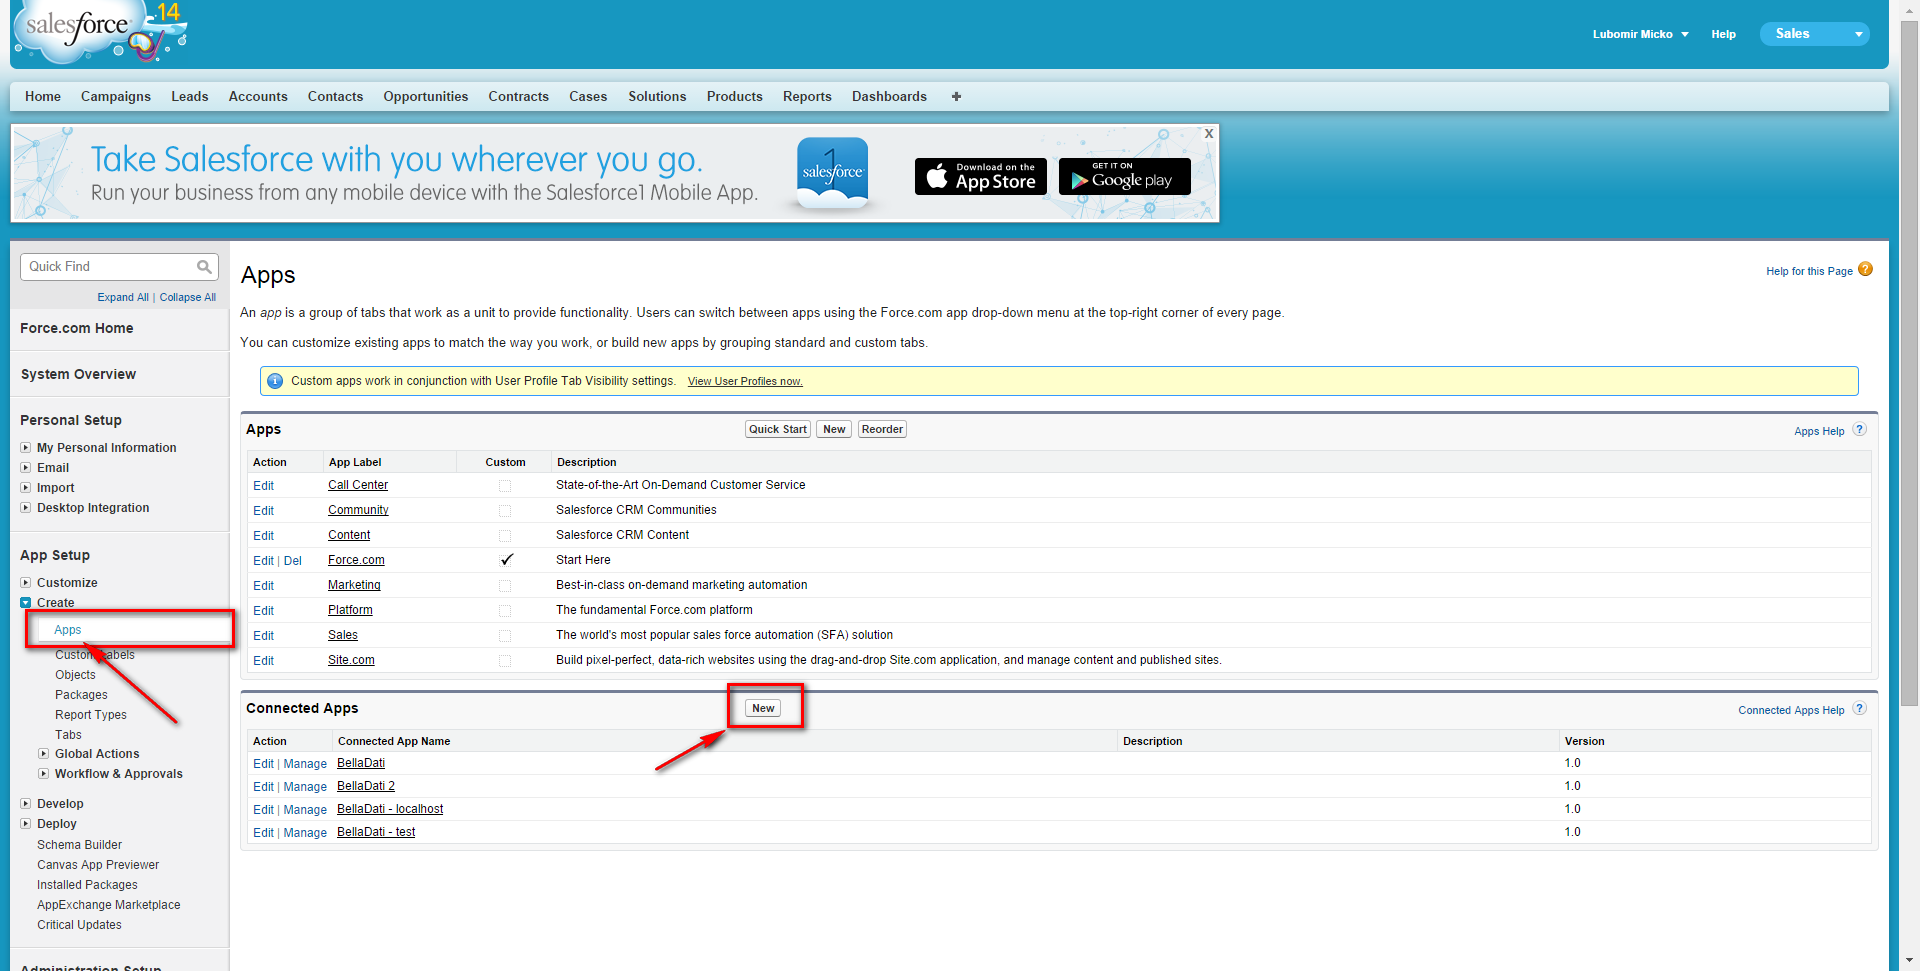
Step-by-step SalesForce configuration
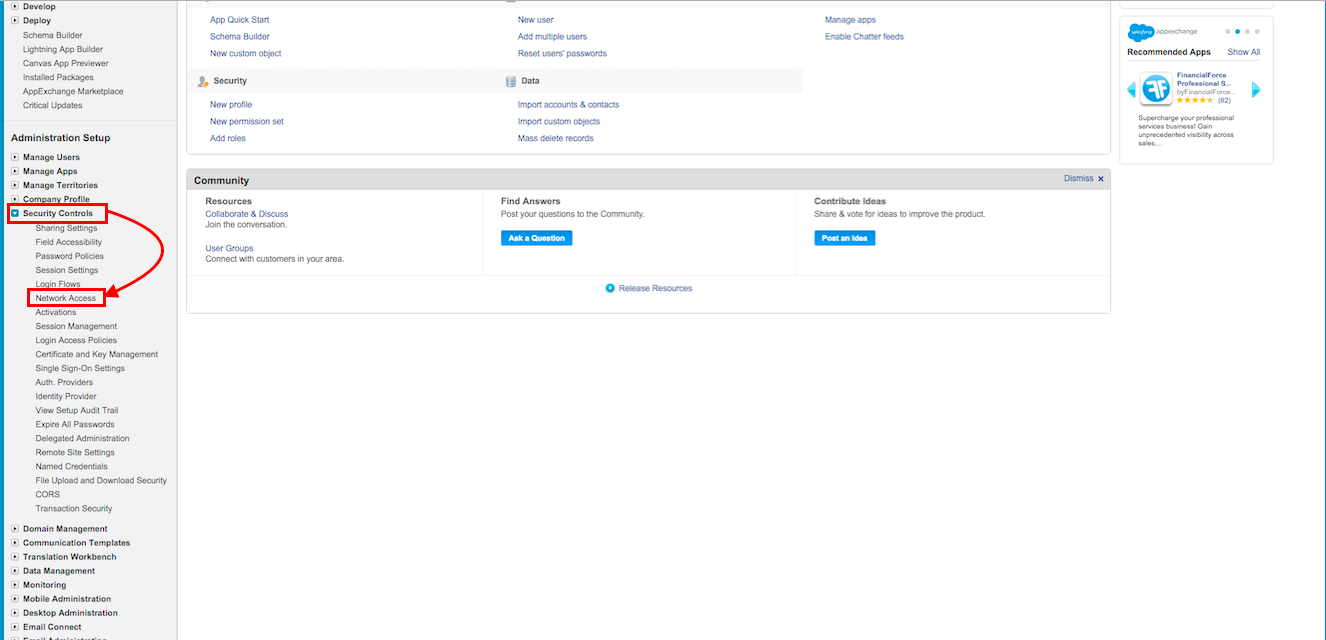
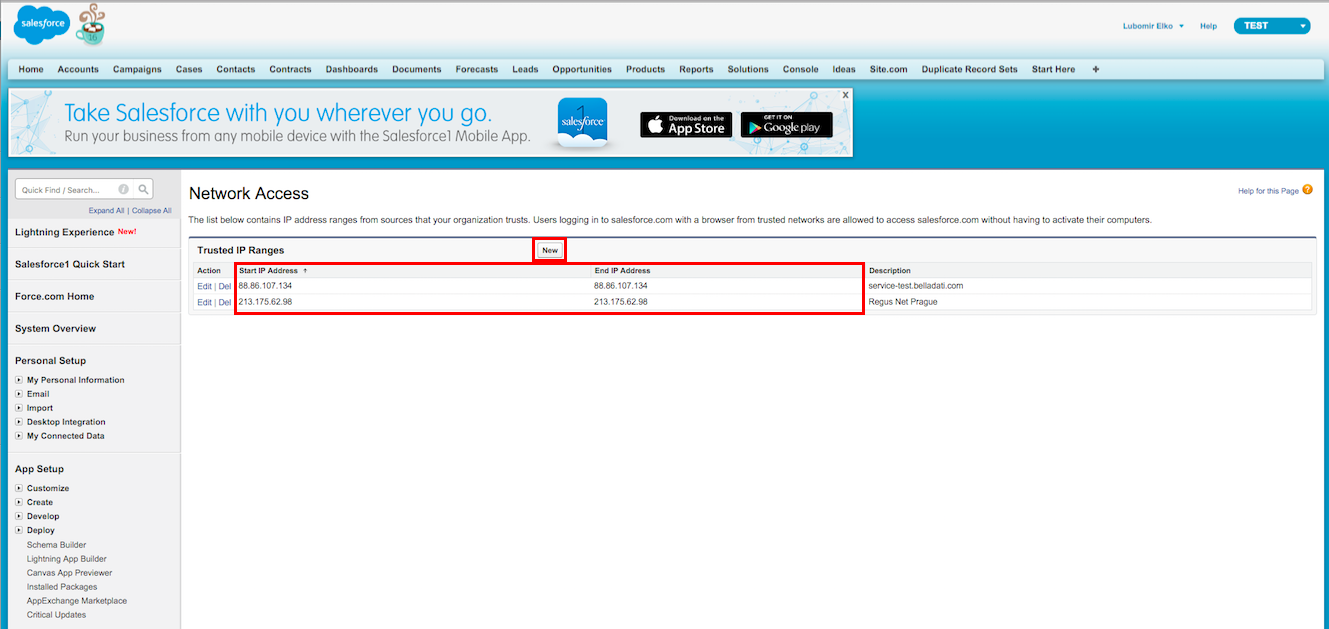
Allow SOAP API loginIn case you want to use SOAP API login, BellaDati IP address of your environment has to be in white list, go to salesforce.com -> go to your Account -> select Security Controls -> select Network Access
Add your IP address
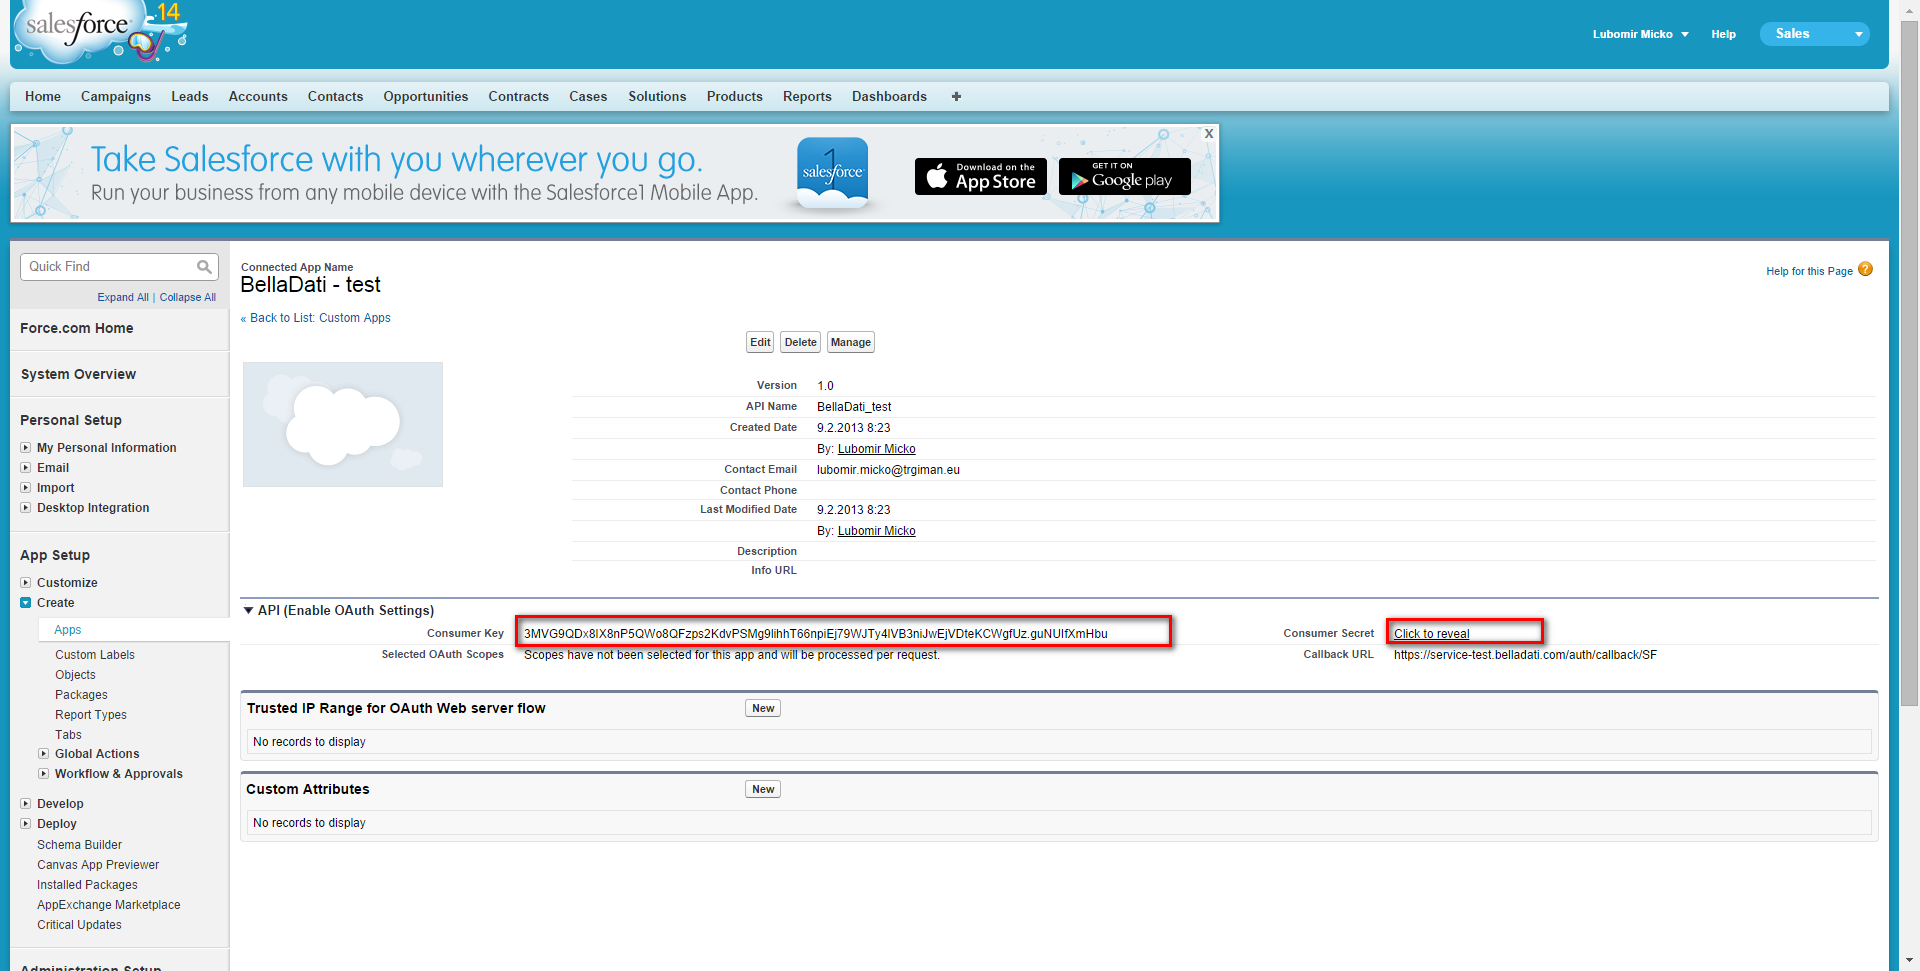
Once you have created an application, you will receive the |
| Sv translation | ||||||
|---|---|---|---|---|---|---|
| ||||||
Pre prístup k Salesforce API, musíte vytvoriť aplikáciu pripojenú k Salesforce. Stačí len nastaviť callback URL, ktoré je totožné s URL, na ktorom beží vaša relácia BellaDati. Napríklad:
Nastavenie Saleforce krok za krokom: 1. Prihláste sa do Salesforce, choďte na Setup a vytvorte novú Connected aplikáciu (pripojenú aplikáciu)
2. Zadajte detaily aplikácie, callback URL (napr. http://your_host/auth/callback/SF) a vyberte rozsah oprávnení pre api a refresh token. 3. Skopírujte váš consumer key/secret a vložte ho do BellaDati
Po tom ako ste vytvorili aplikáciu dostanete Consumer key a Consumer Secret. Teraz je potrebné tieto parametre vložiť do BellaDati. Prihláste sa ako administrátor domény a prejdite na stránku Nastavenia -> Konfigurácia. Pre viac informácií sa pozrite na Správu konfigurácii
|
| Sv translation | ||||||
|---|---|---|---|---|---|---|
| ||||||
Salesforce APIにアクセスできるようにするには、新しく接続されたSalesforceアプリケーションの作成が必要になります。必要なのは、BellaDatiインスタンスが実行されているURLに対応するアプリケーションコールバックURLを設定することだけです。例えば:
Salesforceの段階的な構成
SOAP APIログインの許可SOAP APIログインを使用したい場合は、環境のBellaDati IPアドレスがホワイトリストに登録されている必要があります。salesforce.comに移動 ->アカウントに移動->セキュリティコントロールを選択->ネットワークアクセスを選択します。
IPアドレスを追加します。
アプリケーションを作成したら、コンシューマキーとコンシューマシークレットを受け取ります。次に、これらのパラメーターをBellaDatiに入力する必要があります。ドメイン管理者としてログインし、[設定]-> [構成]ページに移動します。Managing Configurationを参照してください。 |
| Sv translation | ||||
|---|---|---|---|---|
| ||||
Um auf die SalesForce-API zugreifen zu können, müssen Sie eine neue verbundene SalesForce Anwendung erstellten. Sie müssen lediglich die Anwendungsrückruf-URL konfigurieren, die der URL entspricht, unter der Ihre BellaDati-Instanz ausgeführt wird. Zum Beispiel
Schritt für Schritt SalesForce-Konfiguration
SOAP-API-Anmeldung zulassenWenn Sie die SOAP-API-Anmeldung verwenden möchten, muss sich die BellaDati-IP-Adresse Ihrer Umgebung in der Whitelist befinden. Gehen Sie zu salesforce.com -> Gehen Sie zu Ihrem Konto -> Sicherheitskontrollen auswählen -> Netzwerkzugriff auswählen
Fügen Sie Ihre IP-Adresse hinzu
Nachdem Sie eine Anwendung erstellt haben, erhalten Sie den |
Overview
Content Tools