Versions Compared

Key

  • This line was added.
  • This line was removed.
  • Formatting was changed.
Sv translation
languageen

The URL button type provides multiple options to use, this page provides examples of the available options:

The link defines the URL that will be requested when clicking the button. The following options can be used:

  • report:ID - will show the report based on the specified ID
  • report:alias - will show the report based on the specified alias
  • dashboard:ID - will show the dashboard based on the specified ID
  • dashboard:alias - will show the dashboard based on the specified alias
  • dataset:ID - will show the dataset based on the specified ID
  • dataset:code - will show the data set based on the specified code
  • import:datasetID:importTemplate - will show the data set import flow based on the specified data set ID and import template, please see the details of the import flow at the related section of this page

Link target

Specifies how the predefined link will be displayed, the following options are available:

  • New tab - will open new browser tab with the predefined link
  • Current tab - will display the predefined link in the current tab
  • Open in a popup - will display a popup window with the predefined link
  • Dialog popup - will display a custom dialogue popup window

Width x Height

Applied to the links displayed in the popup (Link target is Open in a popup or Dialog popup). Specified values define the popup window size in pixels.

Show buttons

When this option is enabled, the dialogue window will contain buttons Close and Save for work with the dialogue window.

The button Save is displayed only if the link contains view with the BellaDati form. Clicking the button Save will save this form.

Popup header

Defines dialog window header.

Display import flow

Info

The import flow is used to allow users upload data to the data set directly from the reports without any knowledge of the BellaDati data set. The data can be either added or updated.

The Link for the specification of the import flow is defined in the following format: import:datasetID:templateID?text=Description of the import

ParameterValueDescription
dataSetID1ID of the data set to which the data will be imported
templateID11ID of the import template that will be used for the import
textSome textDescription text that will be displayed at the beginning of the import flow

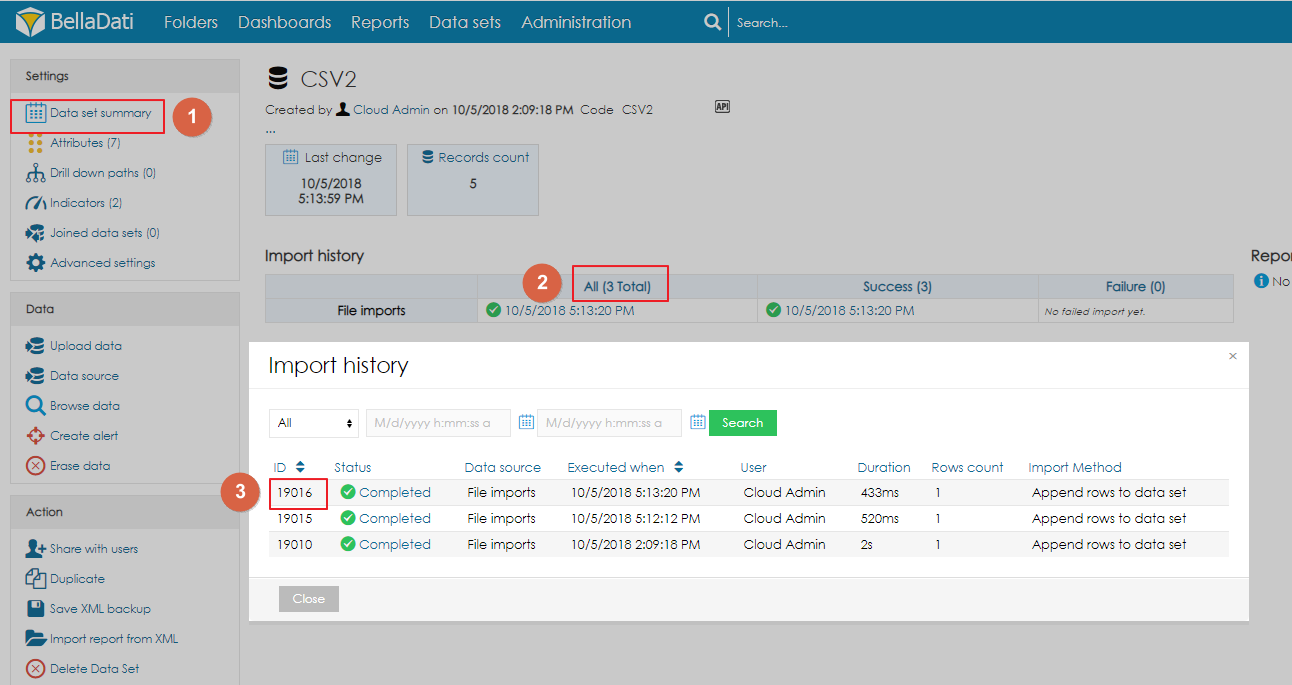
Getting the import template

  1. Make sure you have the developer mode enabled. If not, enable it in the user profile (see http://support.belladati.com/doc/Managing+User+Profile - Chapter Appearance settings)
  2. Go to Data set summary and open the Import history.

    Image Modified
  3. Copy the ID of the import, which will serve as the Import template.

Getting the data set ID

The data set ID can be found in the URL:
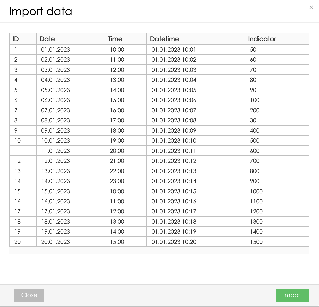
  1. Open the target data set
  2. Copy the value behind /detail/. Example: for the URL /bi/dataset/detail/1596, the data set ID is 1596

Workflow:

Step 1: select the import file

  • The value described in the parameter text is displayed below the header
  • The link to the template file contains the same file that has been used in the import template
  • Click the button Browse to select file that will be uploaded
  • Click the button Continue to proceed to the next step

Image Modified

Step 2: preview imported values

This step shows preview of the imported values. In case some data are not valid, error is displayed for the related column. The data will be uploaded after clicking the button Import.

Image Modified

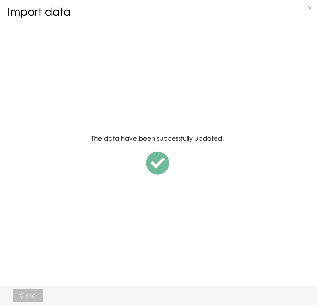
Step 3: Import completed

This screen is displayed once the import to the data set is completed.

Image Added


Sv translation
languageja

URLボタンタイプには、複数のオプションが用意されており、このページでは、使用可能なオプションの例をご紹介します:

リンク

リンクは、ボタンをクリックしたときに要求される URL を定義します。以下のオプションが使用可能です:

  • report:ID - 指定されたIDに基づいたレポートを表示します
  • report:alias - 指定されたエイリアスに基づいたレポートを表示します
  • dashboard:ID - 指定されたIDに基づいたダッシュボードを表示します
  • dashboard:alias - 指定されたエイリアスに基づいたダッシュボードを表示します
  • dataset:ID - 指定されたIDに基づいたデータセットを表示します
  • dataset:code - 指定されたコードに基づいてデータセットを表示します
  • import:datasetID:importTemplate - 指定されたデータセットIDとインポートテンプレートに基づいて、データセットのインポートフローを表示します。インポートフローの詳細は、このページの関連セクションを参照してください。

リンク対象

定義済みリンクの表示方法を指定し、以下のオプションが利用可能です:

  • 新しいタブ - 新しいブラウザのタブを開いて、あらかじめ設定されたリンクを表示します
  • 現在のタブ - 定義されたリンクを現在のタブに表示します
  • ポップアップで開く - 定義されたリンクをポップアップウィンドウで表示します
  • ダイアログポップアップ - カスタムダイアログポップアップウィンドウを表示します

横幅×縦幅

ポップアップに表示されるリンクに適用されます(リンク先がOpen in a popupまたはDialog popupの場合)。指定した値は、ポップアップのウィンドウサイズをピクセル単位で定義します。

ボタンの表示

このオプションを有効にすると、ダイアログウィンドウで作業するための「閉じる」と「保存」ボタンが表示されます。

「保存」ボタンは、リンク先にBellaDatiフォームを含むビューがある場合のみ表示されます。「保存」ボタンをクリックすると、このフォームが保存されます。

ポップアップのヘッダー

ダイアログウィンドウのヘッダーを定義します。

インポートフローの表示

Info

インポートフローは、ユーザーがBellaDatiデータセットのことを知らなくても、レポートから直接データセットにデータをアップロードできるようにするために使用されます。データは追加または更新のどちらかを行うことができます。

インポートフローを指定するLinkは、import:datasetID:templateID?text=「インポートの説明」の形式で定義されます。

パラメータ説明
dataSetID1データのインポート先となるデータセットのID
templateID11インポートに使用するインポートテンプレートのID
textSome textインポートフローの最初に表示される説明テキスト

インポートテンプレートの取得

  1. 開発者モードが有効になっていることを確認します。有効になっていない場合は、ユーザープロファイルで有効にしてください(http://support.belladati.com/doc/Managing+User+Profile - Chapter Appearance settingsを参照)。
  2. データセットの概要に移動し、インポート履歴を開きます。

    Image Added
  3. インポートのIDをコピーし、インポートテンプレートとします。

データセットIDの取得

データセットIDは、URLで確認できます:

  1. 対象データセットを開きます
  2. detail/の後ろの値をコピーします。例:URL /bi/dataset/detail/1596の場合、データセットIDは1596です。

ワークフロー:

ステップ1: インポートファイルを選択します

  • パラメータテキストに記述された値は、ヘッダの下に表示されます
  • テンプレートファイルへのリンクは、インポートテンプレートで使用されているのと同じファイルを含んでいます
  • 「参照」ボタンをクリックして、アップロードするファイルを選択します。
  • 「続行」ボタンをクリックして、次のステップに進みます。

Image Added

ステップ2: インポートした値のプレビュー

このステップでは、インポートされた値のプレビューを表示します。一部のデータが有効でない場合、関連するカラムにエラーが表示されます。インポートボタンをクリックすると、データがアップロードされます。

Image Added

ステップ3: インポート完了

この画面は、データセットへのインポートが完了した時点で表示されます。

Image Modified